

As the summer approaches, this is a beautiful cake to enjoy in the sunshine. A vanilla cake soaked with a homemade lilac syrup and topped with strawberries and mascarpone cream, it's both fresh and light and absolutely delicious!
Read moreRainbow Meringue Cake

It feels like a week where a bit of colour is needed to brighten up the day. Nothing shouts colour more than this stunning Rainbow Meringue Cake with its rainbow layers, gorgeous vanilla mascarpone cream and topped with strawberries, raspberries and pomegranate seeds.

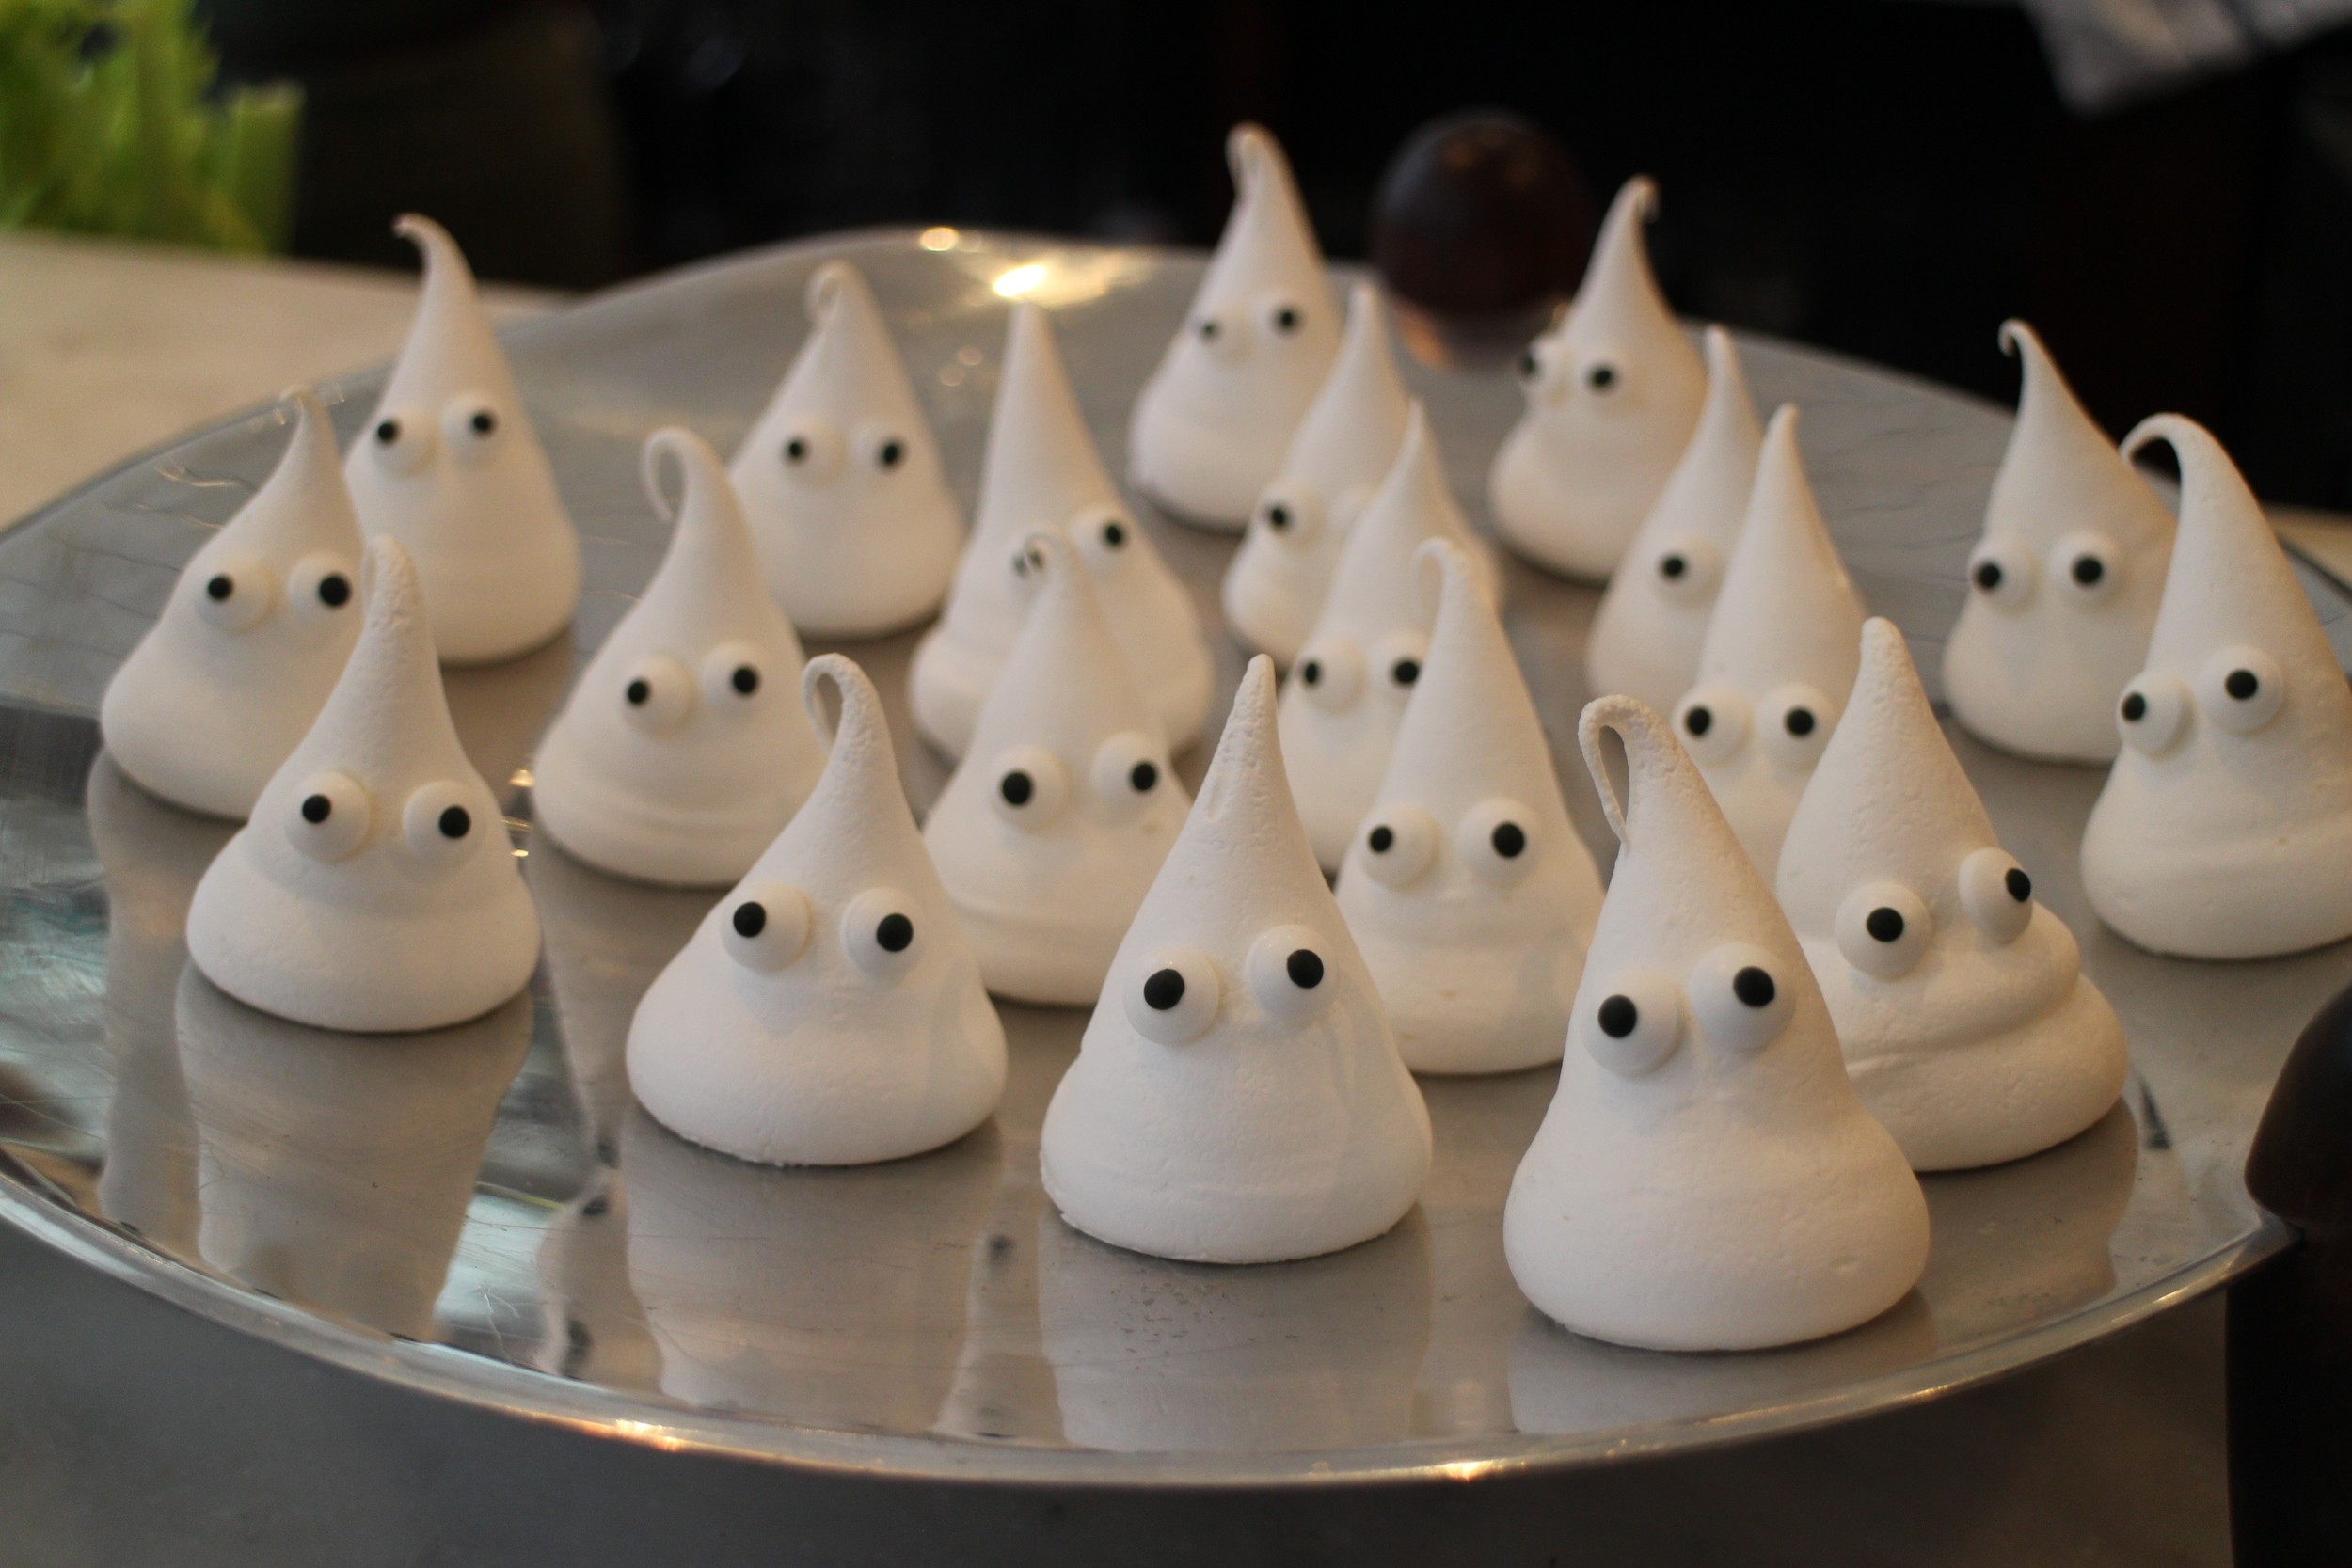
The idea for the rainbow meringue layers was taken from the Meringue Girls Cookbook. I am a HUGE fan of meringue, particularly macarons, and their little meringue kisses which I recently turned into little ghosts for a kids' birthday party, are the loveliest treats.
The meringue is straightforward using the Meringue Girls process. You need a couple of batches of their meringue mixture which is also the base of their kisses. It's simply oven-heated sugar added a spoonful at a time to egg white whipped to stiff peaks and then whisked for around 5 minutes until the sugar has dissolved.

The more fiddly bit is preparing the piping bags for the mixture and these need to be coated with thick food paste in the different rainbow colours. Did you ever use an acronym to remember the rainbow order? I can still be found muttering Richard Of York Gave Battle In Vain!! To achieve the different hues, I used Sugarflair Spectral Paste in these colours: Velvet Red, Yellow/Cream, Yellow Extra, Holly Green, Ice Blue and Purple. To apply them, the way that's easiest for me is to turn the piping bag inside out (I don't worry about the very tip of the icing bag as it will be snipped off and also gives us a little tag to hold onto when pulling the bag back through the right way). Once your bag is turned inside out, pop it over a wine bottle and then take your chosen food colour paste, painting the inside from tip to half-way down the bag with a thick coating of colour. If you leave the bag for too long after painting, you'll notice that the colour may start to separate so it's worth giving the bag a quick brush with a pastry brush to distribute the colour just before adding the meringue.

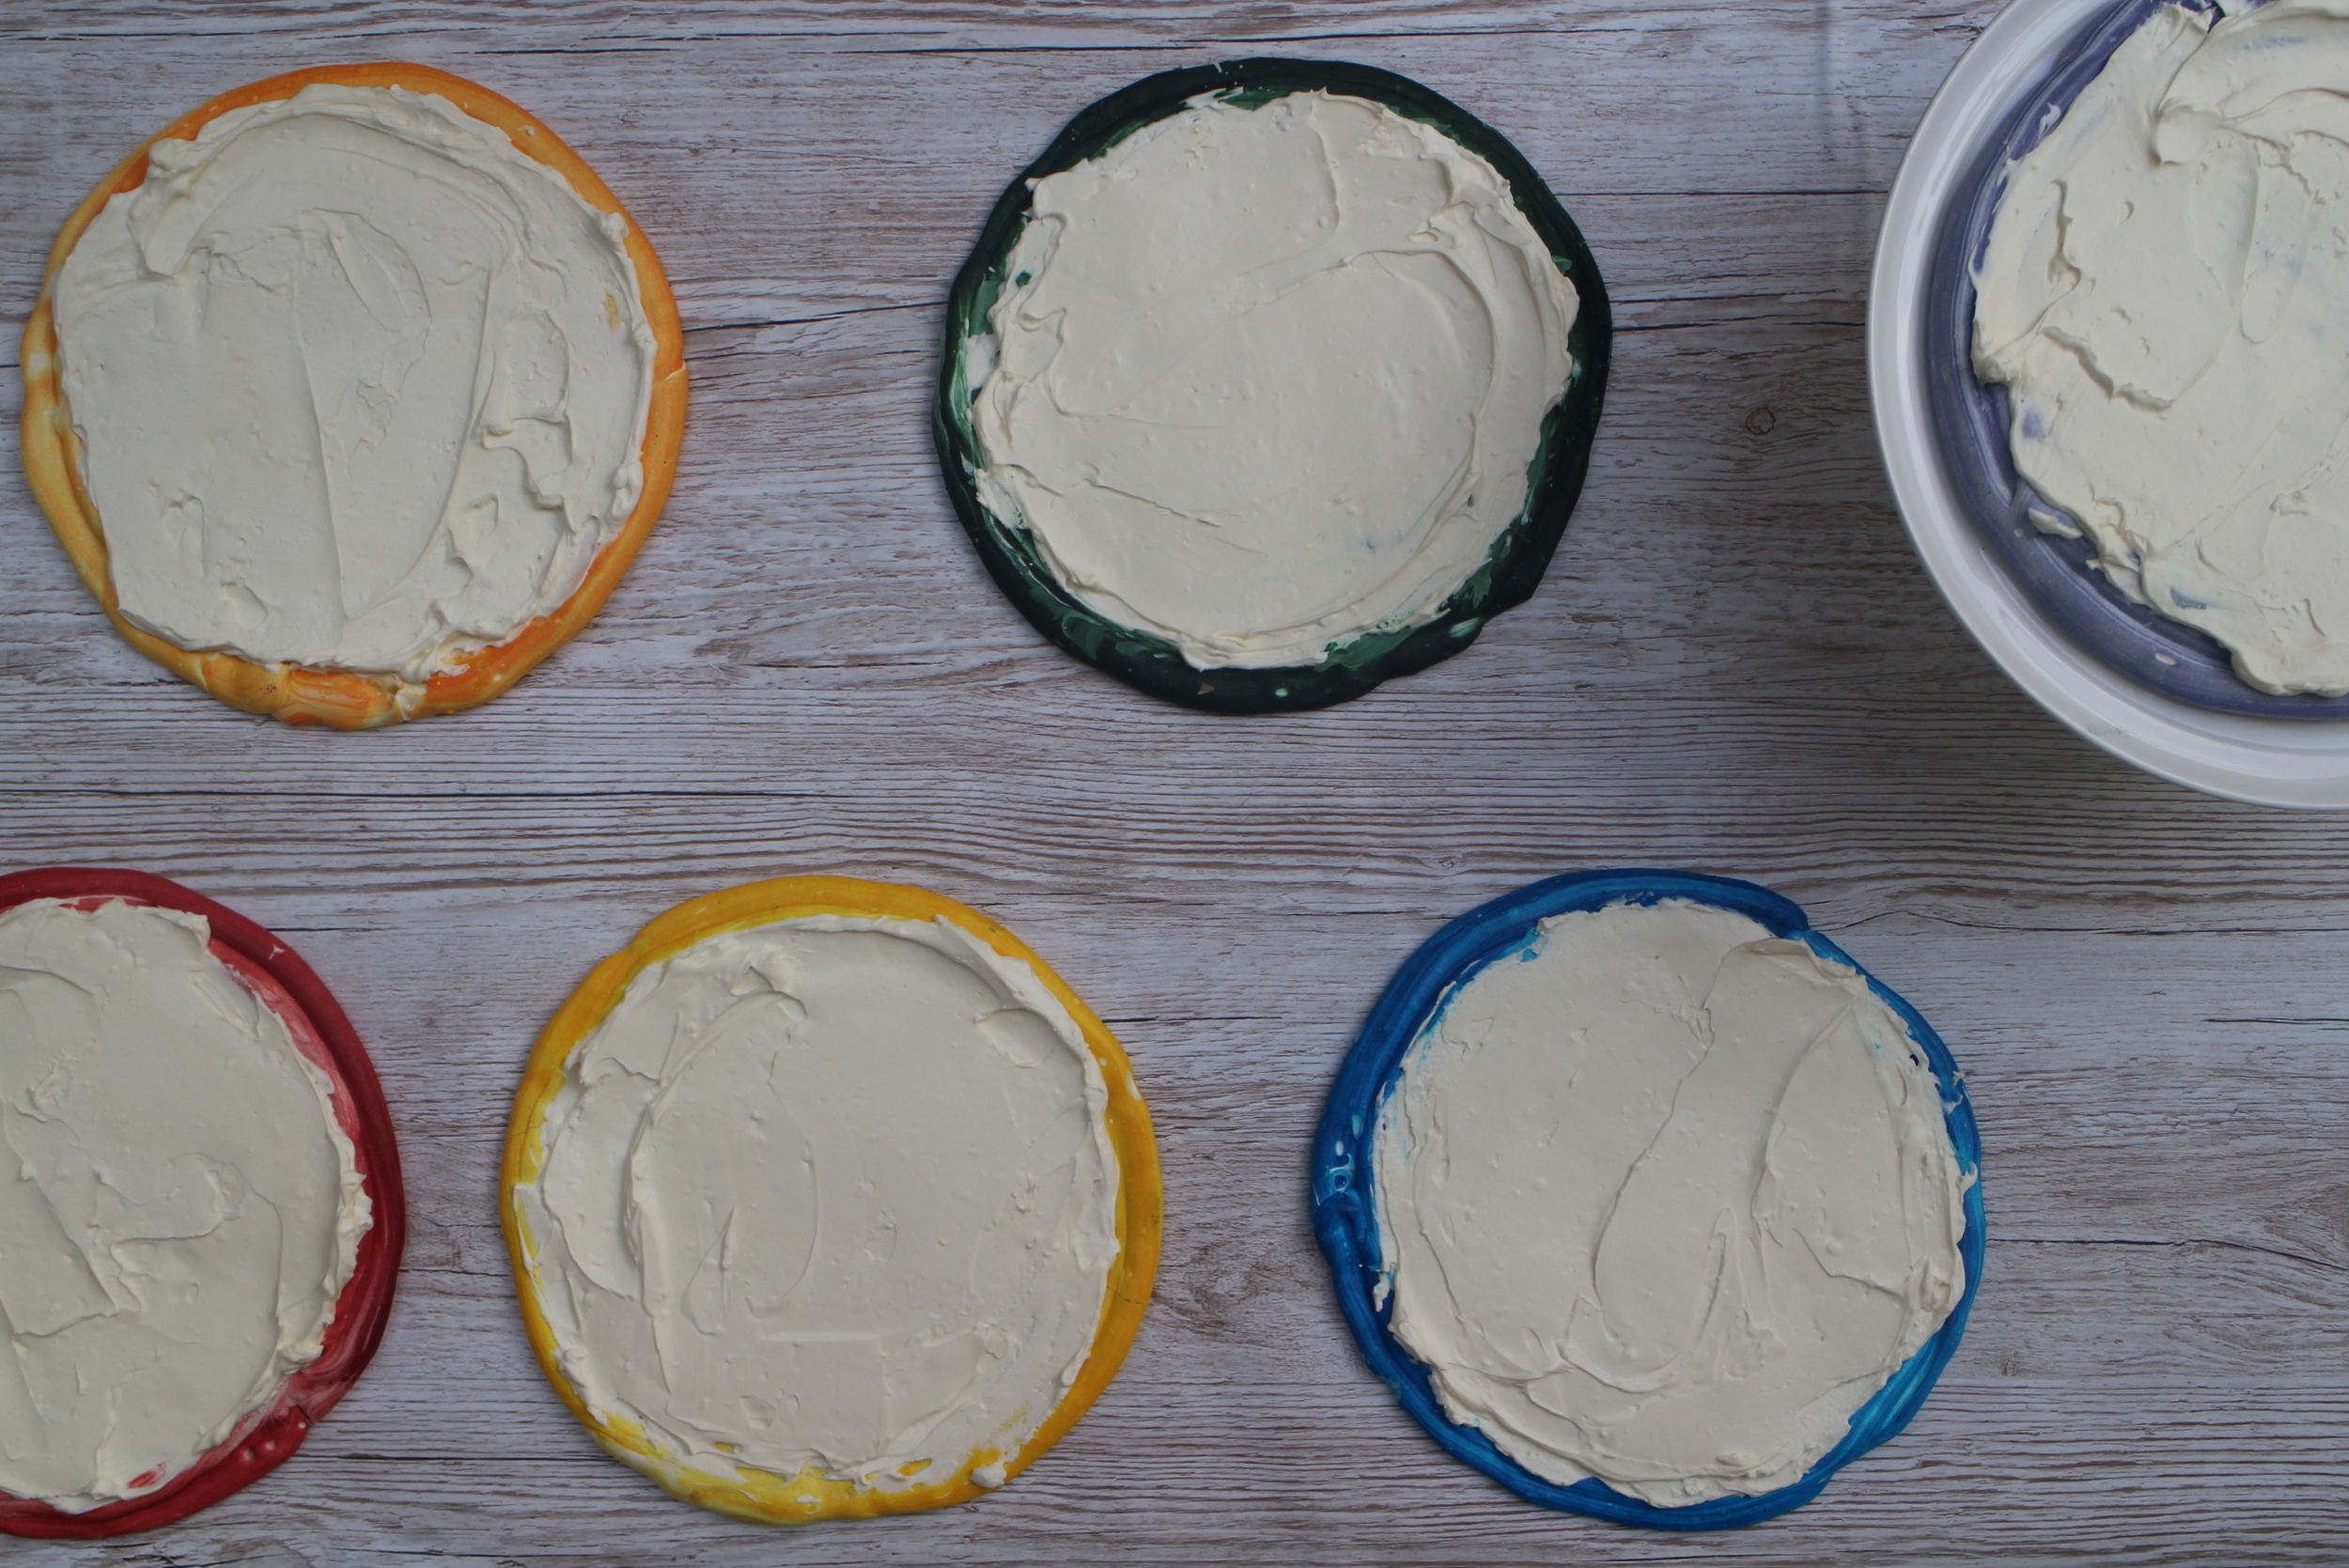
Then pull the bag back the right way so the food colour is on the inside. I then pop my bag into a measuring jug and fill it with a couple of scoops (I used an ice cream scoop) of meringue. Squidge the food colour into the meringue with your fingers and then snip off the end. Pipe the mixture onto a baking tray lined with greaseproof paper starting at the outside and working in. I found that I didn't have generous amount of meringue mixture for each one so had to use a spatula to smooth it and cover the whole circle. Be careful not to smooth the very outside of the circle with the deepest colour as this will show on the outside of your cake so you want a really vibrant colour.
After baking and cooling, you're ready to assemble your cake. The cream does make the inside of the meringue soften and disintegrate a little, so it's best to assemble this as close to serving as you can. I decided to fill my cake with a vanilla mascarpone cream and then top it with beautiful strawberries, raspberries and pomegranate seed and a light dusting of icing sugar.

This cake is sweet and delicious and the cream is lovely and light.
It does take a little preparation but looks so bright and colourful, it would be a welcome addition to any party, dinner affair or just for fun.
Ours is just for fun. Can't wait to show the kids what they're having for pudding tonight :)
Rainbow Meringue Cake
Rainbow Meringue (from Meringue Girls Cookbook)

- 300G EGG WHITES (I use Two Chicks egg whites but you could also use around 10 medium eggs)
- 600G CASTER SUGAR
Vanilla Mascarpone Cream
- 500G MASCARPONE
- 460ML WHIPPING CREAM
- 4 TSP VANILLA EXTRACT (to taste)
- 140G CASTER SUGAR (to taste)
Topping
- PUNNET OF STRAWBERRIES
- PUNNET OF RASPBERRIES
- 1 POMEGRANATE
- ICING SUGAR (to dust)
Method
- Pre-heat the oven to 200 degrees
- The meringue is made in 2 batches so the first batch will make 3 meringue discs
- Line 3 baking trays with greaseproof paper and draw a 10 inch circle as a guide
- Line a roasting tray with greaseproof paper and then pour in 300g sugar, smoothing it to get it spread as evenly as possible
- Put the sugar in the oven for 5 mins
- Measure 150g egg white in a standing mixer and start by whisking is slowly
- Then increase the speed to medium for a couple of minutes and then increase it again to high speed until it's formed stiff peaks
- The sugar should be ready to come out of the oven and with the mixer turned up to high speed, it should be added a spoonful at a time to the egg white (around 30 seconds between each addition)
- When the sugar is all added, keep mixing for another 5 mins - it's ready when you can rub a bit of meringue between 2 fingers and can't feel the grains of sugar
- Prepare 3 icing bags by turning them inside out and popping each one over a wine bottle (or similar shape)
- Paint the icing bags thickly with food colour paste, ensuring a heavy coating from the tip down to half-way
- Turn the bags the right way around and then add 2 scoopfuls of meringue into each bag, squidging the colour into the meringue with your fingers
- Snip off the end and then pipe a 10cm circle on the prepared baking tray
- Bake for around 1 hour until the meringue lifts off the baking tray
- Leave to cool on the tray
- Repeat this process with the other half of the meringue ingredients and the remaining 3 colours
- When you're ready to assemble the cake, prepare the mascarpone cream
- Put all the cream ingredients into a bowl and mix for a couple of minutes until the cream is smooth and has soft peaks
- Spread the cream over each of the layers and then assemble in rainbow order
- Top with your favourite fruit and dust with a sprinkling of icing sugar :)
Baked Almond & Vanilla Rice Pudding

My boys have always been huge fans of rice pudding. I have to confess it remains a guilty pleasure of mine, but these days I only get to clean out the tin after I've served up their desserts! Whilst we're away on half term and being blown around by the lovely south coast winds, it felt like a yummy warm homemade pud was just what we all needed and my youngest wanted to have a go at making this favourite.
Whilst rice pudding is not difficult to make (you just need some patience for the baking) and a great recipe for children to have a go at, we decided to add some flavours different to our usual tinned variety. I adapted one of Donna Hay's recipes and we made Almond and Vanilla Rice Pudding, baked in the oven and served with a healthy drizzle of maple syrup.

I've used cup measurements here as I think when baking with children (especially young ones) it's easier to measure the ingredients with cups when learning to bake, before they move on to scales and weights.
We used arborio rice and whilst this would usually be enjoyed as a risotto, it gave a nice puddingy consistency to the final dessert. Instead of using cow's milk, we decided to use a carton of unsweetened almond milk instead and this added a really lovely nutty flavour - together with the seeds of a vanilla pod and the vanilla pod itself which was baked with the pud before being removed at the end. We also added sugar as I was following a lead from the original recipe but I think next time, I'd be inclined to leave this out and just sweeten with the maple syrup at the final serving.

The baking of the pudding took a lot longer than I thought (probably around 45 minutes) so I suggest leaving plenty of time for the rice to absorb the almond milk - I kept an eye on it for the last 45 minutes and although it was more fluid than the tinned variety, we actually preferred it this way.
The boys LOVED it and I'd definitely make it again for them - it's the kind of wonderful, warming bake that you can throw together in minutes and leave in the oven to slowly develop its loveliness.
The perfect winter warmer for half term :)
Baked Vanilla and Almond Rice Pudding
Ingredients

- ½ CUP ARBORIO RICE
- 1 LITRE OF UNSWEETENED ALMOND MILK
- ½ CUP CASTER SUGAR (to taste)
- 1 VANILLA POD (seeds scraped from this but also the pod itself)
Method
- Pre-heat the oven to 160 degrees (fan)
- Scatter the arborio rice over the base of a 2 litre capacity dish
- Stir together the milk, caster sugar (if you choose to use this) and vanilla seeds and pour over the rice
- Add the vanilla pod
- Cover with tin foil and bake in the oven for an hour
- After an hour, remove the foil and bake for a further 30 to 60 minutes, checking after 30 minutes to see how much of the milk has been absorbed
- When you're happy with the consistency, remove from the oven and remove the vanilla pod
- Serve warm with a healthy drizzle of maple syrup - and if you like, an unhealthy dollop of cream: )
Mr Grey Will See You Now...

Today I wanted to share my excitement at my first (yes, that's my very first) corporate client and I couldn't have asked for a more fun and creative commission than helping Universal Pictures in London celebrate the launch of 50 Shades Of Grey at home entertainment.
Read moreHappy Minion Birthday Cake
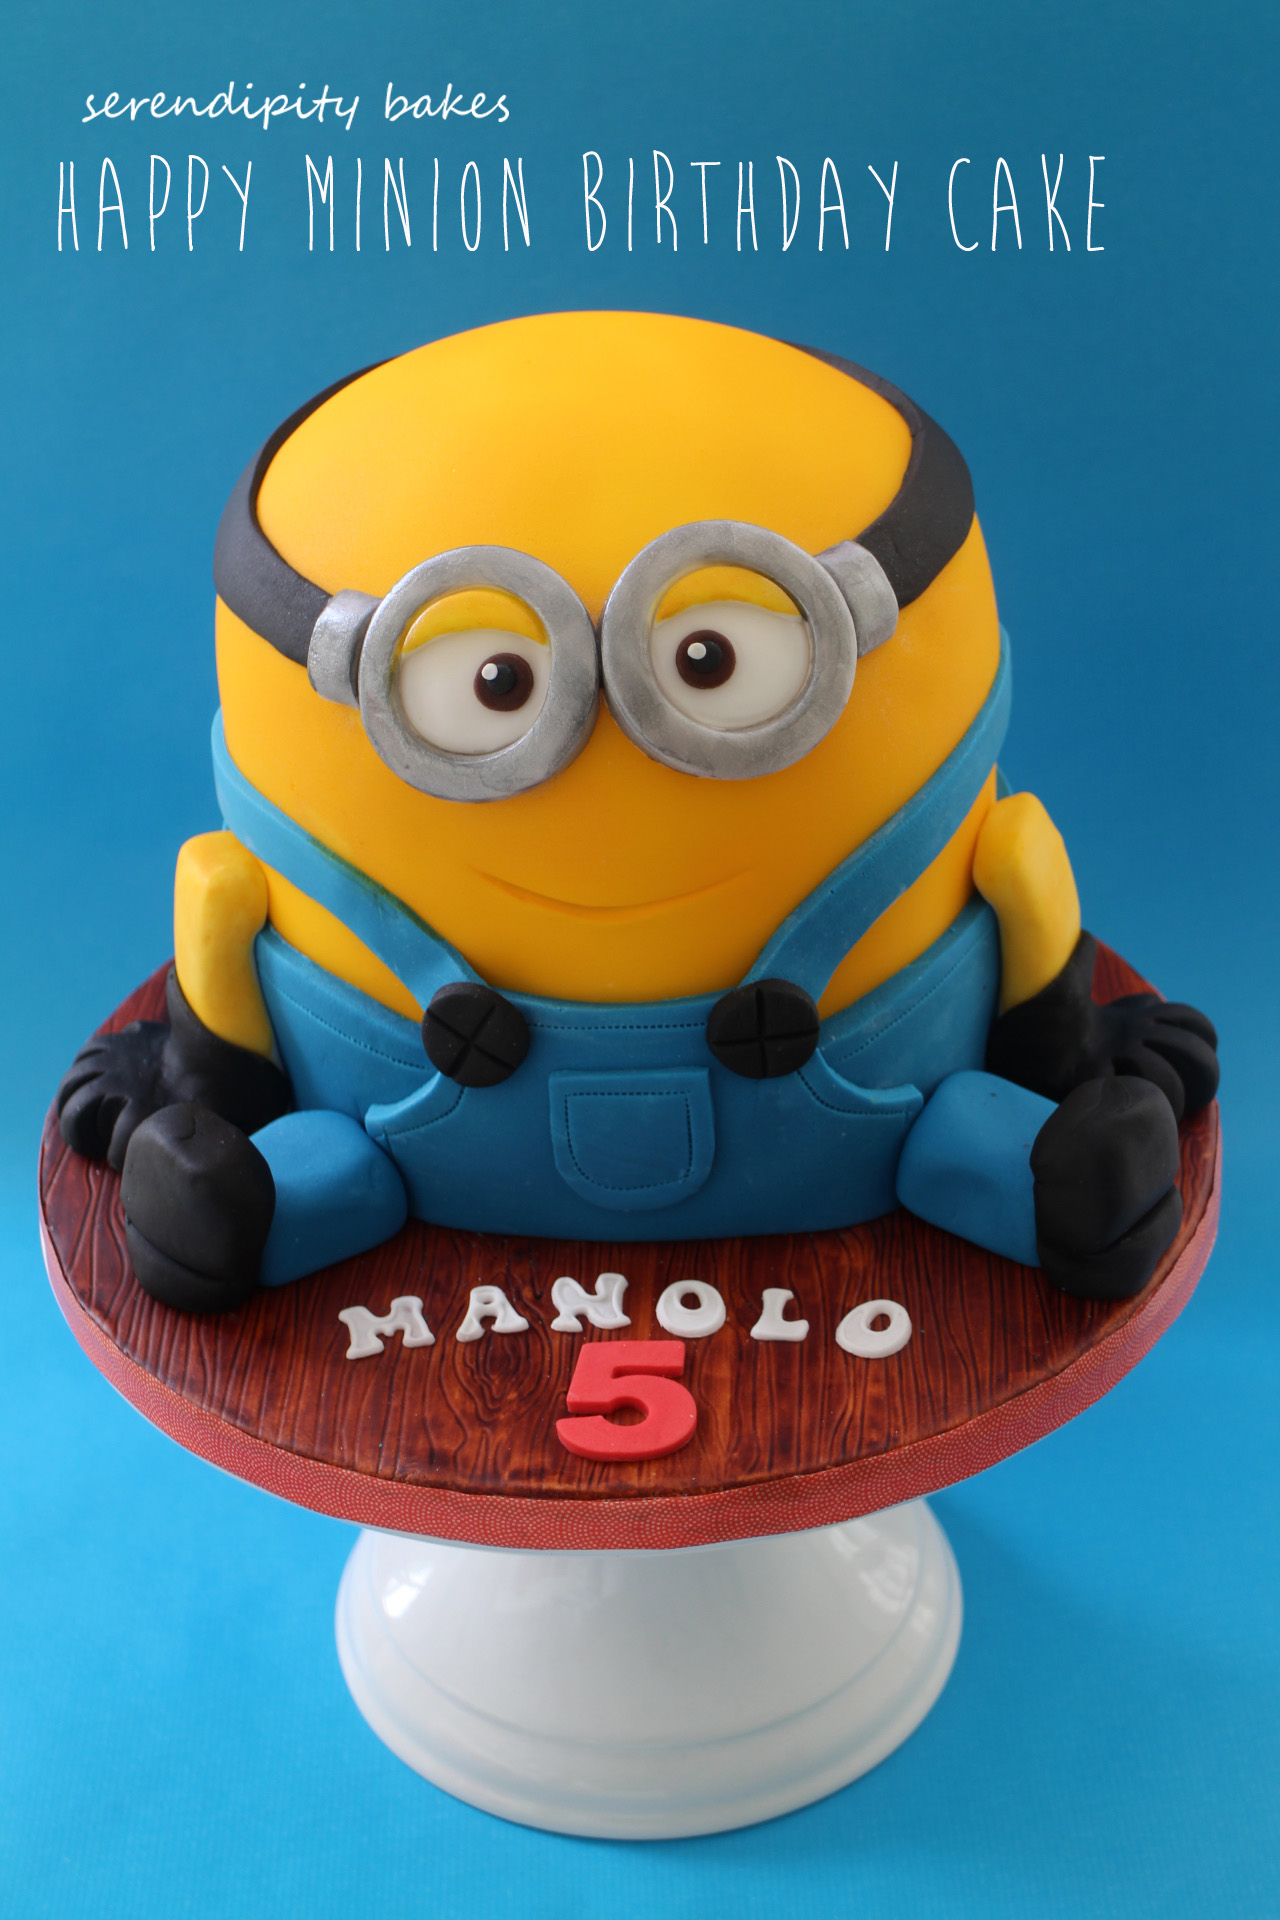
I love minions! I mean, who doesn't love the little yellow bundles of fun and they're such a happy choice for a children's birthday cake. I had a request for a small (!) birthday cake this week and I promise, I promise, it did start out small! It was for a joint birthday with 3 other boys so they didn't need a huge cake and so I thought hmmm, a 7 inch cake would be perfect. Not too big, not too small. But then I had to make two times the 7 inch cake to get the height and when it was buttercreamed and covered in fondant, it was pretty large. Um, over 2½ kg fondant on this one. And that's a 12 inch board. Maybe not quite as small as I had originally planned!
I'm playing with the best way to cover cakes at the moment and have been experimenting with airbrushing them (starting off with my Darth Vader cake last week). The reason for this is that you're then only covering a light external layer with food colouring and not right the way through the fondant itself as these vibrant colours (like the black of Darth Vader and the yellow of the Minion) need a lot of additional colour to get the richness. Although after I'd knocked over my bottle of yellow airbrush paint for the second time, I was cursing my choice - although this was then tempered by the therapeutic airbrushing so all was well in the end.

The cake itself is vanilla cake with raspberry jam and butter cream and contains two 7 inch cakes stacked with a board half-way through. The base board was covered with fondant, then impressed with a woodgrain effect and handpainted with airbrush paint (I find the Culpitt brand works well for this), finished off with some washi tape.
I really love this cake. But then it's hard not to love a minion :)