• About
  • Blog
  • Recipe Index
  • Your Celebrations
  • Contact Me
Menu

Serendipity Bakes

Street Address
City, State, Zip
Phone Number

Your Custom Text Here

Serendipity Bakes

  • About
  • Blog
  • Recipe Index
  • Your Celebrations
  • Contact Me

Roasted Strawberry & Black Pepper Scones

October 4, 2015 Nicola King

So I know it's autumn now, but can you forgive for me for trying to hold on to a little bit of summer? The sun has been shining this week and sometimes it was even warm enough to abandon the jumper :) So although cream teas and scones might conjure up dreams of warmer, lazier days in the garden, I can promise you they are just as delicious on cooler days tucked up inside when the leaves are turning golden brown.

I don't usually watch the Hairy Bikers but this week I caught a little of an old show on TV where they were roasting strawberries with black pepper for scones. The roasted strawberries looked like little jewels adorning scone crowns and I couldn't resist making some for us.

The strawberries take an hour and a half to roast, so whilst the scones are relatively quick to make, you do need to start preparations a little earlier for these. You could always roast the strawberries the day before and get a head start on your baking. They are simple to prepare. The strawberries are hulled and cut in half and then sprinkled with two teaspoons of sugar and one teaspoon of freshly ground black pepper. Then roasted on a sheet of baking paper for an hour and a half. The juices run out and they get a little sticky on the paper but try to scrape all the goodness up as you don't want to lose a drop of this in your scones.

The scones are super simple to make. The butter should be added cold to the flour, sugar and salt and then rubbed in with your fingertips. Then add your roasted strawberries to the mix. Finally stir in the milk (I used whole milk) and combine until all the ingredients are well mixed.

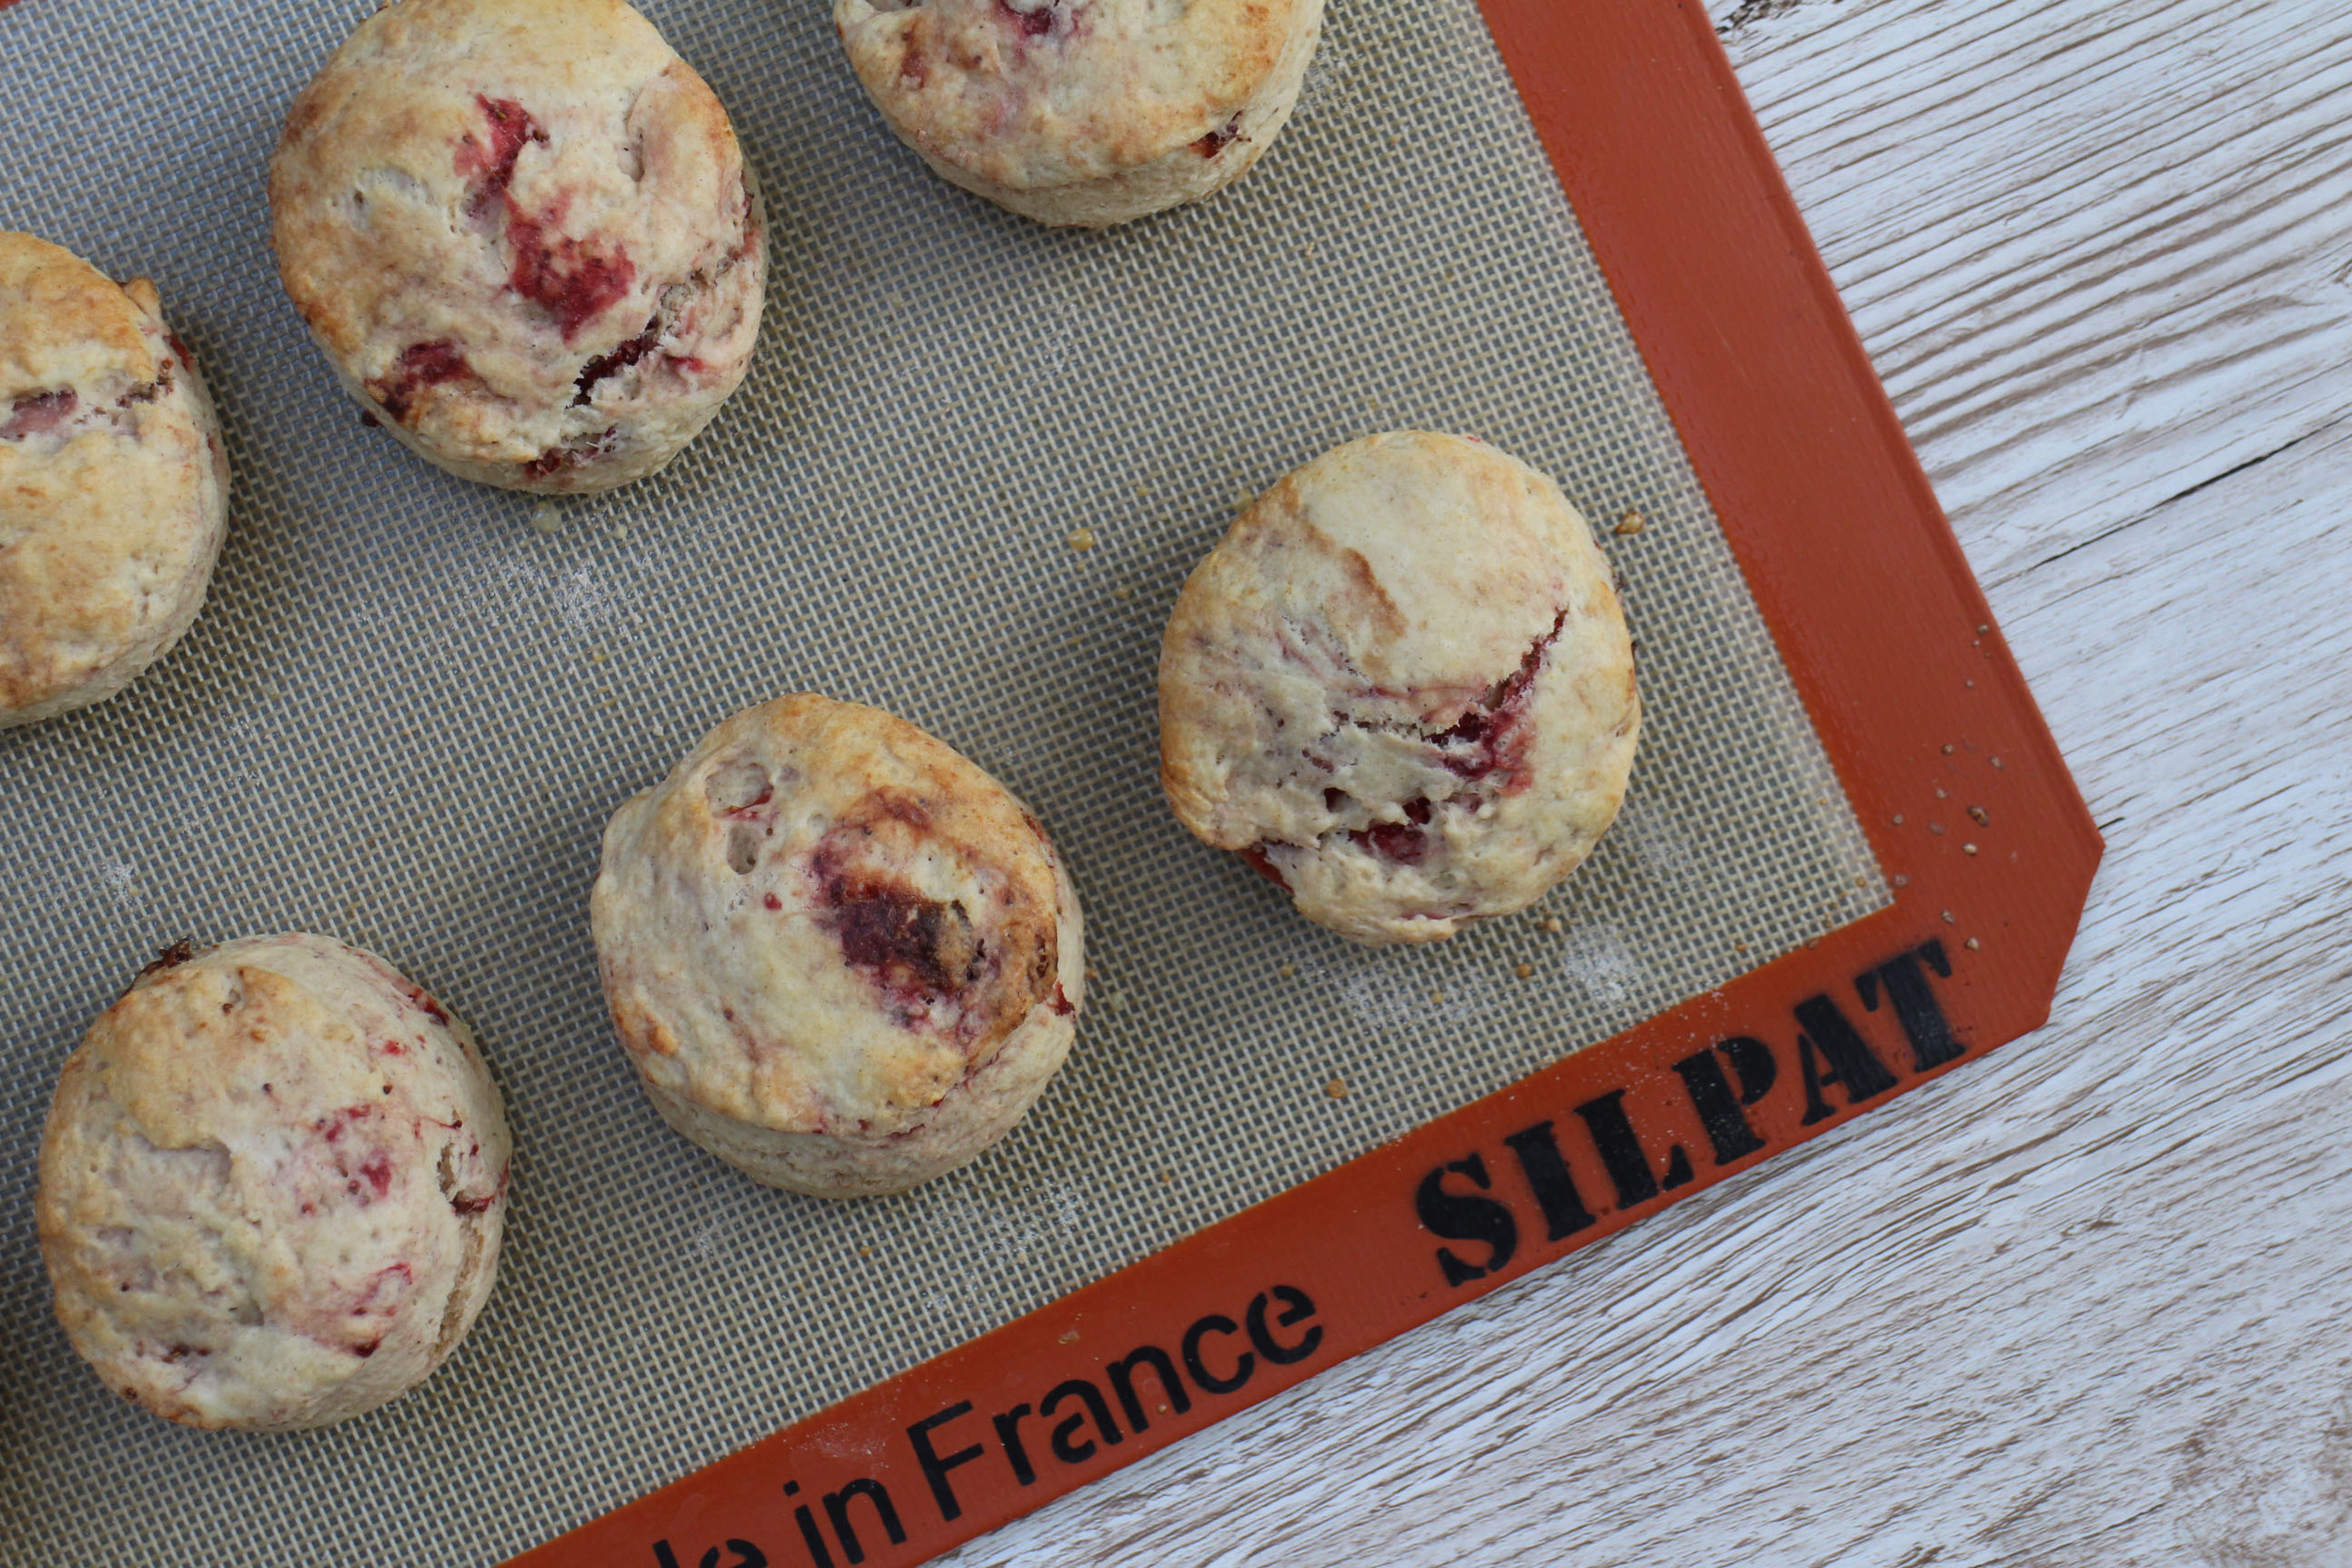
Turn the mixture out onto a well floured surface, add a little more flour to the top and then pat down with your hand until the mixture is around 3cm deep (my scones were taller than the Hairy Biker scones on TV but I prefer them that way) I cut out rounds with a 68mm cutter, placed them on a baking tray lined with Silpat (or you can use baking paper) and then brushed the top with a little milk. Into the oven for around 18 minutes and they are ready to enjoy.

Scones_2.jpg

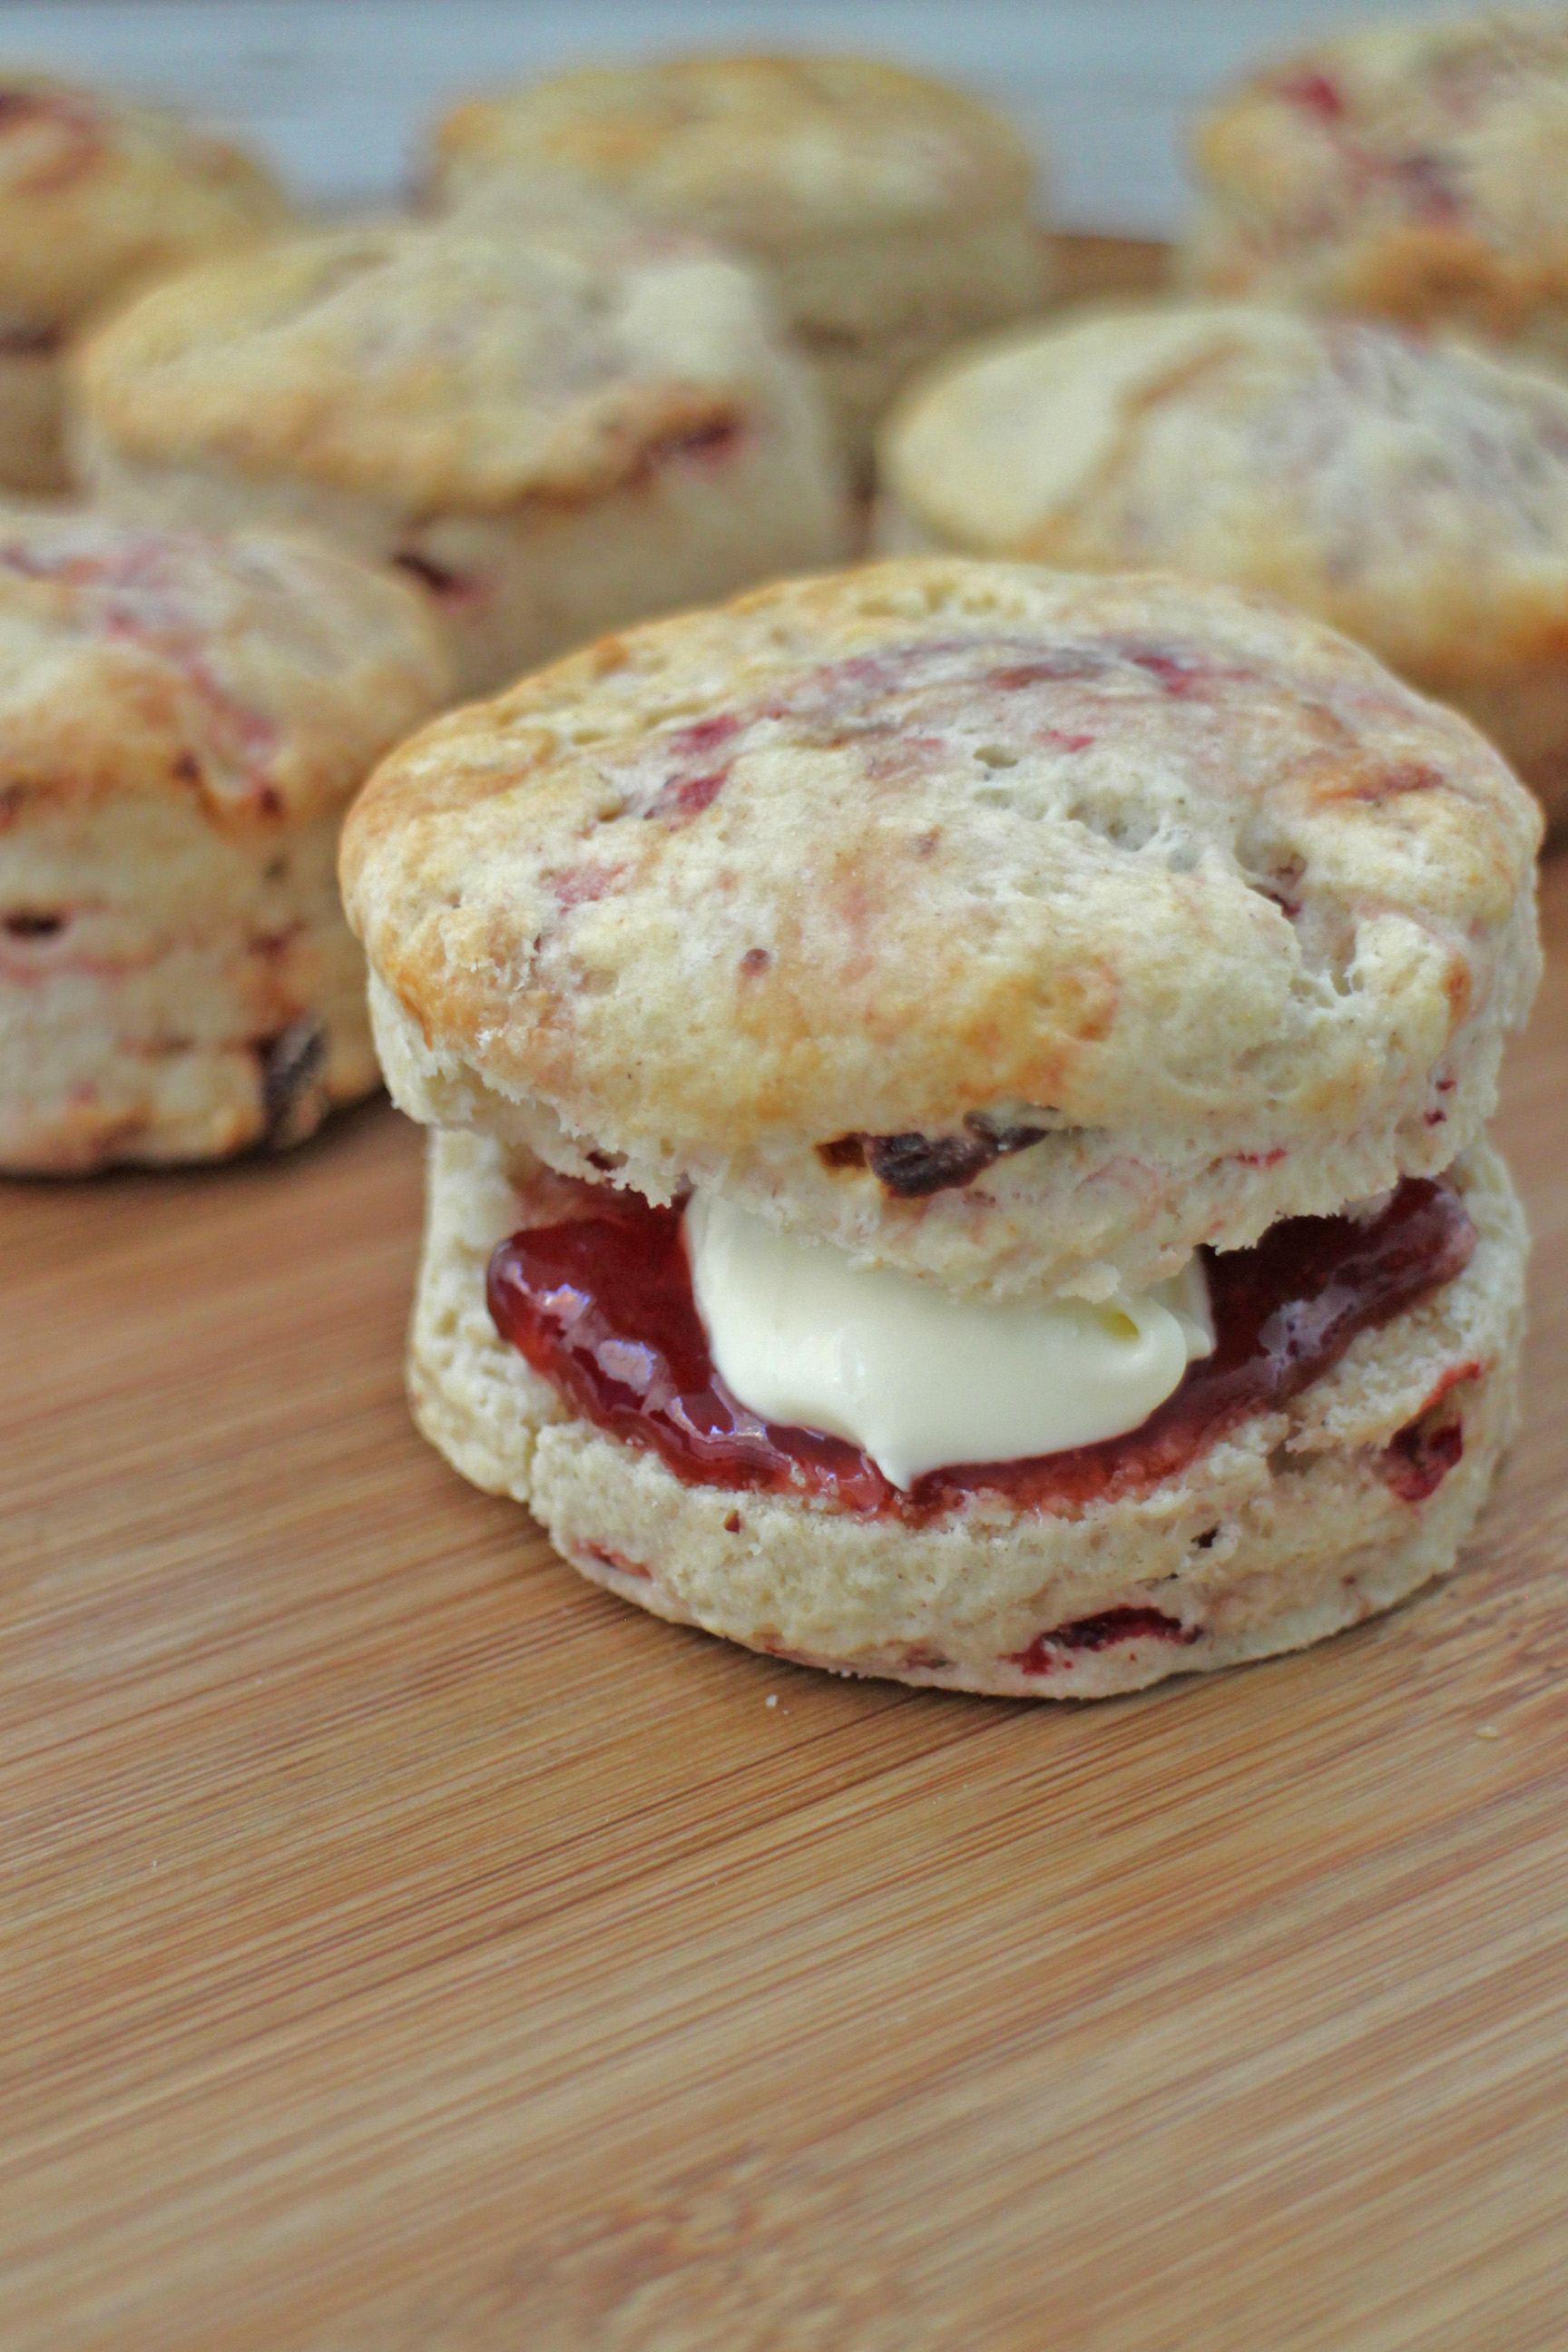
They are delicious warm from the oven and are nice without any other toppings. However, when topped with strawberry jam and clotted cream they are absolutely heavenly.

We are all partial to afternoon tea in this house and these were a lovely treat. I think the addition of the roasted strawberries not only looks more beautiful but the flavour adds a new dimension to them too. Well worth the effort of getting out your roasting tin :)

Roasted Strawberry and Black Pepper Scones Makes 15 (from the Hairy Bikers)

Roasted Strawberry Ingredients

  • 300G STRAWBERRIES
  • 2 TSP CASTER SUGAR
  • 1 TSP FRESHLY GROUND PEPPER

Scone Ingredients

  • 500g SELF-RAISING FLOUR (plus extra for dusting surfaces when rolling)
  • 50G CASTER SUGAR
  • ½ SALT
  • 100G COLD BUTTER, CUT INTO SMALL CUBES
  • 300ML FULL-FAT MILK (plus extra for brushing the top of the scones)
  •  

Method

  1. Preheat the oven to 120 degrees (fan)
  2. For the Roasted Strawberries, prepare them by hulling them and cutting each one in half
  3. Put them on a lined baking tray and then sprinkle them with the sugar and pepper
  4. Roast them for 1½ hours
  5. Scrape them off the baking paper and put to one side
  6. For the Scones, preheat the oven to 180 degrees (fan) and line two baking trays
  7. Place the flour, sugar and salt into a medium mixing bowl
  8. Add the cubed butter and rub into the dry mix with your fingertips until the flour mix looks like fine breadcrumbs (around 3 to 5 mins)
  9. Stir through the roasted strawberries
  10. Add half of the milk and start to combine with the flour mix
  11. Then add the other half and mix until all the ingredients are well-mixed and forms a dough
  12. Dust your work surface with flour and then turn out your dough on to here
  13. Put a little more flour on top and then knead gently until the dough all comes together
  14. Pat down with your hands or rolling pin until the dough is around 3cm thick
  15. Then cut out rounds with a 7cm cutter and place them onto the prepared baking trays
  16. Gather together the scraps of dough, re-roll them and cut out rounds, repeating until you've used all your dough (it should make around 15 scones)
  17. Brush the tops with a little milk
  18. Place them in the oven and cook for around 18 mins until they're risen and the tops are brown
  19. Slice them in half and serve with your favourite combination but I can especially recommend strawberry and clotted cream :)
In Everyday Cakes Tags Scones, Strawberry, Strawberry Jam, Clotted Cream, Black Pepper
Comment

Monte Carlo Biscuits

September 8, 2015 Nicola King

We're back from our final fling of the summer in Tuscany and appear to have left the sunshine behind us! There are only two days left until the boys go back to school. Wow, where did nine weeks go? It's been a whirlwind of going away, entertaining the boys and having lots of visitors as well as a very important fifth birthday for my youngest. I've baked many of my favourite recipes time and again, recipes I've discovered through this blog. And when my gluten-free niece came visiting from New Zealand,  I didn't bat an eyelid at baking some special cakes and puds for her when a year ago the idea of gluten free baking would have sent me into a spin!

I have a stack of recipes I'm looking forward to trying when a little more of the day is my own again but for today, the weather is grey and gloomy so we're having our last lazy day of the summer hols and the boys wanted to turn their hands to baking something yummy. It had to be something whose ingredients are store cupboard essentials as we haven't been near a supermarket since our return from sunnier climes.

We decided upon Monte Carlo Biscuits. These Australian classic biscuits are sweet and filled with jam and buttercream and have been made by Arnott's Biscuits since 1926. I must confess I have never had one before. I saw a version of the recipe on the Australian Good Food website and Frank Camorra's comment on there made me smile: "I remember the first time I saw a Monte Carlo, I couldn't believe how big it was". Having made them today, I can completely relate to that. They are enormous.

I love coconut so for me, this is my favorite part of the cookie but the addition of golden syrup (or you could use honey) also makes them lovely and chewy too. As I said before, they are enormous and I would definitely make something a little daintier next time - I mean, my youngest struggled to get it in his mouth for a bite! There are a lot of recipes available for these biscuits, very similar in ingredients and method. Not having tasted one of these before, I opted for Donna Hay's vanilla buttercream filling which is pretty sweet and has a higher butter content than most of the other recipes - and is exceptionally yummy :)

As the finished biscuits are 7cm in diameter, next time I would divide the dough in half again and make 20 sandwiched biscuits. But these biscuits are gorgeous. I can see why they're such a favourite down under.

Not sure they'll be hanging around for long in this house. Especially when my antipodean hubby spots them ;-)

Monte Carlo Biscuits Makes 10 biscuits sandwiched together (adapted from Donna Hay and Modern Australia | Good Food)

Biscuit Ingredients

  • 125G UNSALTED BUTTER, SOFTENED
  • 160G LIGHT BROWN SUGAR
  • 2 TBSP GOLDEN SYRUP (or you could use honey here as an alternative)
  • 1 EGG
  • 300G SELF-RAISING FLOUR
  • 50G DESSICATED COCONUT
  • 70G STRAWBERRY JAM (or you could use raspberry jam)

Buttercream Ingredients

  • 160G UNSALTED BUTTER, SOFTENED
  • 200G ICING SUGAR
  • 1 TSP VANILLA EXTRACT

Method

  1. Preheat the oven to 180 degrees (fan)
  2. Line two baking trays with greaseproof paper
  3. Beat together the butter, sugar and golden syrup until light and creamy - this should take 2-3 minutes
  4. Add the egg and mix it until just combined
  5. Sift the flour over the dough and add the coconut, then mix together until they're combined
  6. Divide the mixture into 20 balls (around 35g per ball) and place them on the prepared trays ensuring enough space for them to spread
  7. Bake for 12 minutes until they're golden brown
  8. Leave them to cool on their trays for 5 mins and then transfer them to a cooling rack until they're cool
  9. Make the buttercream by placing the butter, icing sugar and vanilla extract in the mixing bowl and beating the buttercream for around 5 mins until smooth and creamy
  10. Either spread or pipe a dollop of buttercream on half of the cooled biscuits
  11. Add jam on top of the buttercream and then sandwich the biscuits together using one of the halves without cream or jam
  12. Enjoy :)
In Biscuits & Cookies Tags Coconut, Golden Syrup, Strawberry Jam, Buttercream, Monte Carlo
Comment

To subscribe, please enter your email address:

Delivered by FeedBurner

Yay for the weekend!! If you saw how I made pineapple flowers earlier this week, here they are adorning my very first Hummingbird cake. I am totally in love with them! I also added a few @edible_flowers to complement them and this makes the perfect w
I was so grateful to be #gifted some beautiful @cotswoldflour flour recently with a challenge to make something from my #bakingbucketlist and so I set about making a Nutella babka and scrolls with them. I’ve had a mixed love affair with bread m
I found the cutest miniature pineapple in the local petrol station co-op so decided to make these roasted pineapple flowers. I think they’re so pretty and remind me of lovely sunflowers. I thought they’d go well with a Hummingbird cake so
We had great fun baking this Malteser Millionaire’s Shortbread which is absolutely delicious! This was something the boys wanted to bake - who can resist a delicious shortbread base, topped with gooey caramel and then a final layer of swirled m
As the rain and clouds returned to our skies this weekend, we’ve been looking for comforting lockdown treats. These Blackberry & Star Anise Friands, dripping with sticky blackberry juice icing are the perfect choice 💗 The recipe is from Sw
You might have seen from my Stories this weekend that I made cinnamon buns. I don’t have the best track record with bread but I’m overcoming my inner fear! These buns were so delicious. It was an amalgamation of a few recipes but the base
  • Serendipity Bakes
    Coconut & Raspberry Friand Muffins
    May 29, 2019, 9:38 PM
  • Serendipity Bakes
    Thank you for sharing my photo of your delicious recipe 😋 @rkhooks Happy Sunday! https://t.co/niKamgfjvt
    Mar 3, 2019, 2:38 PM
  • Serendipity Bakes
    RT @BiscuiteersLtd: Our friends at @thewhitecompany asked us to design something special to celebrate their New York stores first birth… https://t.co/kTsMH57wRv
    Jun 28, 2018, 11:09 AM

Enter your email address:

Delivered by FeedBurner

Powered by Squarespace

Nicola King at Serendipity Bakes Follow my blog with Bloglovin Follow