• About
  • Blog
  • Recipe Index
  • Your Celebrations
  • Contact Me
Menu

Serendipity Bakes

Street Address
City, State, Zip
Phone Number

Your Custom Text Here

Serendipity Bakes

  • About
  • Blog
  • Recipe Index
  • Your Celebrations
  • Contact Me

Pumpkin Dutch Baby With Maple Pecan Butter

January 29, 2016 Nicola King

Who's excited about Pancake Day? Our boys are so excited and I just know we'll be making them pancakes for breakfast, they'll get them at school and will demand them for dinner too! We are huge pancake fans in this house -- the boys would eat them every day if they could but we restrict them to once or twice a week. This is a different kind of pancake -- possibly my new favourite kind -- that I've been trying out in advance of the big day in a couple of weeks.

Ever had a Dutch Baby? Making pancakes generally means hubby standing at the stove flipping a neverending supply of them onto our plates and our boys can eat a LOT of pancakes. After about 20 minutes, they declare they're full and he finally gets to eat his share. So if breakfast time is similar in your house and you haven't tried a Dutch Baby, this scenario will melt into the background. Cue one giant pancake, extremely filling, that you bake in the oven and then you all get to eat it together with your favourite toppings. Especially a cute little recipe for Maple Pecan Butter that is simply to die for. Looking good?

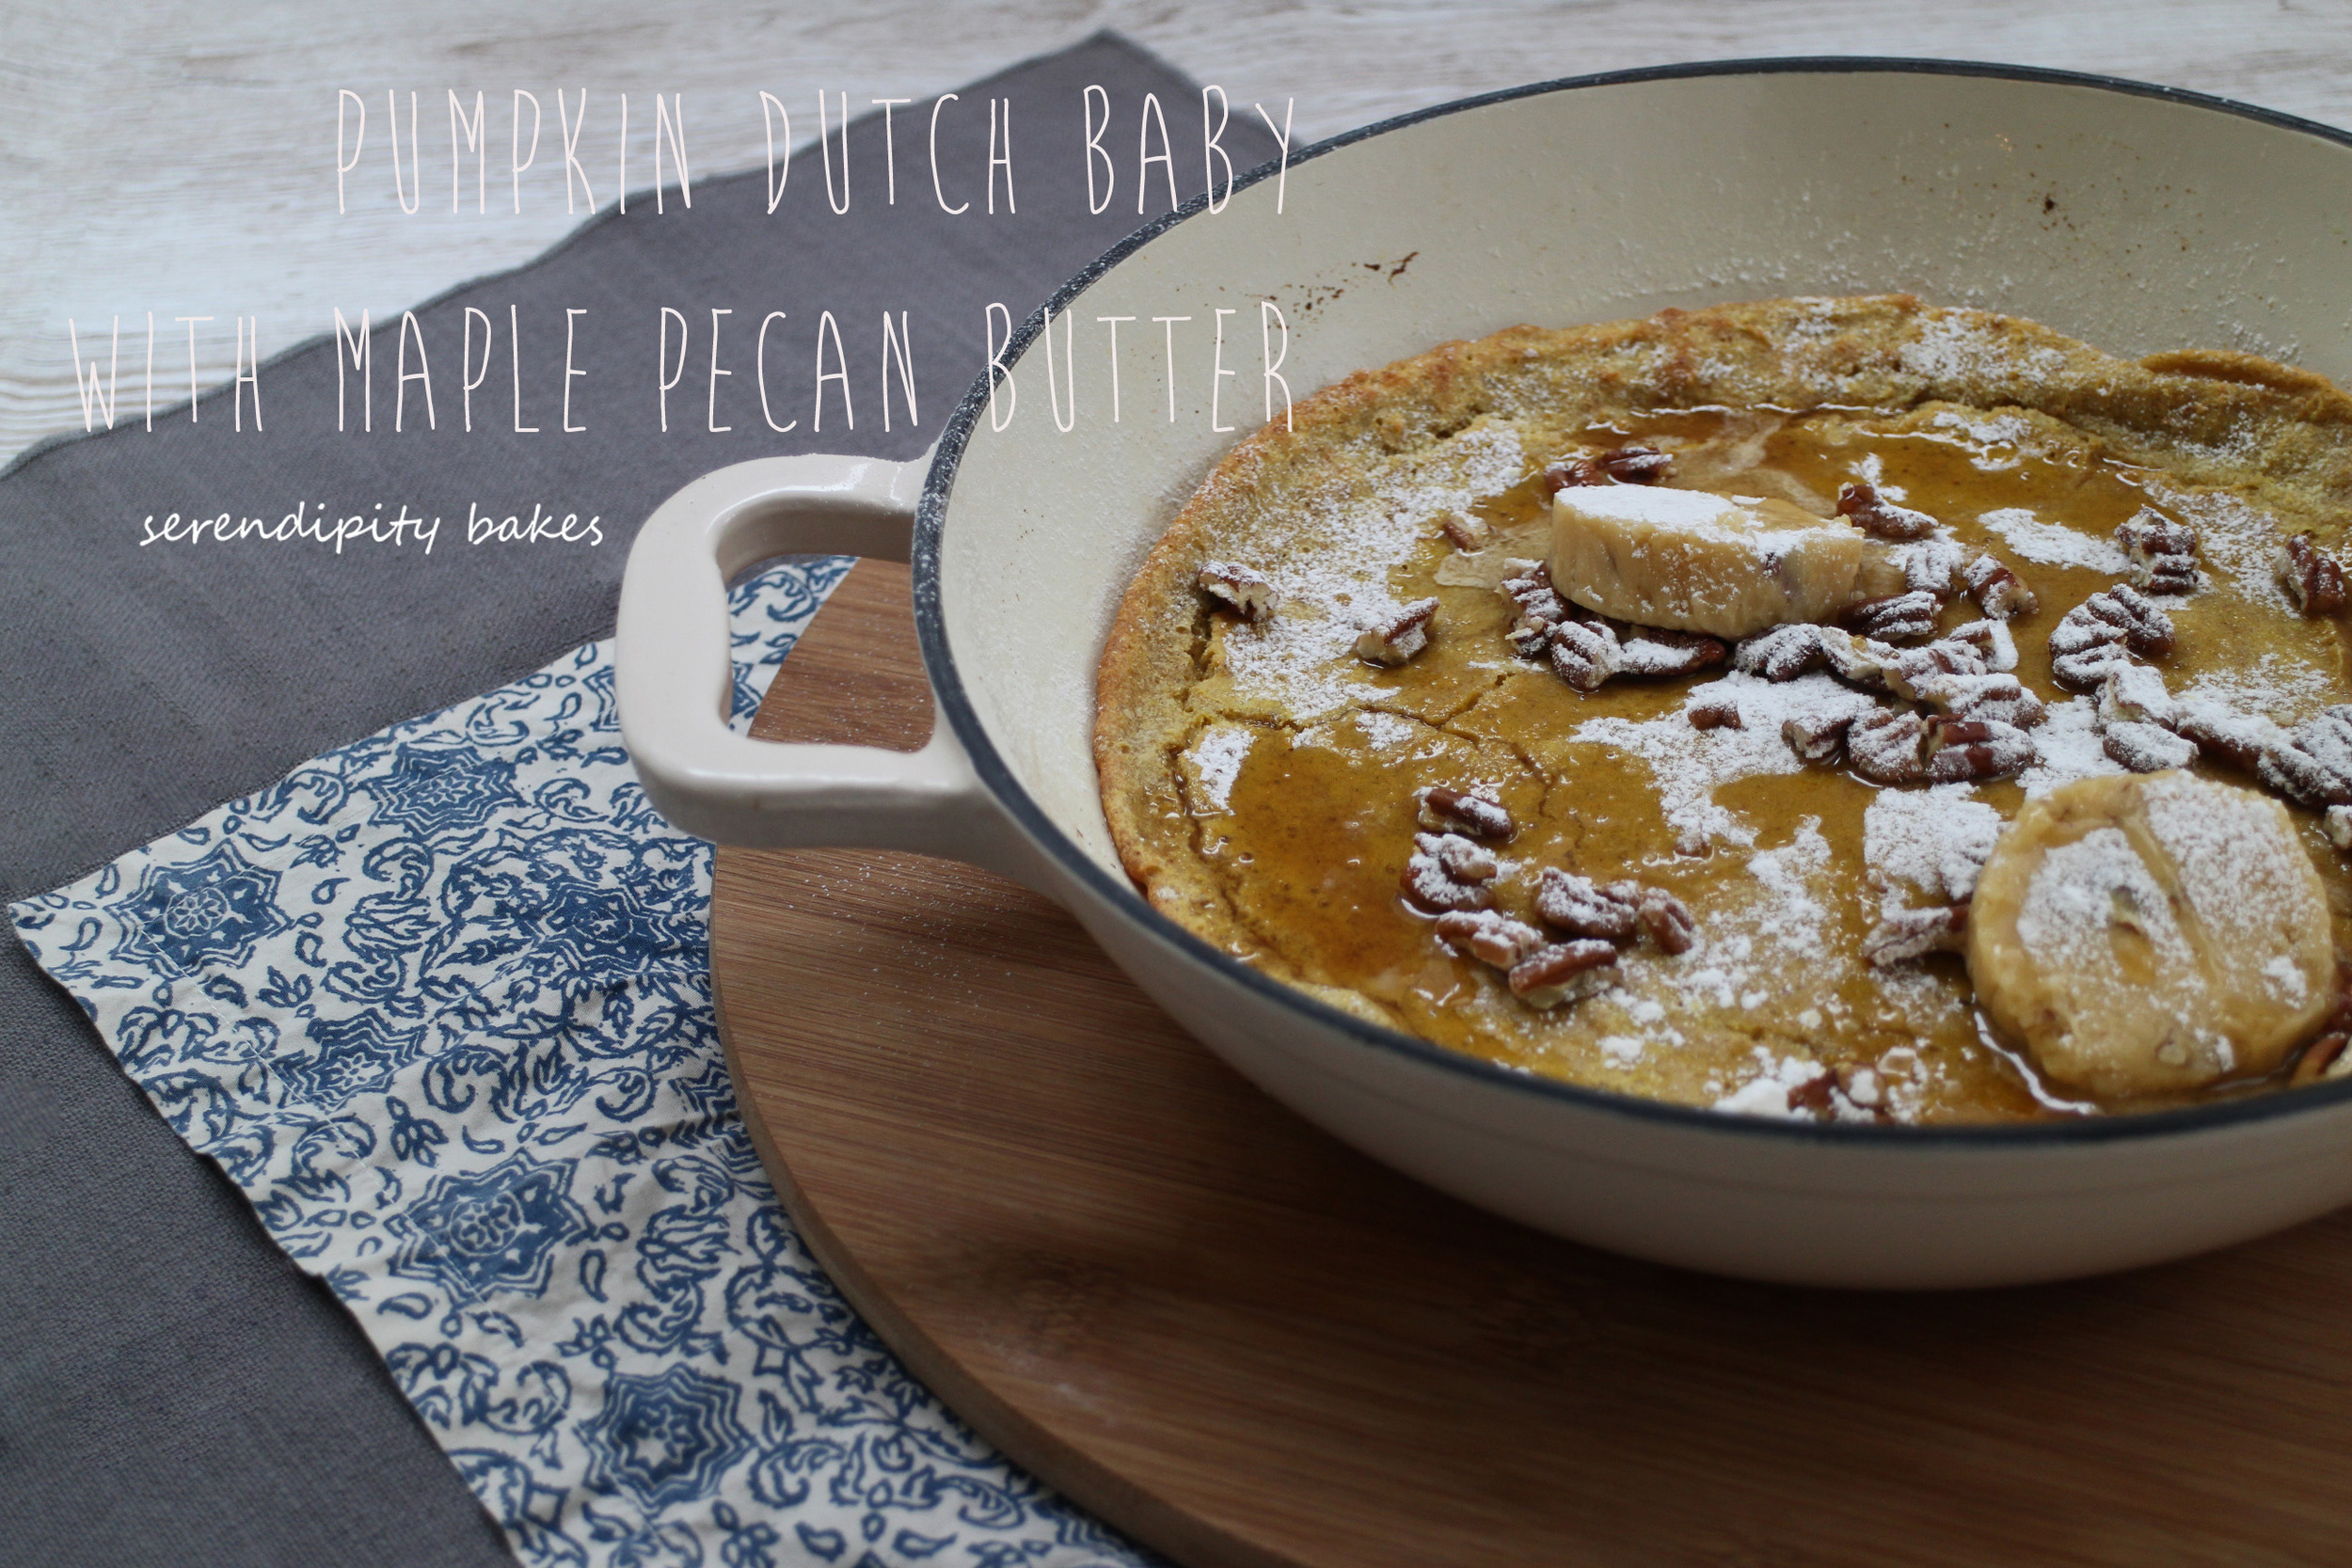
So I think I've said once or twice on here that Pumpkin is one of my favourite ingredients. I know it's more autumnal than winter, but when the weather is bleak outside, you need something to cheer you up and pumpkin makes a very filling and hearty ingredient (plus it's a vegetable so that must get a big tick!) I first fell in love with pumpkin when we used to visit my parents in Toronto and bought tins of Pumpkin Waffle mix from Williams-Sonoma. They are the best. But you can only get it around Halloween in their stores and we don't have the opportunity to travel to Canada right now. So I decided to bring the Pumpkin to a Dutch Baby and I promise you, this is amazing - the Pumpkin Dutch Baby with Maple Pecan Butter.

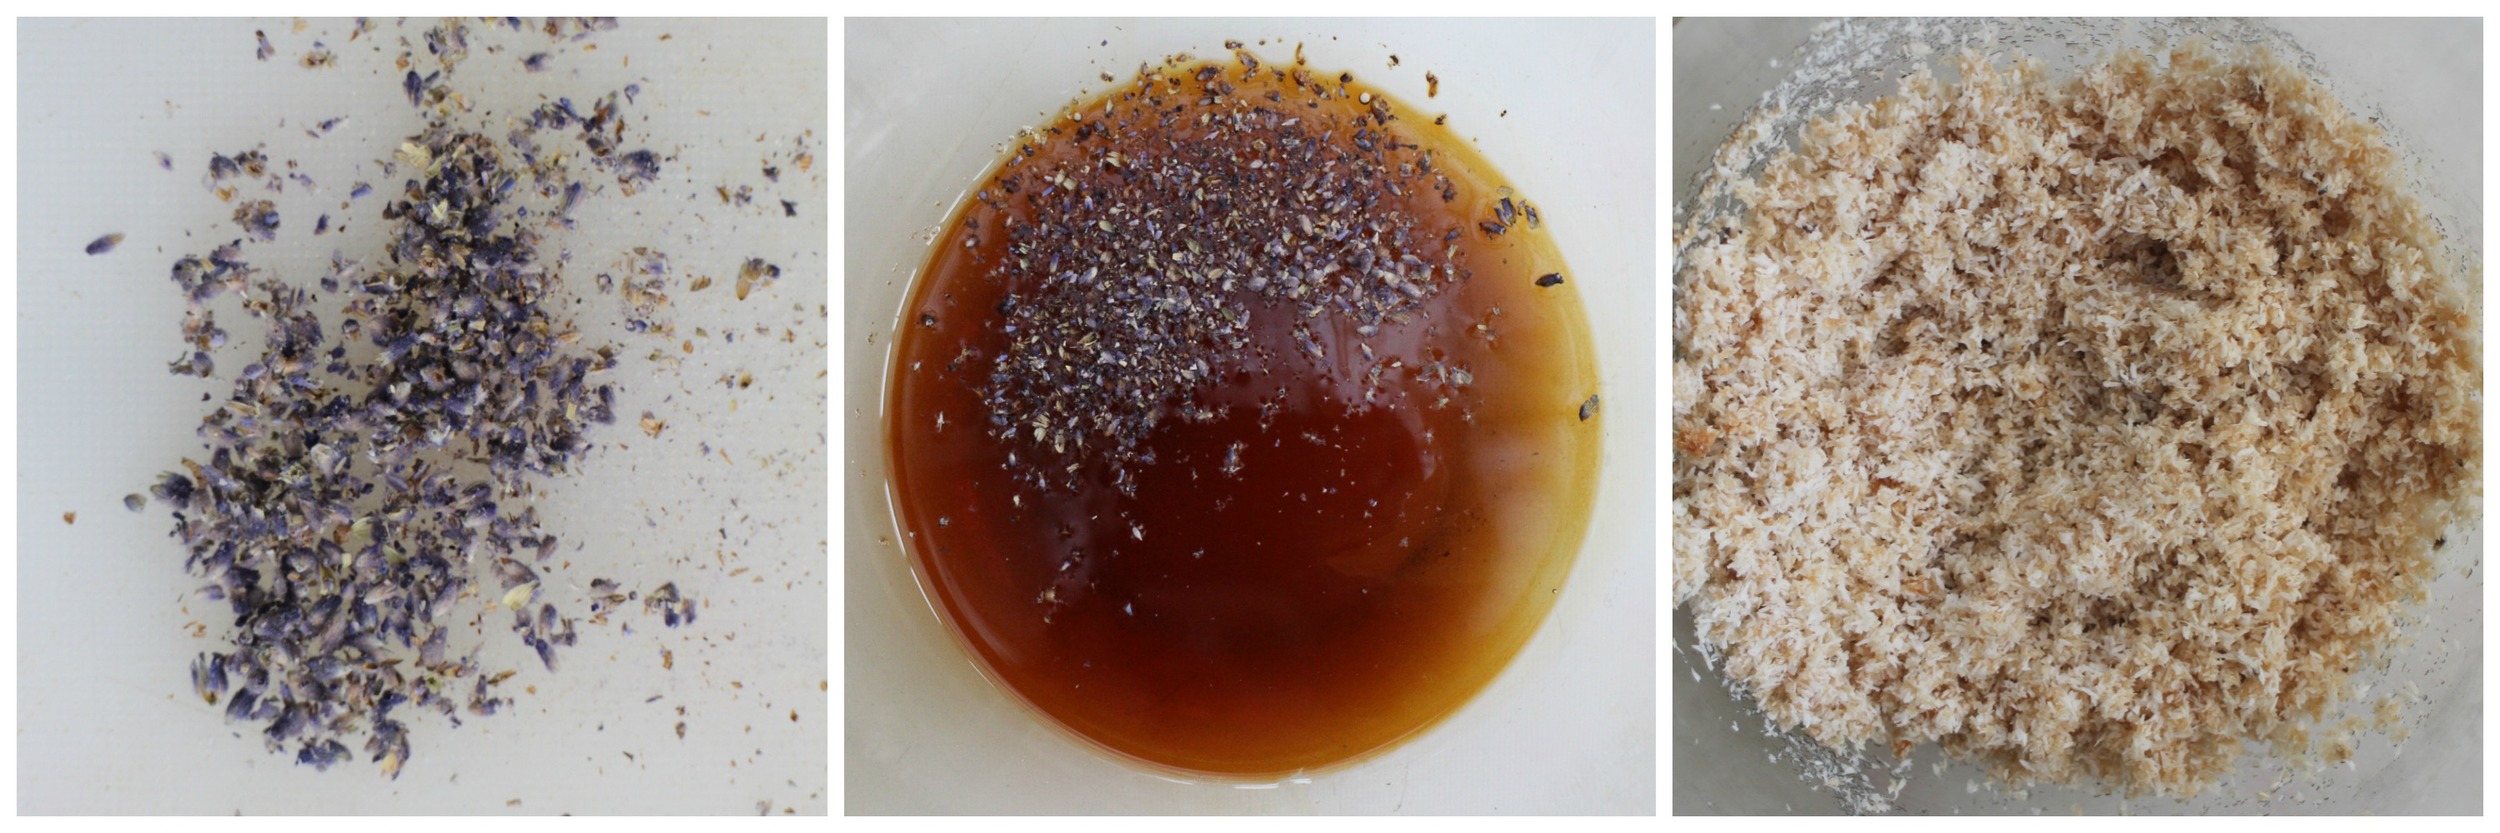
So if you're going the full mile and making the Maple Pecan Butter too (and I seriously suggest you put in the effort as it transforms the dish) you'll start the day before you plan to eat. I had some maple butter years ago in a London breakfast cafe with waffles and it was amazing. The consistency is very smooth and soft -- I refrigerated mine as I wanted the butter a little harder and this worked but it does soften up relatively fast once out of the fridge. I thought it would be as simple as softening some butter and adding the maple syrup and pecans and it is a bit more complicated than that -- but not too much! You do need a candy thermometer as you first need to gently heat the maple syrup and cinnamon stick to soft ball stage (240 degrees), then remove it from the heat, remove the cinnamon stick and add the butter. Then transfer it to a stand mixer and beat with the paddle attachment for 8 to 10 minutes. It will transform pretty quickly -- I wasn't happy with the consistency after 8 minutes (not firm enough) and less than 2 minutes later it had completely transformed so do keep an eye on it. Mix through the pecans and pop it on to some clingfilm and roll it into a sausage shape. Then refrigerate until you need it but mine had around 24 hours in the fridge. The ratios of the ingredients are 2:1 maple syrup:butter if you want to upscale it and make more. It keeps for around 2 weeks in an airtight container in the fridge.

The Pumpkin Dutch Baby itself it very straightforward. Think making pancakes and it's a one bowl and one skillet recipe. All of the ingredients go in the one bowl to be beaten. The one things to remember is that the eggs and milk need to be at room temperature. The skillet is heated in the oven so it's very hot, then the butter added and finally the batter. Then popped back in the oven for around 15-20 minutes. The outsides should be puffed and golden; the insides more of a custardy consistency. When you plan to serve this, it's best to have everyone sat ready at the table as it can deflate quickly -- so it's out of the oven, toppings on and onto the table in a couple of minutes to have the full effect.

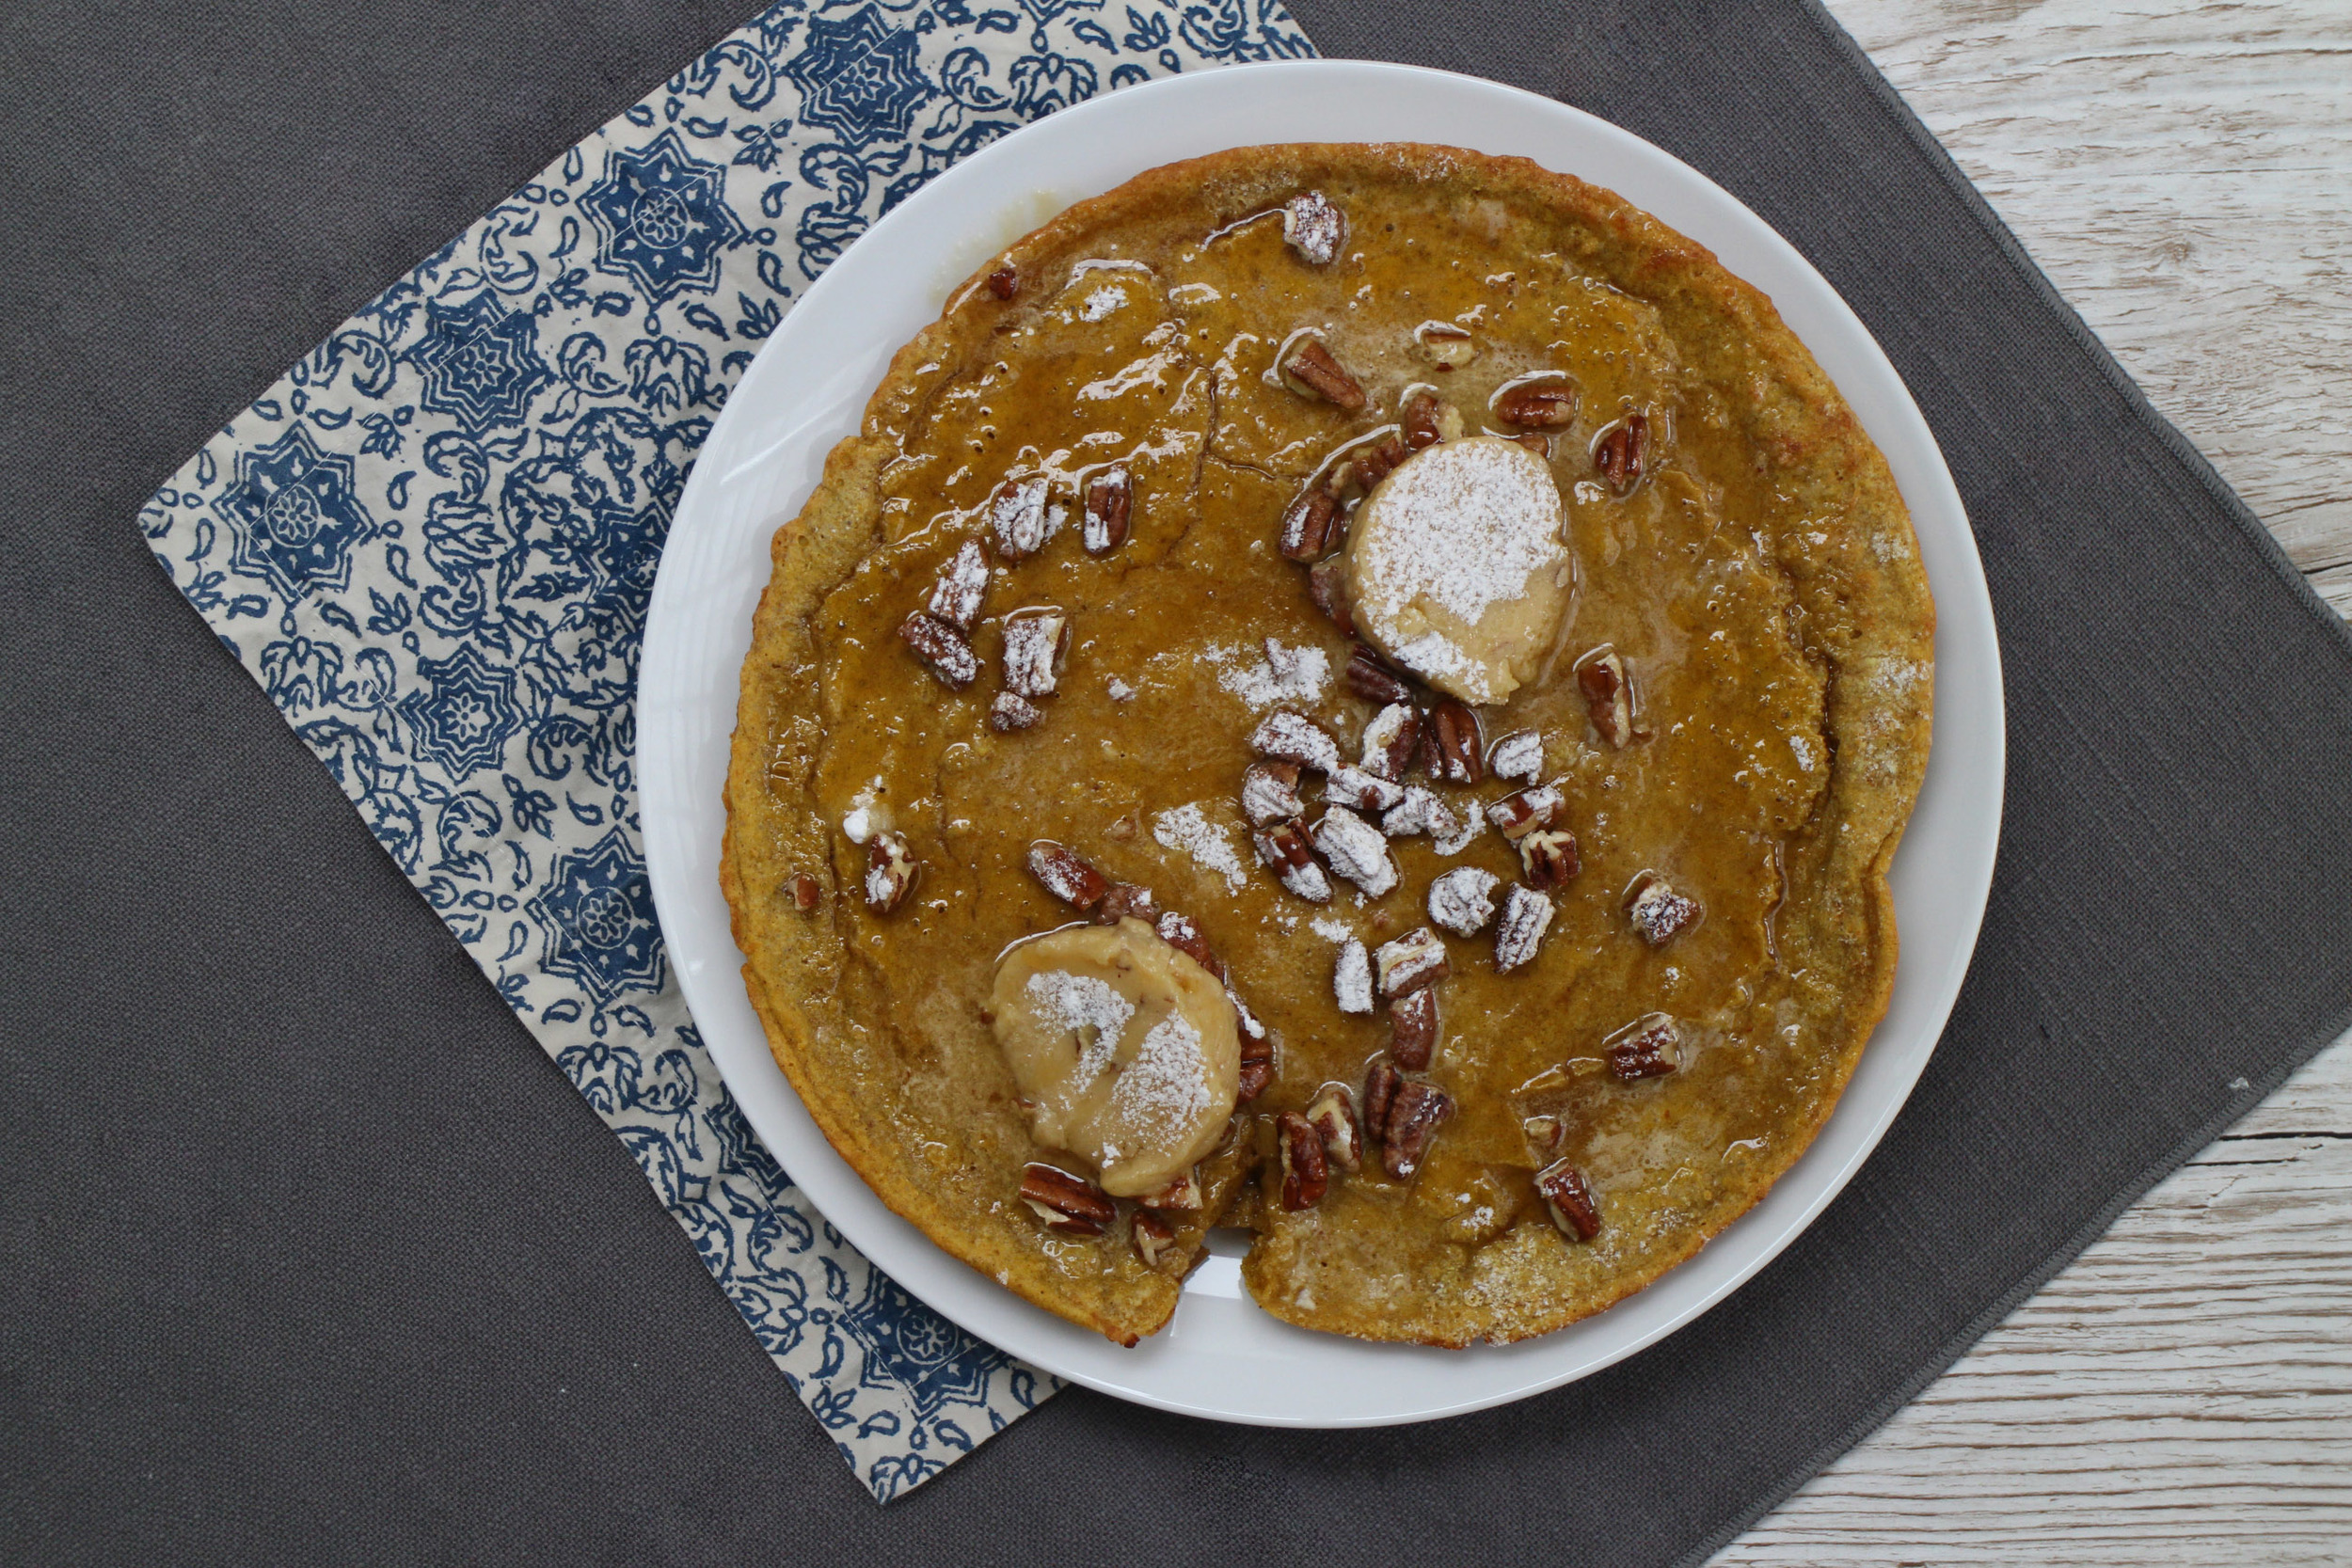
This is delicious. The inside is like a pudding | custard and I love the orange tinge that the pumpkin brings to it. As the Dutch Baby itself doesn't have sugar or sweeteners in it, it does need lovely, sweet toppings. Mine had the Maple Pecan Butter, extra pecans, icing sugar and maple syrup to crown it -- you don't need all of these (I think it would be delicious with caramelised banana or lemon and sugar or just maple syrup or honey) but it's one of those dishes you really want to dress to impress.

And the great thing about a Dutch Baby is that if you think of it just like a pancake, you can make up your own variations with fruit inside the batter (apples, strawberries, bananas, blueberries) and really get creative.

If you fancy another alternative creation for the big day, you could also check out this fabulous Dulce De Leche & Mascarpone Crêpe Cake -- Dutch Baby for breakfast and Crêpe Cake for tea, anyone?!

I hope you all have a wonderful Pancake Day next week and would to hear what you're baking to celebrate :) xoxo

Maple Pecan Butter

adapted from Martha Stewart's Maple Butter

Ingredients

  • 232G MAPLE SYRUP
  • 166G BUTTER
  • 15G PECANS, ROUGHLY CHOPPED
  • 1 CINNAMON STICK

Method

  • Place the maple syrup and cinnamon stick in a medium saucepan and heat gently until it reaches 240 degrees (soft ball stage) - this should take around 10-15 minutes and it's important to keep this on a gentle heat for that time
  • Remove from the heat, remove the cinnamon stick and stir in the butter until it's melted
  • Transfer it to a stand mixer with the paddle attachment and beat on low at first (to save splashing it everywhere), then gradually increase to a medium speed
  • Keep beating for around 8 - 10 minutes but keep an eye on it from 8 minutes as it does change consistency very quickly - you're looking for it to turn opaque and have a smooth consistency
  • Stir through the pecans
  • Place onto a piece of clingfilm and roll it up into a sausage shape
  • Refrigerate until set - mine was prepared 24 hours before I used it

Pumpkin Dutch Baby

Ingredients

  • 3 LARGE EGGS at room temperature
  • 170ML MILK (semi-skimmed or whole) at room temperature
  • 150G PLAIN FLOUR
  • 3 TBSP PUMPKIN PUREE
  • 1 TSP VANILLA EXTRACT
  • 1/4 TSP SALT
  • 1 TSP PUMPKIN SPICE
  • 15g BUTTER

Method

  • Pre-heat the oven to 200 degrees (fan)
  • Put the skillet into the oven and heat for at least 10 minutes
  • Meanwhile, mix together all the ingredients (except for the butter) in a bowl with a whisk until smooth
  • When the skillet's ready, remove from the oven and add the butter ensuring that the melted butter coats the bottom and sides of the skillet
  • Immediately add the batter to the skillet and bake for around 15 minutes
  • The Dutch Pancake is ready when the sides are golden and slightly puffed and the middle is a custard consistency
  • Remove from the oven, add slices of Maple Pecan Butter, chopped pecans (toasted if preferred), maple syrup and icing sugar (or your preferred toppings)
  • Serve immediately and enjoy with a huge smile on your face :)
  • Happy Pancake Day!!
In Celebrations, Weekend Brunch Tags Pumpkin, Maple Syrup, Pecans, Pancake, Maple Pecan Butter
Comment

Maple Syrup Monkey Bread

January 21, 2016 Nicola King

There are times when I wish our senses could transcend the written word. Like right now. If you could smell the warm, sweet, maple syrupy smell coming from my kitchen at this moment, you'd be in love. Just like me. And it doesn't just smell good - the taste is even better!

This Maple Syrup Monkey Bread is gorgeously squidgy. It has its first blanket of maple syrup when it's just out of the oven and then another one a few minutes later when it's turned out on the plate. I think mine looks like it's swimming in it :)

The recipe comes from James Martin's Sweet which I highly recommend if you're looking for lots of sweet delights to bake. I love James Martin and his recipes (whether from this book or his other savoury ones) always turn out brilliantly. They're easy to follow and always work. Win win. And there are lots of beautiful photos to inspire you!

This is simple to make but, as with all bread, you do need a little patience for the proving. The dough itself is straightforward - the milk is warmed in a saucepan, the yeast is added and then it's mixed with breadcrumbs made from flour, sugar, salt and butter. I mixed the breadcrumbs by hand but then I used my standalone mixer and dough hook to combine all the ingredients. You can work the dough by hand if you don't have this equipment - it will just take you 15 minutes rather than the 5 minutes with the dough hook. But you get bonus points for giving your arm muscles a workout!

When the dough is tacky to the touch, it's put into a bowl, covered and left for around 2 hours in a warm place until doubled in size. When it's ready, butter a 23cm savarin mold. I didn't have one of these so I used an 8 inch cake tin. You're going to make 30-35 dough balls with your dough so weigh the dough and then work out how much each dough ball should weigh. I kept my scales to hand and weighed out each amount of dough and then formed it into little balls. Then each ball is dipped into melted butter and rolled in a mixture of demerara sugar and cinnamon. By the time I formed my last ball the sugar was a complete gunky mess, clumped together with the butter, but keep going. Then place the balls into your cake tin. My bottom row was 2 balls wide (leaving a hole in the middle as it would have with a savarin mold) and then 1 circle of balls on the top layer.

The dough is left to prove again, lightly covered with some oiled clingfilm, for around 45 minutes. I generally leave my dough to prove for the second time overnight which I did with this bake but you need to ensure that you don't leave it in too warm a place as the butter will melt. I found that happened a little with mine (it didn't affect the final outcome as far as I can tell) but I suggest you place it on a baking tray when proving otherwise you might get a sticky trail when you come to pick it up!

When you're ready to bake it, preheat the oven to 180 degrees. Bake it on the baking tray for around 25 minutes until it's golden brown. I did find that the the middle hole disappeared as it baked and because I wasn't using a savarin mold, the middle dough balls underneath aren't cooked quite as well as the outer ones, so a savarin mold is preferable if you have one to hand, but not absolutely necessary.

When it's out of the oven, it's coated with 100 ml of maple syrup, left for 2 minutes and then turned out on a plate. Mine was pretty sticky and did try to come apart when being lifted from the tin to plate but I managed to get it there in one piece. It's crucial that you remove it from its tin this quickly. Then it's bathed in another 100ml maple syrup.

It is a thing of beauty. Simply delicious and especially good straight from the oven. 

I'm looking forward to trying other variations of Monkey Bread but wanted to try this one first. We are firm maple syrup lovers in this house so I know it will be a big hit when the boys come home.

If there's any left by the time the boys come home ;-)

Maple Syrup Monkey Bread

from James Martin's Sweet

Ingredients

  • 300ML MILK
  • 500G STRONG BREAD FLOUR (plus extra for dusting)
  • 75G CASTER SUGAR
  • 5G FINE SEA SALT
  • 50G SOFTENED BUTTER (plus extra for greasing your tin)
  • 2 TSP FAST-ACTION DRIED YEAST
  • 200ML MAPLE SYRUP
  • 250G DEMERARA SUGAR
  • 1 TBSP CINNAMON
  • 200G MELTED BUTTER

Method

  1. Gently warm the milk in a saucepan until it's warm but not boiling
  2. Place the flour, sugar and salt in a standalone mixer with a dough hook and mix to combine
  3. Add the butter and mix together until you have the consistency of fine breadcrumbs - I did this by rubbing it between my fingertips
  4. Then sprinkle the yeast over the warmed milk and add to the breadcrumb mixture
  5. Mix together with a dough hook on your standalone mixer on a medium speed for around 5 minutes
  6. The dough should be soft, sticky and shiny and tacky to the touch but definitely not dry
  7. Place the dough in a bowl, cover with clingfilm and leave it to prove for 1-2 hours until it's risen, spongy and doubled in size
  8. Then butter your savarin mold (23cm) or cake tin (20cm)
  9. Turn out your dough onto a lightly floured surface and knead for 1 minute
  10. Weigh the dough and divide it by 35 and then make 35 dough balls of equal size
  11. Mix the demerara sugar and cinnamon in a bowl
  12. Dip each dough ball into the melted butter and then coat in the sugar mixture
  13. Place it in the mold/baking tin - I had enough for 2 circles (one inside the other) on the bottom of the tin, leaving a hole in the middle, and then another circle on top
  14. Cover with oiled clingfilm and leave to prove in a warm place (not too warm though otherwise the butter will melt) for 45 minutes until the dough is well risen - I left mine overnight
  15. When you're ready to bake them, preheat the oven to 180 degrees
  16. Bake for 25-30 minutes until the balls are golden brown
  17. Remove from the oven and immediately coat the balls with 100ml maple syrup
  18. After 2 minutes, remove the monkey bread from the tin and place onto a plate - it's important to do this now otherwise the bread will stick to the tin and be very difficult to remove without breaking
  19. Once on a plate, bathe the monkey bread in another 100ml maple syrup
  20. And enjoy (but not so much that you eat the entire thing in one sitting!!)


In Bread, Weekend Brunch Tags Monkey Bread, Maple Syrup, Bread, Cinnamon
Comment

Stem Ginger Bundt Cake

November 10, 2015 Nicola King

It started with an image of a scrummy gingerbread cake from The Boy Who Bakes on Instagram. And the fact that it's Gingerbread Month on BBC Good Food. Although I've often made Gingerbread Biscuits, I've never made a Gingerbread Cake before. So I set about to find an authentic recipe with a truly gingerbready (is that even a word?) cake - and I think I've found the one.

I played around with an old recipe from the Crabapple Bakery that was originally intended to make Gingerbread Cupcakes. I wanted to make a Stem Ginger Bundt Cake. I've had my share of challenges removing cakes from Bundt tins in the past and scoured the web for help - stay tuned for the top tips I've gathered!

So this cake is a lovely traditional gingerbread and the wonderful ginger taste comes from both stem ginger and ground ginger. Although I'm not a fan of stem ginger, the small pieces throughout give a slight crunch and lovely pop of ginger when you take a bite. The cake itself is light in texture, although it does have a slight squidginess which is ever so delicious.

So before we make the cake, let's talk Bundt Tins. Ever had a bundt cake that just wouldn't release from its tin after baking? Or perhaps it broke apart when coming out of its tin? I have. So here are my tips that I now use. First I grease the tin with butter, wiping all over the surfaces with a good coating of room temperature butter. Then I get a pastry brush and make sure that all the little cracks and crevices are well coated too. Once the tin is very well buttered, I dust the whole tin with flour. I read somewhere that you shouldn't pour your batter into the tin in one go, but fill it with cupfuls so I did that here. And a final tip that I found on Crafty Baking was that when the cake is ready to come out of the oven, soak a towel with steaming water in the sink and place the cake (tin side touching the cloth) for 10 seconds, before turning out immediately onto a cooling rack. And it works!

Now on to the cake. The batter is made in a large saucepan where we start by melting the butter, dark muscovado sugar and treacle until the butter has melted and sugar dissolved but the mixture shouldn't boil. Once they're melted together, leave to cool for 5 minutes and then add in succession (stirring well between each addition) the milk, eggs, chopped stem ginger and sifted flour mixture, taking care not to over-mix and toughen the batter. Then pour this into the tin until it's three-quarters full and bake.

When I had a finished cake turned out and cooling on the rack, I warmed a quarter cup of maple syrup and brushed that all over the outside and then dusted the cake with icing sugar. It wasn't intended to look Christmassy but it does look like a light sprinkling of snow has passed overhead. And I have to confess that after spending the last few weeks practicing my son's Christmas choir songs for his school carol service, it's already beginning to look a lot like Christmas!

This makes a really lovely, light cake and/or dessert (I'm thinking of trying it with a little ice cream later!) with fresh pops of ginger throughout.

Personally I think it's all worth it for the smell alone when it's baking in the oven - but if you love ginger, then this is sure to be a hit :)

Stem Ginger Bundt Cake (adapted from Crabapple Bakery's Ginger Lovers' Cupcakes)

Ingredients

  • 300G UNSALTED BUTTER
  • 200G DARK MUSCOVADO SUGAR
  • 160G TREACLE
  • 240ML SEMI-SKIMMED MILK
  • 3 EGGS, BEATEN
  • 1 PIECE OF STEM GINGER, CHOPPED INTO TINY PIECES
  • 400G SELF-RAISING FLOUR
  • 1½ TBSP GROUND GINGER
  • ¼ TSP SALT

​Method

  1. Grease with butter and flour your bundt tin
  2. Preheat the oven to 150 degrees
  3. In a large saucepan, gently heat the butter, sugar and treacle until the butter is melted and the sugar dissolved but don't let it boil
  4. Once the mixture is melted and well-mixed, remove from the heat and leave to one side for 5 mins
  5. Sieve the flour, ginger and salt into a separate bowl
  6. Add the milk to the saucepan and stir until well-mixed
  7. Then add the eggs one at a time, ensuring that all the egg is combined well with the mixture
  8. Stir through the stemmed ginger
  9. Add the flour mixture 1 cup at a time, ensuring that the flour is well incorporated and the mixture smooth but taking care not to over-mix it
  10. Transfer the batter to the bundt tin one cup at a time
  11. Bake for around 40 mins until a skewer inserted in the middle comes out clean
  12. Just before the cake is due out of the oven, soak a tea towel with steaming hot water in the sink and place the tin on top of it (tin side touching the towel) for 10 seconds
  13. Then turn out the cake immediately onto a cooling rack
  14. Leave to cool for 10 mins and then heat a quarter cup of maple syrup for 20 seconds in the microwave
  15. Lightly brush the outside of the cake with the syrup
  16. Sieve icing sugar over the top of the cake and serve on a pretty platter (Christmas look optional!!)
In Everyday Cakes, Celebrations Tags Ginger, Maple Syrup, Bundt, Cake, Christmas
Comment

Lavender & Maple Coconut Macaroons

May 30, 2015 Nicola King

Back to the big smoke after our mini-break in the countryside and we swapped flowers, animals and rolling hills for Kensington in the sunshine as we headed to the Science Museum for Space exploration! Great fun, but thoroughly exhausting - and hubby and I were relieved to collapse on the sofa by late afternoon :) I needed a pick-me-up, moreish and yummy - and healthy would be an added bonus.

After searching for lavender throughout the local stores and garden centres over the last couple of weeks (having decided not to order it online as it would take too long and then had to wait even longer to find it naturally) I found some last week at my parents' house. Dried lavender from last year's lavender crop in their garden and I only needed three-quarters of a teaspoon. It's been safely sitting in my bag for when I had enough time to make the second recipe I wanted to try from Hemsley & Hemsley, their Lavender & Maple Coconut Macaroons. I LOVE all the ingredients of these little macaroons, even though most shop assistants I approached when searching for the lavender to use in cooking looked at me like I was nuts.

This recipe is gluten and dairy free and the only sugar comes from the maple syrup so this is a healthy alternative to cookies and cakes. The macaroon itself is made predominantly from shredded coconut so for me, is very reminscent of the macaroons I enjoyed when growing up, when macarons (the deliciously almondy French variety I love so much) were a thing of distant dreams. As with many of my other bakes, I used liquid egg whites but you can use the whites of 3 medium eggs instead if you prefer. There is just the merest hint of lavender in these macaroons and I think this could be upped, probably to at least 1 tsp next time I make them. They don't take long to make, so provided you have the ingredients in your store cupboard, you can whip them up in no time for a lunchbox or afternoon treat.

I love these little macarons. There's not much about coconut I don't like, but I really like the pairing with maple syrup and the hint of lavender for a slightly more unusual twist. This is the second recipe I've made from Hemsley & Hemsley (see the Pumpkin Puds recipe here) and am hard pushed to say which I prefer more, so I forsee I will be making these two recipes many times over - just while I make my mind up, of course!

Lavender & Maple Coconut Macaroons Makes 18 (from Hemsley & Hemsley)

Ingredients

  • APPROX ¾ TSP LAVENDER FLOWERS
  • 4 TBSP MAPLE SYRUP
  • ½ TBSP VANILLA EXTRACT
  • 150G UNSWEETENED DESSICATED COCONUT
  • 180G LIQUID EGG WHITES (OR EGG WHITES OF 3 MEDIUM EGGS)
  • 1/8 TSP SALT

Method

  1. Preheat the oven to 170 degrees and line two baking trays with parchment paper
  2. Finely chop the lavender and mix it with the maple syrup, vanilla extract and coconut in a large bowl
  3. In a separate bowl, whisk the egg whites with the salt until stiff peaks form
  4. Gently fold the egg whites in with the coconut mixture using a metal spoon
  5. Using a tablespoon measure, scoop the mixture onto the baking parchment and then neaten the mounds with your hands
  6. Bake for 12 to 15 minutes until the macaroons are lightly browned
  7. Remove them from the baking tray and place on a wire rack to cook (I used a slice to remove them as they were a bit sticky underneath but they came away easily)
  8. They are quite soft when they first come out of the oven, but firm up as they cool down!
In Free From, Biscuits & Cookies Tags Coconut, Maple Syrup, Lavender, Gluten Free, Dairy Free
Comment

Pumpkin Pie Pudding

May 20, 2015 Nicola King
Pumpkin Pie Pud Rectangle.jpg

I've been reading a lot about Hemsley & Hemsley at the moment. It seems like they're everywhere! A friend was telling me about their cookbook a week or so ago and I've been debating whether to buy it. I have so many books already and don't want this to be another healthy eating fad where I make a couple of recipes and then the book gathers dust at the back of our cupboard. I mean, bone soup isn't really my kind of thing!

So I decided to make one or two things from their blog and see if their recipes are my kind of food and taste. I was having coffee with another friend last week and we were revelling in our love of pumpkin. I'm not a pumpkin-as-a-vegetable fan as I don't like very sweet vegetables, but pop it in a pie, pud or doughnut and I'm in pumpkin heaven! So when I saw Hemsley & Hemsley's recipe for Pumpkin Pie Pudding, I knew this was the first thing I wanted to try.

I didn't pick this because it was simple to make, but its very simplicity was a welcome relief in a crazy busy week. This is a one-bowl pudding where everything is mixed together in 5 mins and then popped in the oven and forgotten about for 35 mins. Super easy! The original recipe is available through the link which offers some substition options - for example, coconut oil in place of butter, coconut flour in place of almonds and a breakdown of their spice mix (I use a spice mix from Canada but Allspice as a shortcut would work too). And they roast their pumpkin and then puree it, but I like to use Libby's Pumpkin Puree in a tin.

I'm not sure why I was surprised that I loved this, given how much I like pumpkin desserts, but the texture was light and airy and almost souffle-like. The hint of spice gives it a delicious flavour that makes it very much like an all-American pumpkin pie filling. I also chose the ingredients that would make this gluten and dairy free so it's a perfect pud if you have someone that has these food allergies. Even better, the girls tell us that pumpkin flesh is loaded with vitamin A for an immune system boost too so you can feel extra virtuous eating it!

This is definitely a winner for me. And I think that means I might just be buying a new cookery book :)

Pumpkin Pie Pudding Makes 2 (from Hemsley & Hemsley)

Ingredients

  • 120G PUMPKIN PUREE (I use a can of Libby's)
  • 1 TBSP COCONUT OIL
  • 1 TBSP COCONUT FLOUR
  • 1 TBSP MAPLE SYRUP
  • 1 TSP VANILLA EXTRACT
  • 1 EGG
  • 1 SMALL PINCH OF SALT
  • ½ TSP BAKING POWDER
  • 1 TSP SPICE MIX

Method

  1. Preheat the oven to 180 degrees
  2. Melt the coconut oil and allow it to cool (you don't want it cooking the egg when added to the rest of the ingredients)
  3. Then place all the ingredients into a bowl and mix until thoroughly combined
  4. Divide between 2 ramekins
  5. Place on a tray in the oven and book for 35 - 40 mins
  6. Enjoy straight from the oven!
In Free From, Puddings Tags Pumpkin, Coconut Oil, Maple Syrup
Comment

To subscribe, please enter your email address:

Delivered by FeedBurner

Yay for the weekend!! If you saw how I made pineapple flowers earlier this week, here they are adorning my very first Hummingbird cake. I am totally in love with them! I also added a few @edible_flowers to complement them and this makes the perfect w
I was so grateful to be #gifted some beautiful @cotswoldflour flour recently with a challenge to make something from my #bakingbucketlist and so I set about making a Nutella babka and scrolls with them. I’ve had a mixed love affair with bread m
I found the cutest miniature pineapple in the local petrol station co-op so decided to make these roasted pineapple flowers. I think they’re so pretty and remind me of lovely sunflowers. I thought they’d go well with a Hummingbird cake so
We had great fun baking this Malteser Millionaire’s Shortbread which is absolutely delicious! This was something the boys wanted to bake - who can resist a delicious shortbread base, topped with gooey caramel and then a final layer of swirled m
As the rain and clouds returned to our skies this weekend, we’ve been looking for comforting lockdown treats. These Blackberry & Star Anise Friands, dripping with sticky blackberry juice icing are the perfect choice 💗 The recipe is from Sw
You might have seen from my Stories this weekend that I made cinnamon buns. I don’t have the best track record with bread but I’m overcoming my inner fear! These buns were so delicious. It was an amalgamation of a few recipes but the base
  • Serendipity Bakes
    Coconut & Raspberry Friand Muffins
    May 29, 2019, 9:38 PM
  • Serendipity Bakes
    Thank you for sharing my photo of your delicious recipe 😋 @rkhooks Happy Sunday! https://t.co/niKamgfjvt
    Mar 3, 2019, 2:38 PM
  • Serendipity Bakes
    RT @BiscuiteersLtd: Our friends at @thewhitecompany asked us to design something special to celebrate their New York stores first birth… https://t.co/kTsMH57wRv
    Jun 28, 2018, 11:09 AM

Enter your email address:

Delivered by FeedBurner

Powered by Squarespace

Nicola King at Serendipity Bakes Follow my blog with Bloglovin Follow