

We had a fab week off for half term and all too soon the boys are back to school. After a busy week of baking in the week before half term, last week was all about spending quality time with my boys and catching up with friends. My eldest son had his 8th birthday (where, of where did those years go?) and I had a couple of fun projects to celebrate his big day -- Star Wars cookies for his classmates and a bright drippy cake for the big day (his celebration cake comes in a few weeks time!) Then some cupcakes for my gran to share with her new friends after moving into a new care home and finding life at 92 after living in her own place until now, a little challenging.

Last week, my friend dug out a rather fetching party photo of me from way back when featuring tea cakes (don't ask!) and said that her hubby had made the Peyton & Byrne ones for her once - and that they were delicious! I think her kitchen took a bit of a beating (we are talking about biscuits, marshmallow and melted chocolate) but it was totally worth it. I said I needed the recipe.
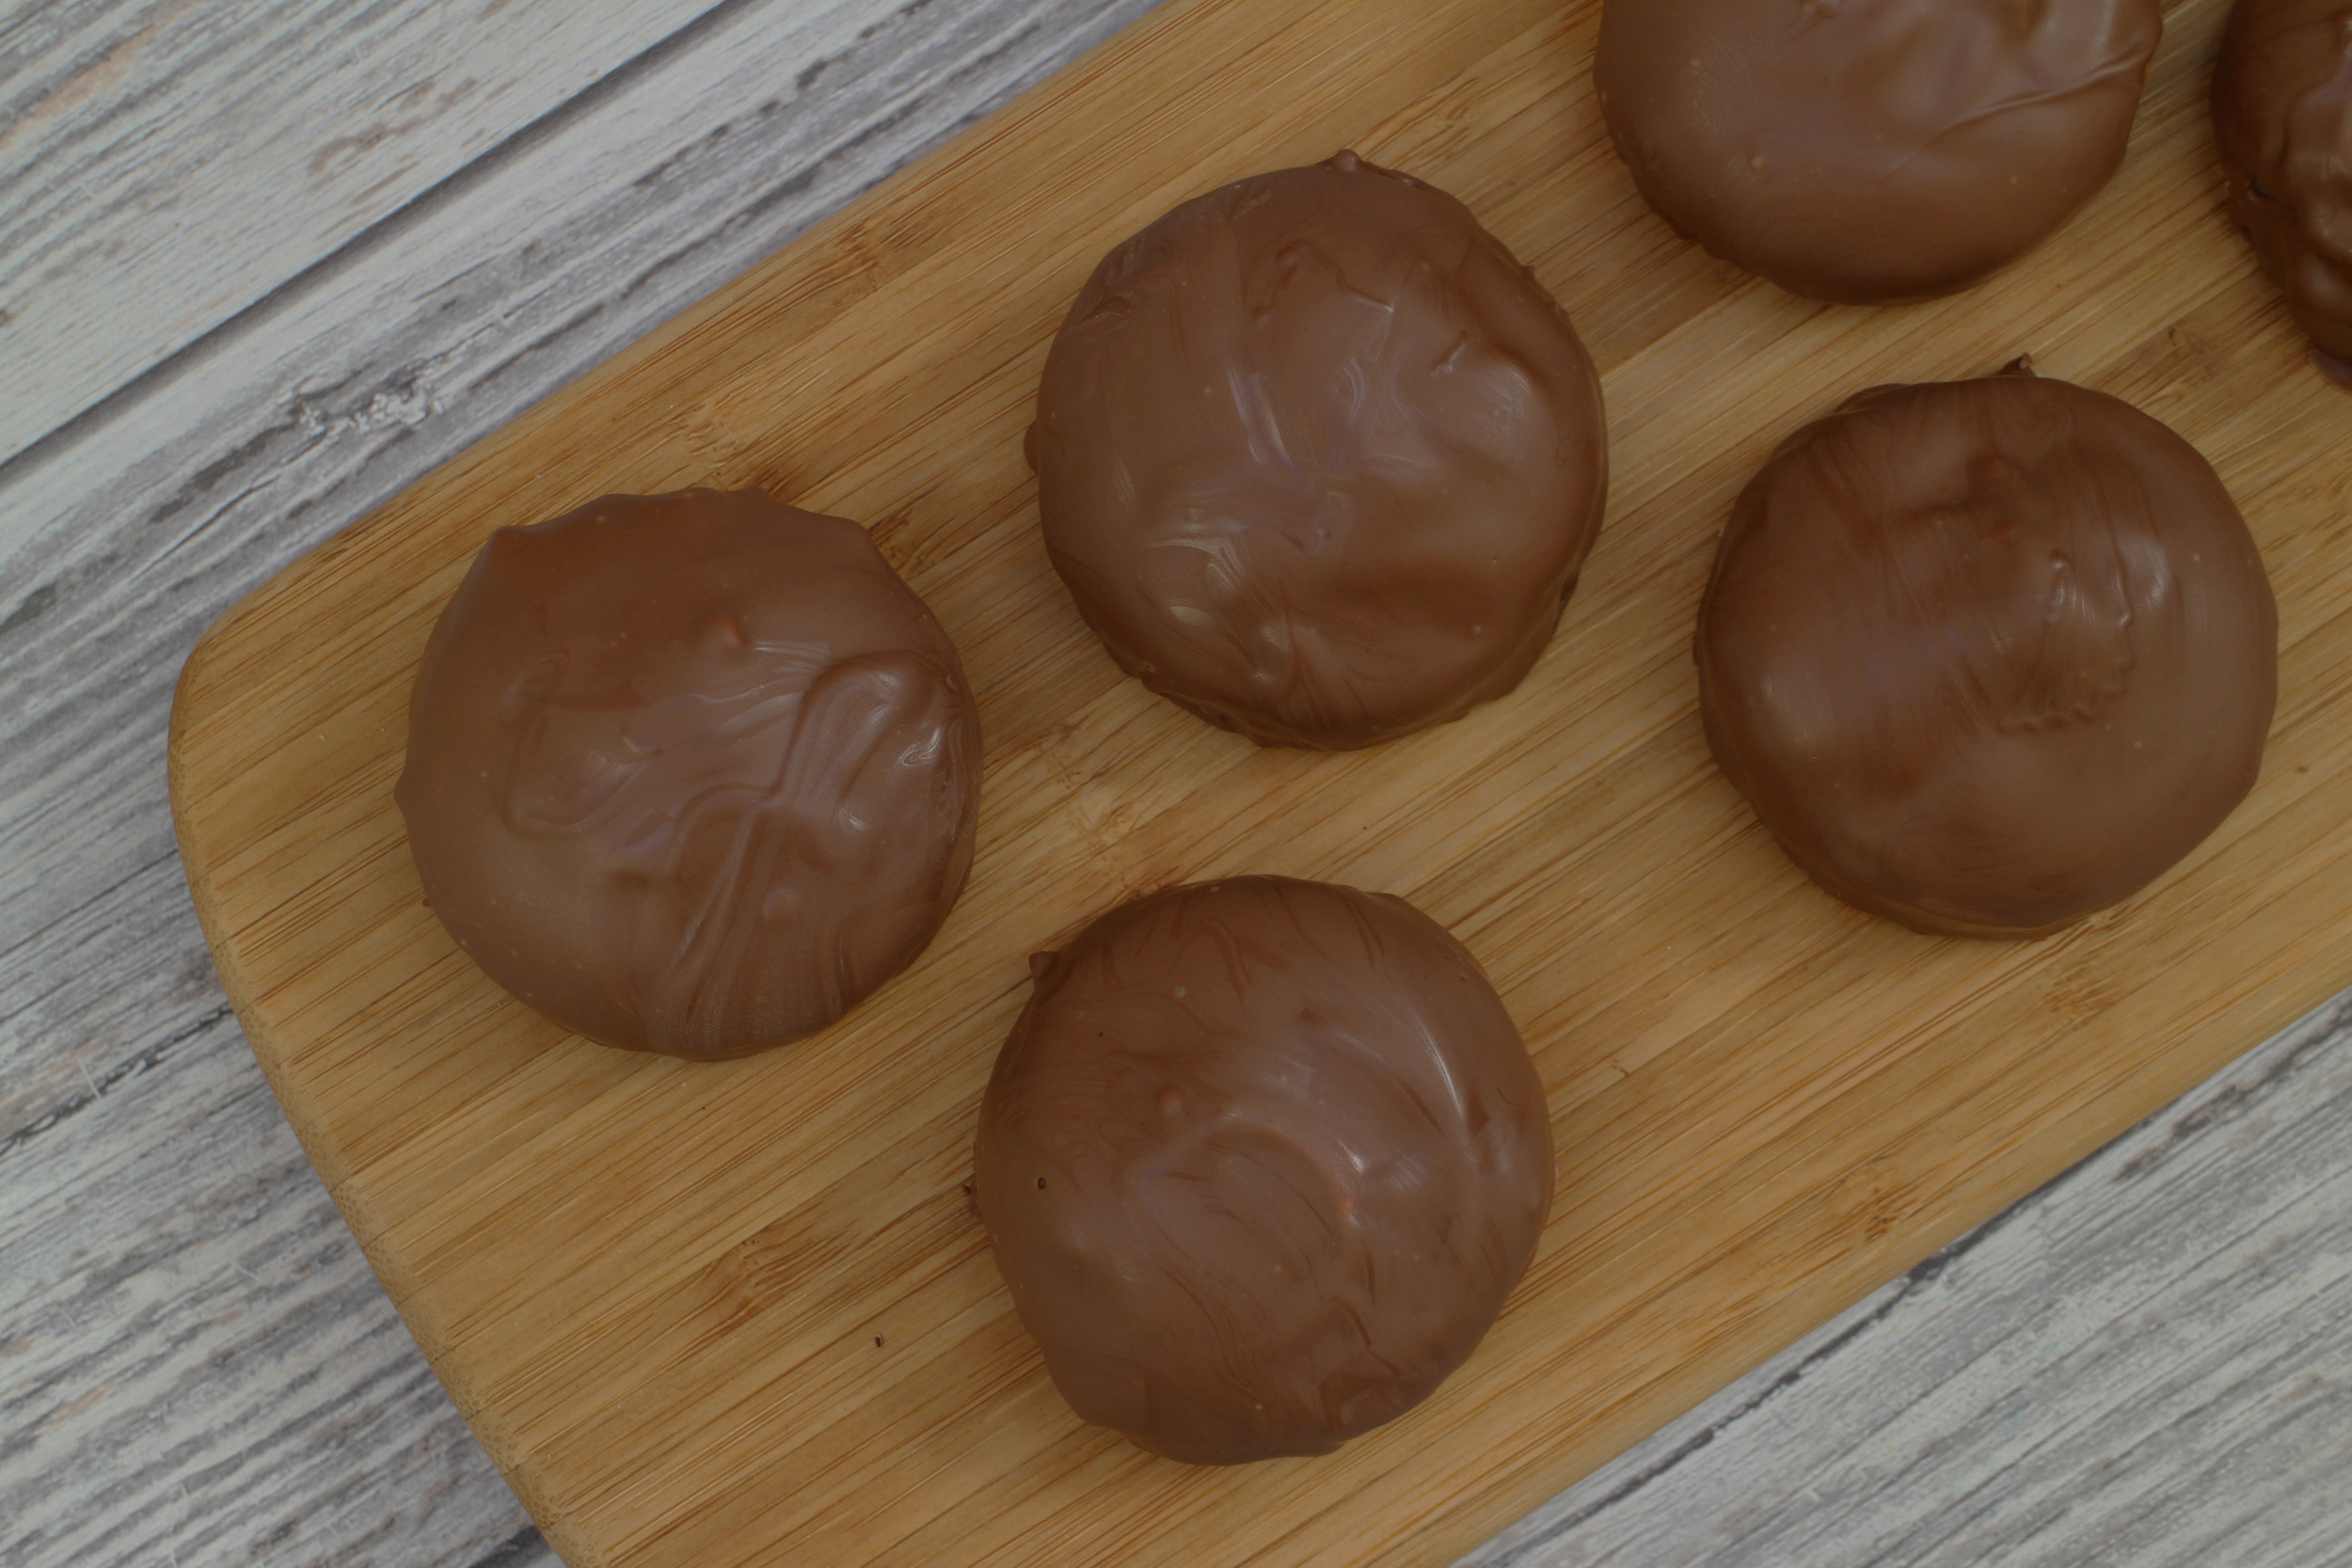
Do you remember the Tunnocks Tea Cakes that come wrapped in foil? I haven't had one since I was a kid and I don't know whether they've been available all this time or made a retro comeback but they are alive and well. So today I made the Peyton & Byrne Marshmallow Teacakes which were simply divine and had everything good about them that you'll remember from the Tunnocks ones - but especially yummy since they are fresh and squidgy and gooey and covered in melted milk chocolate. They have three stages but are simple to make.
The recipe makes twelve teacakes but our expanding waistlines are requiring a little more restraint of late so I halved the recipe and just made six. I've featured the recipe for twelve but you can alter the quantities to make as many as you like. First of all you need to make the biscuits. They are very simple although you do need to keep scraping down the side of the bowl to ensure that you mix it thoroughly. I then weighed out the mixture to make each one the same size. When they came from the oven, they were a little larger than I expected but I addressed that later -- keep reading!

As the biscuits cooled, I moved onto the marshmallow. All the ingredients are whisked over a saucepan of simmering water until frothy and slightly opaque. The recipe says that this should take 10-15 minutes, although mine was ready in 5 minutes so keep an eye on the texture. I then whisked the mixture with an electric hand mixer for a further 5 minutes until the marshmallow held its shape. It does set up relatively quickly so you want to move onto the next stage straightaway. I was a bit disappointed with the amount of marshmallow I had and would have been happy with twice the amount -- maybe that's just me! When I piped it on to the biscuits, I had to do this sparingly and there was quite a large ridge left around the outside of the biscuit. I didn't think this would look good once the chocolate was covering it so I decided to cut the biscuits smaller, using the outside of the marshmallow as a guide. It was a bit messy but I was much happier with the shape left.

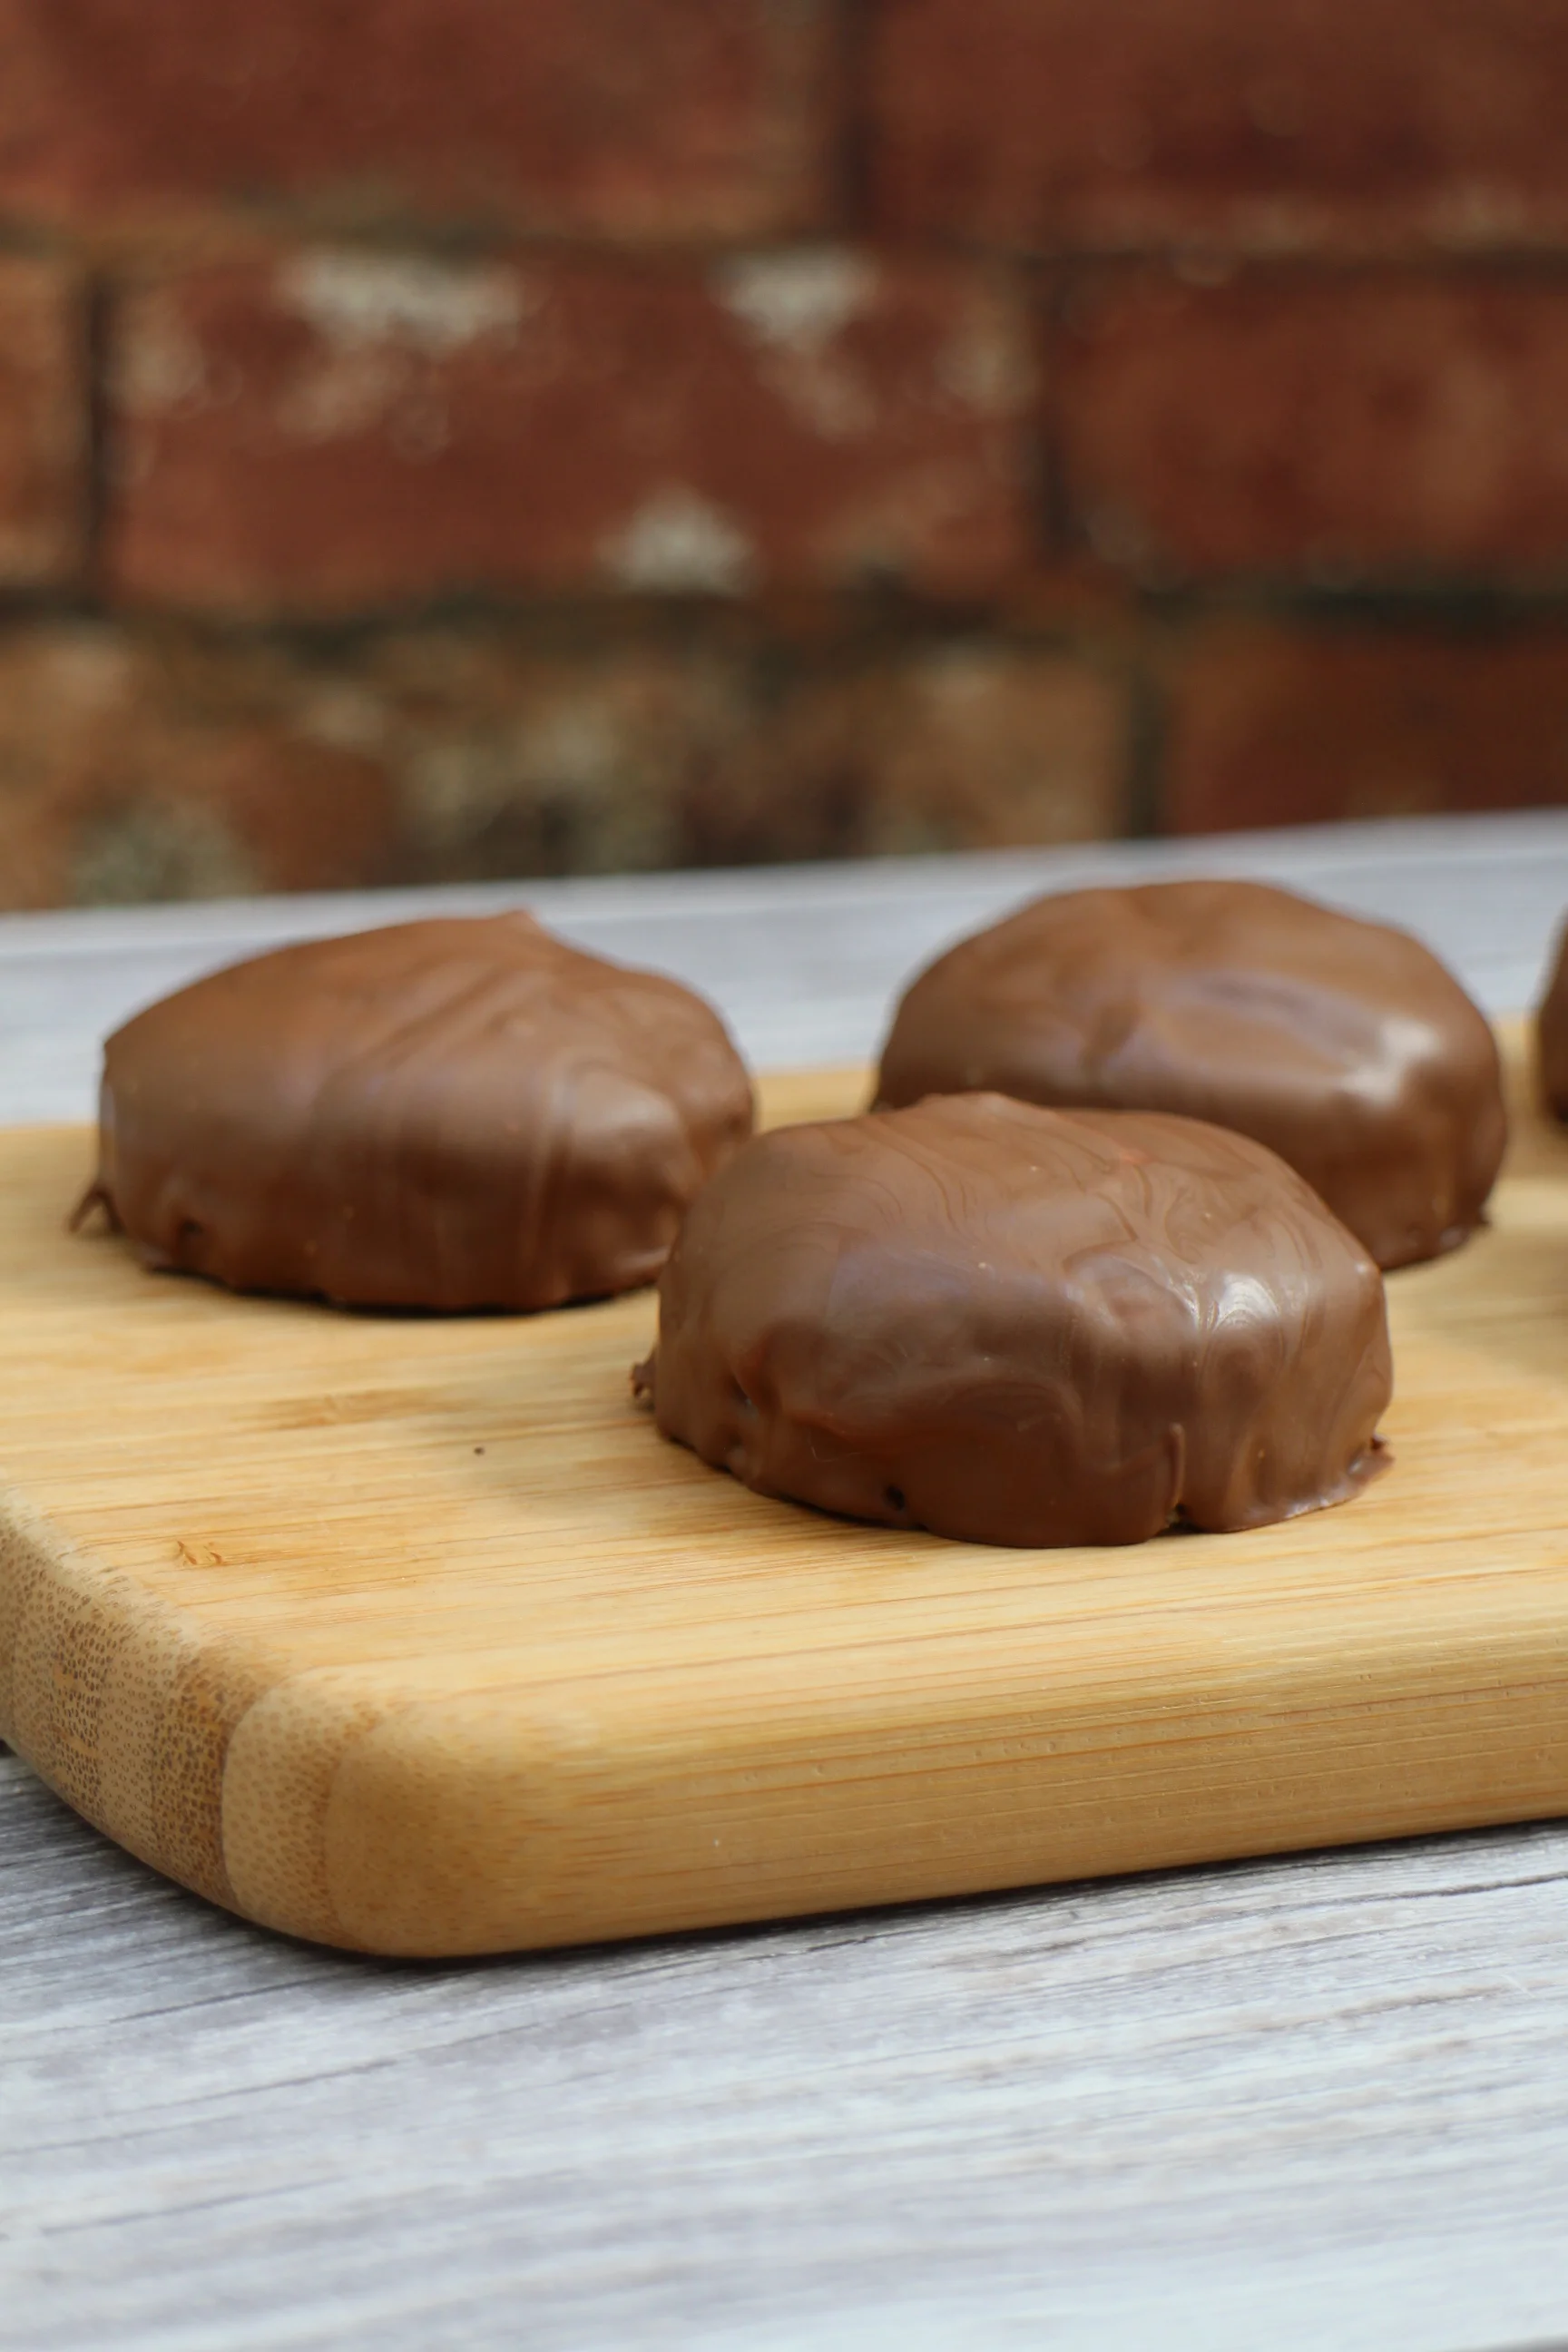
Finally, on to the melted chocolate. Melted chocolate is dangerous in my kitchen because I love the stuff. Especially the melted Belgian milk chocolate variety that I used here. You melt half the chocolate first and then remove from the heat -- then adding the remaining chocolate and leaving 7 minutes before stirring it. This is a way of tempering the chocolate so it doesn't bloom when it sets and go dull and streaky. I have to say that mine were a little dull and streaky but that might be because I played around it with it too long when covering my little biscuits. Pop your biscuits onto a cooling rack with something underneath to catch your chocolate drips -- and get pouring! So much fun :) You need to try to make sure all the sides are completely covered but don't worry if not - they will just look a little more rustic but taste the same amount of deliciousness.

The final stage is to wait. An hour is needed for them to set. But it is hugely tempting to taste test them early! I let mine set for around 15 minutes and then lifted them with a palette knife, cleaning the drips from underneath, and put them onto a sheet lined with greaseproof paper to set.
Perhaps it will disappoint you to know that these need to be eaten the day they're made. All of them. It's a hardship but someone has to do it.
We're currently sat looking at an empty plate.
It's totally worth making these from scratch and you won't be disappointed.
Marshmallow Teacakes
from Peyton & Byrne's British Baking
Biscuit Ingredients
- 110G PLAIN FLOUR
- 1/8 TSP BAKING POWDER
- 1/8 TSP BICARBONATE OF SODA
- PINCH OF SALT
- 60G UNSALTED BUTTER, SOFTENED
- 60G CASTER SUGAR
- 2 EGG YOLKS (you need the egg whites for the marshmallow)
- 1/2 TSP VANILLA EXTRACT
- 1 TBSP DOUBLE CREAM
Method
- Preheat the oven to 180 degrees (fan)
- Line 2 baking trays with baking paper
- Sift together the flour, baking powder, bicarbonate of soda and salt into a bowl
- In a freestanding mixer, beat together the butter and sugar until light and fluffy
- Add the egg yolks and vanilla and mix well, scraping down the sides
- Beat in the cream and then the flour mixture until just combined
- Scrape down the bowl sides and mix it quickly once more
- Weigh the dough and divide it by 12, then divide the dough into 12 small balls and put them onto the lined trays (they do spread so leave space between each one)
- Bake for around 10 minutes until the edges are lightly golden
- Remove from the oven and leave on the baking tray to cool
Marshmallow Ingredients
- 2 EGG WHITES
- 100G CASTER SUGAR
- 1 TBSP GOLDEN SYRUP + 1 TSP
- PINCH OF SALT
- 1/2 TSP VANILLA EXTRACT
Method
- Place all of the ingredients in a bowl over a saucepan of simmering water
- Whisk until the mixture becomes frothy and slightly opaque (the recipe says 10-15 minutes but mine was ready in 5 minutes)
- Remove the bowl from the heat and then whisk it with an electric hand whisk until it hold its shape (mine was whisked for 5 minutes)
- Put the marshmallow into a piping bag and then pipe a dollop onto the top of each biscuit
- Optional - I wasn't happy with the surplus biscuit around the marshmallow so I cut each biscuit with a 5cm cutter to get a uniform shape
Chocolate Topping Ingredients
- 250G BEST QUALITY MILK CHOCOLATE (chopped into small pieces)
Method
- Take 125g chocolate and melt it in a bowl over a saucepan of simmering water until melted
- Remove from the heat and put the remaining chocolate into the bowl
- Leave untouched for 7 minutes and then stir the chocolate until it's all melted
- Place the biscuits onto a wire rack with a tray underneath to catch the drips
- Once ready, use a dessert spoon to drench each teacake with chocolate - you can help the chocolate along a little so it drips down the sides - if you want a perfect finish, then you may need to keep adding more chocolate to the teacake and tease it down the sides
- Leave the teacakes for around 15 minutes and then carefully remove each one with a spatula, tidying up the bottoms, and then place on a tray lined with greaseproof paper to set
- Leave for at least an hour until the chocolate has set
- Enjoy with a nice cup of tea :)