• About
  • Blog
  • Recipe Index
  • Your Celebrations
  • Contact Me
Menu

Serendipity Bakes

Street Address
City, State, Zip
Phone Number

Your Custom Text Here

Serendipity Bakes

  • About
  • Blog
  • Recipe Index
  • Your Celebrations
  • Contact Me

Bonfire Toffee

November 4, 2015 Nicola King

We're just one day away from Bonfire Night and the anticipation is hanging in the air in our house. The boys are SO excited! We're having a mini fireworks party with friends and have our sparklers at the ready. And what could be more perfect to eat but Bonfire Toffee?

I have been hanging on to this recipe for a few months until the perfect time, which would be right about now. I adore Annie Rigg and her beautiful photography which makes me want to go and make everything in her books right now. So it was hard work hanging on for this long. Believe me. I've read up on a number of recipes for this lovely toffee but decided to stick 100% with Annie's recipe. I don't consider myself a sweetie maker and on several occasions have fallen prey to not getting my temperature quite right and coming out with a sticky goo concoction, so I wanted a trustworthy recipe for my first attempt at this.

If you'd like to attempt this at home - it's easy as long as you (1) own a sugar thermometer and (2) follow the instructions like your life depends on it. It's all about timing. And patience. After putting all your ingredients into a large saucepan, you bring them slowly to the boil (stirring a few times to make sure it's all well-mixed and the butter has melted) and then slowly boil it for 20 mins until it reaches 130 degrees ("hard ball" stage). Then after submerging the base of the pan in cold water and giving it a couple of stirs, pour it into a tin lined with greaseproof paper. And wait for it to cool. Then snap it into pieces or cut it up and store it in boxes between layers of greaseproof paper or in little individual sweetie papers.

The taste of this toffee is a lovely deep flavour, sort of smokey where the undertones of the treacle really shine through. I can see why it's called Bonfire Toffee. It's reminiscent of big smokey bonfires with strong flavours and a lovely chewy consistency.

If you fancy having a go at making sweets, the only investment you need to make for simple sweets is a good sugar thermometer. Which also comes in handy if you like making macarons my way. Or jam. And if you do fancy having a go at sweets, do try this recipe (even if it's not Bonfire Night).

I promise you, it's gooooood!

Bonfire Toffee Makes around 50 squares (from Annie Rigg's Sweet Things)

Ingredients

  • SUNFLOWER OIL (for greasing the tin)
  • 20CM SQUARE BAKING TIN
  • 125G UNSALTED BUTTER
  • 200G CASTER SUGAR
  • 150G BLACK TREACLE
  • 125G GOLDEN SYRUP
  • 50G CREME FRAICHE
  • 1/4 TSP CREAM OF TARTAR
  • 100ML WATER
  • PINCH OF SEA SALT FLAKES

Method

  1. Grease the baking tin with sunflower oil and then line it with greaseproof paper
  2. Place the butter, sugar, treacle, golden syrup, creme fraiche and cream of tartar into a large saucepan (2.5 litre capacity)
  3. Add the sea salt and water
  4. Set over a low heat until the butter is melted and sugar dissolved
  5. Stir mixture from time to time until it's smooth
  6. Then put the sugar thermometer into the pan and bring to the boil
  7. Cook steadily for around 20 minutes until the temperature reaches 130 degrees (I have an induction hob and I kept the temperature on 6 out of 9)
  8. Remove from the heat and plunge the base of the saucepan into a sink of cold water
  9. Stir the mixture a couple of times and then pour it into the prepared tin
  10. Either score the toffee whilst it's still warm if you want to finally have it in uniform squares or you can snap pieces off when it's cold
  11. Leave in a cool place to set
  12. Enjoy for up to 2 weeks :)
In Chocolates & Sweeties, Celebrations Tags Toffee, Treacle, Golden Syrup
Comment

Five Minute Melting Chocolate Puddings

October 29, 2015 Nicola King

So I wasn't going to post this. I was playing around with a cake recipe the other day and ended up making this. My boys were SO excited by it, they wouldn't share it with me and I managed to get only two photos before it got demolished. Obliterated. And they asked for more. Then I mentioned it to a friend and she said she needed the recipe for it!!! And it's so good, I thought you might need it too :)

I was originally playing around with Broma Bakery's 30 Minute Chocolate Cake For Two. This is a microwave mug production. I'm not overly fond of microwave mug puddings having first made them a few years ago and finding them a bit tough and spongy and to be honest losing a lot of love along the way. Then I found Broma Bakery's cake which is made in the microwave (the reason it needs 30 minutes is to cool it down so it can be frosted and shared with the love of your life) and I liked the ingredients which are faithful to a chocolate cake recipe, but slightly more involved than the usual microwave mug cakes. 

The cake idea is made in heaven itself - but I got waylaid and was debating whether I really wanted to make it into a cake and use buttercream. And instead of baking it in 3 portions, I decided to make it in 2 and heat each one for a minute each.You may need to play around with the time as each microwave is different and mine tends to err on the side of a higher temperature.  I turned it out into a dish and it had a gorgeous, oozy chocolate sauce. I couldn't help but throw an extra handful of chocolate chips on top for good measure. And some ice cream. And voilà! A stunning melting chocolate pudding that can be rustled up in 5 minutes from start to finish and tastes sublime. 

The ONLY downside I would say is that the portion size is perhaps a little too big (but I'm being picky).

I am more than happy to keep practicing with this one until it's perfected - and no doubt add a few inches to my waistline in the process!

If you're craving something sweet, I really would try this it :)

Five Minute Melting Chocolate Puddings  Makes 2 (adapted from Broma Bakery's 30 Minute Chocolate Cake For Two)

Ingredients

  • 1/2 CUP (110G) CASTER SUGAR
  • 7 TBSP (70G) PLAIN FLOUR
  • 3 TBSP (30G) COCOA POWDER
  • ¼ TSP BAKING POWDER
  • ¼ TSP BICARBONATE OF SODA
  • ¼ TSP SALT
  • 1 EGG
  • ¼ CUP MILK
  • 2 TBSP VEGETABLE OIL
  • ½ TSP VANILLA EXTRACT
  • 2 TBSP WATER
  • HANDFUL OF CHOCOLATE CHIPS (optional)

Method

  1. Grease two large mugs
  2. Mix all the ingredients in a bowl until combined
  3. Divide the mixture between the two mugs
  4. Bake the first one for 1 minute in the microwave - the sponge will rise up above the top of the mug but sink slightly on removal from the microwave
  5. Loosen the sponge slightly with a knife and turn out onto a plate
  6. Throw a few chocolate chips on the top so they melt slightly
  7. Repeat with the other pudding
  8. Serve with a lovely dollop of ice cream - and enjoy :)


In Puddings Tags Chocolate
Comment

Baked Almond & Vanilla Rice Pudding

October 27, 2015 Nicola King

My boys have always been huge fans of rice pudding. I have to confess it remains a guilty pleasure of mine, but these days I only get to clean out the tin after I've served up their desserts! Whilst we're away on half term and being blown around by the lovely south coast winds, it felt like a yummy warm homemade pud was just what we all needed and my youngest wanted to have a go at making this favourite.

Whilst rice pudding is not difficult to make (you just need some patience for the baking) and a great recipe for children to have a go at, we decided to add some flavours different to our usual tinned variety. I adapted one of Donna Hay's recipes and we made Almond and Vanilla Rice Pudding, baked in the oven and served with a healthy drizzle of maple syrup.

I've used cup measurements here as I think when baking with children (especially young ones) it's easier to measure the ingredients with cups when learning to bake, before they move on to scales and weights.

We used arborio rice and whilst this would usually be enjoyed as a risotto, it gave a nice puddingy consistency to the final dessert. Instead of using cow's milk, we decided to use a carton of unsweetened almond milk instead and this added a really lovely nutty flavour - together with the seeds of a vanilla pod and the vanilla pod itself which was baked with the pud before being removed at the end. We also added sugar as I was following a lead from the original recipe but I think next time, I'd be inclined to leave this out and just sweeten with the maple syrup at the final serving.

The baking of the pudding took a lot longer than I thought (probably around 45 minutes) so I suggest leaving plenty of time for the rice to absorb the almond milk - I kept an eye on it for the last 45 minutes and although it was more fluid than the tinned variety, we actually preferred it this way.

The boys LOVED it and I'd definitely make it again for them - it's the kind of wonderful, warming bake that you can throw together in minutes and leave in the oven to slowly develop its loveliness.

The perfect winter warmer for half term :)

Baked Vanilla and Almond Rice Pudding

Ingredients

  • ½ CUP ARBORIO RICE
  • 1 LITRE OF UNSWEETENED ALMOND MILK
  • ½ CUP CASTER SUGAR (to taste)
  • 1 VANILLA POD (seeds scraped from this but also the pod itself)

Method

  1. Pre-heat the oven to 160 degrees (fan)
  2. Scatter the arborio rice over the base of a 2 litre capacity dish
  3. Stir together the milk, caster sugar (if you choose to use this) and vanilla seeds and pour over the rice
  4. Add the vanilla pod
  5. Cover with tin foil and bake in the oven for an hour
  6. After an hour, remove the foil and bake for a further 30 to 60 minutes, checking after 30 minutes to see how much of the milk has been absorbed
  7. When you're happy with the consistency, remove from the oven and remove the vanilla pod
  8. Serve warm with a healthy drizzle of maple syrup - and if you like, an unhealthy dollop of cream: )
In Puddings Tags Rice Pudding, Vanilla, Almonds
Comment

Chocolate Doughnuts with Chocolate Ganache

October 23, 2015 Nicola King

It's Friday. It's half term. It couldn't have come sooner.

What better way to celebrate a week off together than with Chocolate Doughnuts. The boys had a playdate so I thought I'd make these doughnuts that I've had my eye on for a while. I made Pumpkin Doughnuts not long ago and both these and the chocolate ones are baked rather than deep fried (I will get to deep frying doughnuts at some point but these seem just that little bit healthier).

This recipe is adapted from one by Manuela Kjeilen who has the most fabulous blog called Passion 4 Baking. Think pink. Think retro kitchens. Think complete inspiration. I've looked through most of her recipes and there are so many things I'd love to make, but one bake that stuck in my mind was her doughnuts.

One of the main ingredients is Jell-o Instant Pudding Powder which is an American product that I dug out in the supermarket when I was in Canada over the summer. I adapted Manuela's Delicious Baked Vanilla Donuts recipe to make a chocolate version so I used the Chocolate Jell-o Pudding Powder in mine. It's fair to say that my baked doughnuts don't look that chocolatey and flavour-wise weren't that chocolatey either so after going to great lengths to get this pudding mix, I think cocoa powder would work well next time. But I'm pretty happy with the results from this first batch.

The doughnuts have yeast in them and their texture is very bread-like. They're left to prove twice which means they need a little longer to make but this really helps give them their fluffy texture. The first batch I made looked like Manuela's but I found that after they'd proved and been in the oven, they expanded so much that they almost joined together and the hole all but vanished. So the ones on the right below were my second batch which don't look as pretty pre-baking, but give the customary hole in the middle and much better post-baking look.

I would say that the doughnuts themselves don't have a huge amount of flavour (which I think would be enhanced by the addition of cocoa powder) so the toppings are really important and I decided to use a rich dark ganache and a helping of sprinkles. I love the flavour of the really rich chocolate ganache and the crunchy little non-appareils.

They take a little more time because of the proving but these are a fun little bake.

And if you're looking for ways to allay half term boredness, then kids would love to be chief decorators :)

Chocolate Doughnuts with Chocolate Ganache Makes 20 (adapted from Passion 4 Baking's Delicious Baked Vanilla Donuts)

Chocolate Doughnut Ingredients

  • 30G BUTTER, MELTED
  • 350ML WARM MILK
  • 7G FAST ACTION BREAD YEAST
  • 150G CASTER SUGAR
  • 1 PACKET JELL-O CHOCOLATE INSTANT PUDDING POWDER
  • PINCH OF SALT
  • 2 EGGS
  • 625G PLAIN FLOUR

Chocolate Ganache

  • 100g WHIPPING CREAM
  • 100G DARK CHOCOLATE, CHOPPED
  • SPRINKLES

Method

  1. Firstly, melt the butter and put aside
  2. Heat the milk so it's warm but not hot and place in a mixing bowl
  3. Sprinkle the yeast over the top
  4. Add the melted butter and mix together
  5. Add the sugar, instant pudding powder, salt and flour
  6. Mix these ingredients together with a dough hook until the ingredients are combined
  7. Add the flour and continue to mix with the dough hook until smooth and elastic (around 8-10 minutes)
  8. Turn the dough into a lightly greased bowl, cover and leave to double in size for around 1 hour
  9. Lightly flour a work surface and then roll out the dough until it's around 1 cm thick
  10. I used the Wilton Mini Doughnut Pan so found that a 6cm cutter and 3.5cm piping nozzle were the right sizes for this
  11. Put these doughnuts into the pan, cover with a clean cloth and leave for an hour
  12. Preheat the oven to 170 degrees (fan)
  13. Bake the doughnuts for around 8-10 mins until golden brown on the outside
  14. When ready, turn out the doughnuts onto a cooling rack
  15. Make the ganache by heating the cream until it's just boiling and then pour over the chocolate slowly
  16. Leave for few minutes and then stir together until all the chocolate lumps have disappeared
  17. Hold one of the doughnuts upside down and swirl it in a circular motion in the chocolate until you have an even coating on the top (use a spoon to help spread this if needed)
  18. Top with your favourite sprinkles :)


In Bread, Everyday Cakes Tags Doughnuts, Chocolate, Ganache, Sprinkles, Bread
Comment

Lime & Green Tea Madeleines

October 20, 2015 Nicola King

I love when my friends recommend recipes to me. This last week has been a little topsy turvy with a big corporate baking project, making the Jurassic World Launch Cookies for Universal's head office in London (170 boxes of 3 vanilla and chocolate cookies was quite a challenge - photo below!) Whilst I was knee-deep in flour and sugarpaste and covered in airbrush paint, a friend popped a recipe through to me she thought I could try.

This fabulous recipe for Lime & Green Tea Madeleines with Vanilla & Black Pepper Cream. Wow, what flavour combinations! I think the recipe came from a magazine but is from Laura Santtatini's new book, At Home With Umami. It combines zesty lime with green tea in the madeleines and then pairs them with a lovely lightly whipped cream speckled with vanilla seeds and pepper.

What I love most about these madeleines is the wonderful green colour and the zesty lime flavour. I'm not a huge matcha fan but I found that this recipe uses the tea to give it a wonderful colour and the flavour isn't too predominant. I only made a half batch to start off as wasn't sure this would be a popular flavour with my boys, but am now kicking myself that I didn't make the full 20!! The recipe is straightforward but with each stage it's important to keep lots of air in there to make them as light as possible when they're baked. And also to ensure that you grease the madeleine tins well. Laura suggests oiling them but I went with my usual method which is to butter and flour them.

I'm used to making madeleines with just egg whites, but this recipe uses whole eggs. The batter is refrigerated before it goes into the tins for baking. I usually put my batter into a piping bag and then refrigerate  it. Just a preference of mine, but I find it easy to store and then when the mixture sets more in the fridge, it's easier to pipe it into the madeleine tins. 

These madeleines are lovely as a standalone treat without the cream but the fluffy cream adds another dimension. The pepper gives a slightly spicy taste and I love the additional icing sugar that adds a touch of sweetness. Laura suggests adding these to taste and also the option of adding saké but I didn't have any to hand so decided to just flavour with the vanilla seeds, icing sugar and ground pepper. 

This would work really well for afternoon tea but I think if you were making them for morning coffee then losing the cream would work equally - but adding a proper pairing with a nice cup of green :)

Lime & Green Tea Madeleines with Vanilla & Black Pepper Cream Makes 10

Lime & Matcha Madeleine Ingredients

  • 65g BUTTER, MELTED & COOLED
  • 80G PLAIN FLOUR
  • 1/8 TSP SALT
  • 1/4 TSP BAKING POWDER
  • 1/2 TBSP MATCHA GREEN TEA POWDER
  • 1 LARGE EGG
  • 85G CASTER SUGAR
  • ZEST OF 1 LIME
  • 1 TBSP LIME JUICE (just less than the juice of a lime)

Vanilla & Black Pepper Cream Ingredients

  • 150ML DOUBLE CREAM
  • 1/2 POD VANILLA SEEDS
  • 1/2 TSP BLACK PEPPER (to taste)
  • 1 TBP ICING SUGAR (to taste)

Method

  1. Firstly, melt the butter and set aside to cool
  2. In a bowl, sieve the flour, salt, baking powder and matcha green tea powder
  3. Place the sugar and egg in a mixer and whisk until it's doubled in volume (around 3-5 minutes)
  4. Whisk the lime juice into the egg mixture
  5. Fold the flour into the mixture until just combined
  6. Fold in the butter and lime zest
  7. Put the mixture into a piping bag and refrigerate for an hour
  8. When you're ready to make the madeleines, preheat the oven to 180 degrees (fan)
  9. Butter and lightly flour the madeleine tins and then pipe the mixture into the cavities until each is 3/4 full
  10. Bake for around 12 minutes but watch them carefully as you're waiting for the edges to turn golden brown and don't want them to burn
  11. Remove from the oven and turn them out gently onto a cooling rack
  12. To make the cream, whisk the double cream to soft peaks being carefully not to over-beat the cream
  13. Fold in the vanilla seeds, pepper and icing sugar to taste (these are the quantities I used but feel free to flavour as you like)
  14. Enjoy the madeleines warm from the oven with a sprinkling of icing sugar and the cream cool from the fridge :)
In Everyday Cakes, Patisserie Tags Madeleines, Lime, Matcha
Comment

Chinese Pork Buns

October 5, 2015 Nicola King
Chinese Pork Buns Rectangle.jpg

Have you ever been out to a restaurant and wondered how easy it would be to make something you're eating yourself? I constantly do! We were out with friends a couple of months back eating dim sum and had a discussion about how easy it would be to make the delicious Chinese Pork Buns we were enjoying at the time. And I committed to have a go myself :)

Shall I now let you into a little secret? Having thought they would be completely tricky to make, they're actually pretty simple. And yummy. And the satisfaction from making them yourself... I did cheat a little though. I was chatting to our local butcher the other day about how to make the meat filling and he convinced me that I should invest in a jar of ready-made Char Siu Sauce (I used the Lee Kum Kee brand as it was available in my local supermarket). I um'd and ah'd about not making it myself, but I wanted to see how successful the process was first - and actually the sauce is so delicious that I would definitely use it again!

The start of the process is preparing the meat. I used 300g pork loins and marinaded them with the sauce for an hour (a lot of recipes suggest overnight so you could also do this if you prefer). Then I popped them in the oven and cooked them for around 25 mins. When they were cooked I smothered them in more of the marinade (I swear if you try this stuff, you'll want to use as much as possible!) and left it to cool down. Then cut it into cubes. You can do this the day before. When I came to use the meat, I felt it still a little chunky so I blitzed it in the food processor for 30 seconds to break it down a little more and the texture was perfect for these buns.

The making of the dough is pretty simple. There are recipes with yeast but I decided to work with one from taste.com.au which makes the dough from flour, baking powder, caster sugar, salt, water and vegetable oil. All very simple and after mixing together the dry ingredients, you add the water and oil and stir them together until you have a sticky dough. Knead this for around 5 mins on a lightly floured surface and you have your lovely bun dough. It needs to be refrigerated for an hour and then it's ready to use.

When you come to make your buns, the dough should make around 10 average size buns so I worked out the total weight and then calculated how much dough each required to make 10 of them. Then you want to lightly flour the surface and roll each dough portion out to a 12cm round. The dough of the first buns I steamed were a little thick so do try to roll them out as thinly as possible. The buns also dry out quickly so cover them with cling film whilst you roll out the others. Place a dollop of meat in the middle of the circle and then pull up the sides to make the bun, pinching the dough at the top.

I steamed my pork buns with a bamboo steamer. One of these over a pan filled with 1/3 boiling water and cook them for around 15 mins. As my meat was pre-cooked I didn't have to worry about it being cooked properly, but you want to ensure that the buns are fully cooked by inserting a bamboo skewer in the middle which should come out clean.

These buns take a little more effort than buying them ready-made, but they really are delicious and you can flavour them however you like. I used a lot of the Char Sui Sauce as I really loved the flavour of it and of course, you can use any meat or vegetables you like in them.

So next time, you're thinking of a chinese meal, these will go perfectly with your stir fry, beef in black bean sauce or egg fried rice! They are also very filling so would be great for a family meal too. A little more preparation required but well worth the effort and I think pretty impressive too :)

Chinese Pork Buns Make 10 (adapted from taste.com.au)

Ingredients

  • 300G PORK LOIN
  • 1 JAR OF CHAR SUI SAUCE
  • 250G PLAIN FLOUR
  • 2½ TSP BAKING POWDER
  • 55G CASTER SUGAR
  • PINCH OF SALT
  • 1 TSP SALT
  • 118 ML WARM WATER
  • 2 TBSP VEGETABLE OIL

Method

  1. Prepare the pork loin by marinating it in 3 tbsp of the Char Sui Sauce from 1 hour to 24 hours (at your discretion) and then cooking it according to its weight
  2. When it's cooked, chop it into small pieces and mix through another 2 tbsp Char Sui Sauce (if you want finer pieces of meat, which I recommend, blitz it for 30 seconds in the food processor)
  3. To make the dough, sift the dry ingredients (flour, baking powder, sugar and salt) in a bowl
  4. Gradually add the oil mixed with warm water, stirring it until you have a soft dough
  5. Turn the dough out onto a lightly floured surface and knead until smooth
  6. Wrap in cling film for at least an hour
  7. When you're ready to make the pork buns, divide the dough into 10 portions
  8. Roll each portion out to a 12cam round, making sure to roll this as thinly as possible
  9. Place a heaped teaspoon of meat into the centre of the round
  10. Pull up the sides of the round until you have formed a little bun and then pinch the dough on top to seal the bun
  11. Fill a saucepan with 1/3 water and bring this to the boil
  12. Place the buns in a bamboo steamer lined with baking paper over the saucepan of boiling water (make sure the water doesn't touch the steamer)
  13. Cook for 15 minutes or until a skewer inserted in the middle comes out clean
  14. Keep warm whilst you make the other buns and then enjoy them fresh, warm and tasty :)
In Simple Suppers Tags Pork, Char Sui, Chinese Bun
Comment

Roasted Strawberry & Black Pepper Scones

October 4, 2015 Nicola King

So I know it's autumn now, but can you forgive for me for trying to hold on to a little bit of summer? The sun has been shining this week and sometimes it was even warm enough to abandon the jumper :) So although cream teas and scones might conjure up dreams of warmer, lazier days in the garden, I can promise you they are just as delicious on cooler days tucked up inside when the leaves are turning golden brown.

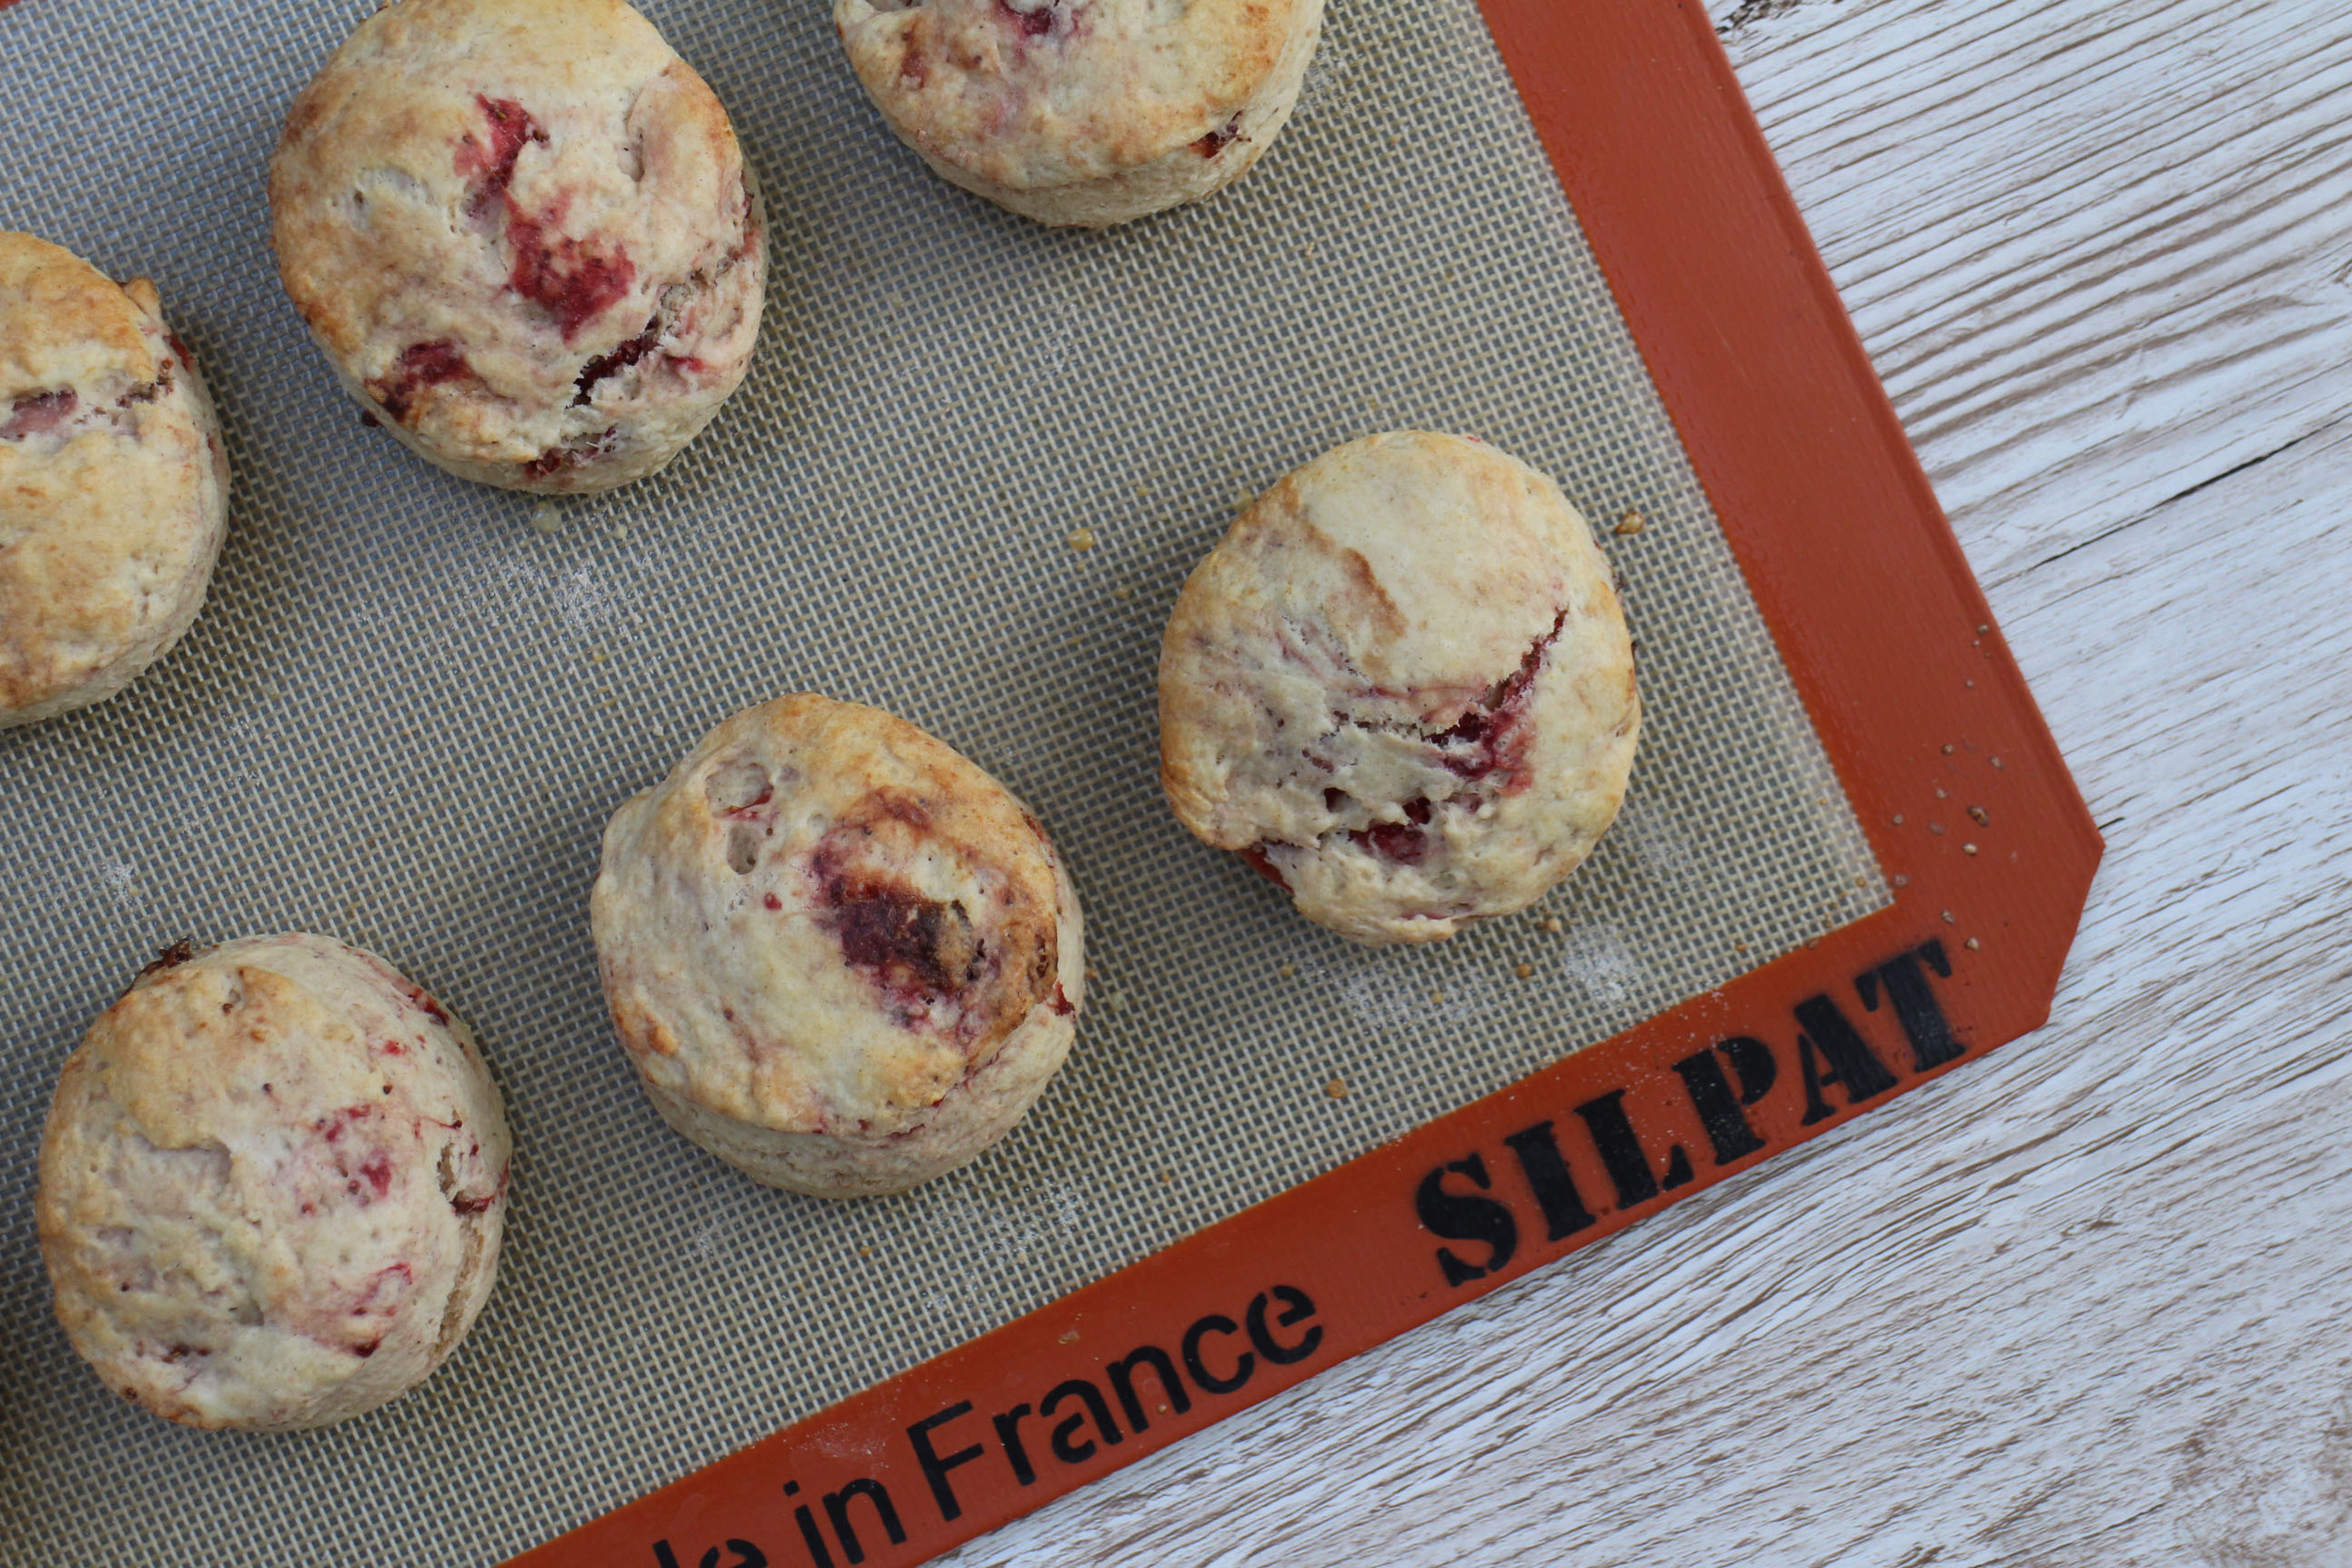
I don't usually watch the Hairy Bikers but this week I caught a little of an old show on TV where they were roasting strawberries with black pepper for scones. The roasted strawberries looked like little jewels adorning scone crowns and I couldn't resist making some for us.

The strawberries take an hour and a half to roast, so whilst the scones are relatively quick to make, you do need to start preparations a little earlier for these. You could always roast the strawberries the day before and get a head start on your baking. They are simple to prepare. The strawberries are hulled and cut in half and then sprinkled with two teaspoons of sugar and one teaspoon of freshly ground black pepper. Then roasted on a sheet of baking paper for an hour and a half. The juices run out and they get a little sticky on the paper but try to scrape all the goodness up as you don't want to lose a drop of this in your scones.

The scones are super simple to make. The butter should be added cold to the flour, sugar and salt and then rubbed in with your fingertips. Then add your roasted strawberries to the mix. Finally stir in the milk (I used whole milk) and combine until all the ingredients are well mixed.

Turn the mixture out onto a well floured surface, add a little more flour to the top and then pat down with your hand until the mixture is around 3cm deep (my scones were taller than the Hairy Biker scones on TV but I prefer them that way) I cut out rounds with a 68mm cutter, placed them on a baking tray lined with Silpat (or you can use baking paper) and then brushed the top with a little milk. Into the oven for around 18 minutes and they are ready to enjoy.

Scones_2.jpg

They are delicious warm from the oven and are nice without any other toppings. However, when topped with strawberry jam and clotted cream they are absolutely heavenly.

We are all partial to afternoon tea in this house and these were a lovely treat. I think the addition of the roasted strawberries not only looks more beautiful but the flavour adds a new dimension to them too. Well worth the effort of getting out your roasting tin :)

Roasted Strawberry and Black Pepper Scones Makes 15 (from the Hairy Bikers)

Roasted Strawberry Ingredients

  • 300G STRAWBERRIES
  • 2 TSP CASTER SUGAR
  • 1 TSP FRESHLY GROUND PEPPER

Scone Ingredients

  • 500g SELF-RAISING FLOUR (plus extra for dusting surfaces when rolling)
  • 50G CASTER SUGAR
  • ½ SALT
  • 100G COLD BUTTER, CUT INTO SMALL CUBES
  • 300ML FULL-FAT MILK (plus extra for brushing the top of the scones)
  •  

Method

  1. Preheat the oven to 120 degrees (fan)
  2. For the Roasted Strawberries, prepare them by hulling them and cutting each one in half
  3. Put them on a lined baking tray and then sprinkle them with the sugar and pepper
  4. Roast them for 1½ hours
  5. Scrape them off the baking paper and put to one side
  6. For the Scones, preheat the oven to 180 degrees (fan) and line two baking trays
  7. Place the flour, sugar and salt into a medium mixing bowl
  8. Add the cubed butter and rub into the dry mix with your fingertips until the flour mix looks like fine breadcrumbs (around 3 to 5 mins)
  9. Stir through the roasted strawberries
  10. Add half of the milk and start to combine with the flour mix
  11. Then add the other half and mix until all the ingredients are well-mixed and forms a dough
  12. Dust your work surface with flour and then turn out your dough on to here
  13. Put a little more flour on top and then knead gently until the dough all comes together
  14. Pat down with your hands or rolling pin until the dough is around 3cm thick
  15. Then cut out rounds with a 7cm cutter and place them onto the prepared baking trays
  16. Gather together the scraps of dough, re-roll them and cut out rounds, repeating until you've used all your dough (it should make around 15 scones)
  17. Brush the tops with a little milk
  18. Place them in the oven and cook for around 18 mins until they're risen and the tops are brown
  19. Slice them in half and serve with your favourite combination but I can especially recommend strawberry and clotted cream :)
In Everyday Cakes Tags Scones, Strawberry, Strawberry Jam, Clotted Cream, Black Pepper
Comment

Mini Pumpkin Doughnuts

September 28, 2015 Nicola King

Much as I want to cling onto the last rays of summer, I think there can be no disputing that autumn is definitely here and every hope of an Indian summer is fading fast. However, I do not despair! Autumn brings with it its own richness and flavours. I have an abundance of apples and quince from a friend that are begging to be transformed into something scrumptious; a pile of recipes for delicious looking soup; and today I couldn't resist bringing back my favourite autumnal flavour. Pumpkin.

It's been a busy few weeks planning and making celebration cakes (see my Jimmy Choo Cake here and Laser Tag Cake here) and I haven't been able to do everyday baking just for us. But I've been desperate to treat us to some mini doughnuts and I'm hoping that the use of pumpkin in these counts as one of our five a day :) And these are baked doughnuts rather than fried so are healthier in this respect too.

They're made from a simple cake batter which has pumpkin in it and I also use a pumpkin pie spice to add flavour - I use Clubhouse Pumpkin Pie Spice which we picked up in Canada a while ago but you could use a mix of cinnamon and cloves or allspice according to taste. The recipe is very straightforward where you mix all the dry ingredients in one bowl and the wet ingredients in another and then mix the two together. I have a couple of KitchenAid Doughnut pans (6 holes per pan) and I piped the batter in a ring in each hole.

They only take 10 minutes to cook and then the trick to giving them the doughnut crust is to brush the tops with melted butter and then gently roll the buttered part in a mix of sugar and cinnamon. It works best if you just lightly brush them with butter because if they're soaked it tends to seep through the sugar. And you need to do this when they're just out of the oven.

They're best served straight from the oven, lovely and warm, and eaten on the day they're made. As they're mini doughnuts, they kind of call out to you to keep eating them so there's not a great chance they'd last longer than a day in your house!

The boys loved them. They didn't raise an eyebrow at the mention of pumpkin and declared them delicious, begging for their third one as an after school treat.

I haven't shown hubby yet. I don't think there's any chance they'll last longer than 5 mins when he sets his sights on them :)

Mini Pumpkin Doughnuts  Makes around 20 mini doughnuts (adapted from Baking Bites Pumpkin Donut Muffins)

Doughnut Ingredients

  • 200G PLAIN FLOUR
  • 1 TSP BAKING POWDER
  • 1/4 TSP SALT
  • 2 TSP PUMPKIN SPICE
  • 115G BUTTER, MELTED
  • 70G LIGHT BROWN SUGAR
  • 100G CASTER SUGAR
  • 1 LARGE EGG
  • 115G PUMPKIN PUREE (I use Libby's tinned pumpkin puree)
  • 1 TSP VANILLA EXTRACT
  • 120ML SEMI-SKIMMED MILK

Cinnamon Sugar Ingredients

  • 30G MELTED BUTTER
  • 100G CASTER SUGAR
  • 1 TSP CINNAMON

Method

  1. Preheat the oven to 180 dregrees (fan)
  2. Melt the butter for the doughnut and set aside to cool for 5 mins
  3. In a bowl, combine the flour, baking powder, salt and pumpkin pie spice
  4. In a separate bowl, whisk the melted butter, sugars, egg, pumpkin puree, vanilla extract and milk
  5. Add the dry ingredients to the wet and mix until combined
  6. Put the batter into a piping bag
  7. Pipe a ring of batter into each doughnut hole (be careful not to over-fill them as you don't want them rising up and the centre hole closing up
  8. Bake for 10 mins in the oven (check with a toothpick that it comes out clean when inserted into the doughnuts)
  9. Leave them aside for a couple of minutes to cool slightly
  10. Melt the butter for the Cinnamon Sugar topping
  11. Mix the caster sugar and cinnamon on a plate
  12. Turn the doughnuts out of their tins and then lightly brush the tops with melted butter
  13. Roll the buttered side lightly in the cinnamon sugar until well coated
  14. Leave aside to cool - or eat them as they are!
In Everyday Cakes Tags Pumpkin, Doughnuts
Comment

Raspberry Swirl Brioche

September 18, 2015 Nicola King

So I loved the last, my first, brioche that I made. But I've read about other ways of proving this lovely sweet dough and wanted to try a different recipe. I saw a Pin for this lovely Raspberry Swirl Brioche from Hint Of Vanilla which drew me in and although it has more stages than my last brioche, I knew I wanted to try this one next.

This recipe uses very exact quantities of ingredients, in particular the eggs which need to be weighed. The first addition was around 2 eggs. The mixing of initial ingredients is all very straightforward, but then it came to full gluten development (* this is when you stretch a little dough between 2 fingers and it should be so elastic that you can see through it without it breaking) I wasn't sure how long this would take and it actually took around 15 - 20 minutes in a mixer with the dough hook to get there. This heats up the mixture so after the final egg addition, I measured the temperature and it was 25 degrees (needs to be less than 27 degrees).

The fermenting was again pretty straightforward and then I transferred the dough to the fridge. The recipe suggest between 1 and 12 hours - I left mine for around 1.5 hours. When it came out of the fridge it's rolled into a rectangle and covered with a gorgeous Raspberry Smear. Now this smear is absolutely delicious. A raspberry flavoured butter that is rich and creamy. Megan made her smear with powdered raspberry and since I didn't have any of this I used a tube of freeze-dried raspberries that I blitzed in the food processor (then sieving the powder to remove the remaining raspberry seeds) and mixed this with butter, sugar and lemon juice. I also didn't have vanilla sugar so I just used regular caster sugar.

Then it came to the plaiting. I was to leave 2 inches at the top (which I measured!) but I think I should have cut it a little higher as I didn't get the raspberry ribbons successfully through that part; and also I should have plaited it much tighter as Megan's raspberry ribbons are really visible and mine not so much. When it proves again for the final time, Megan suggest 1.5 - 2 hours until it's doubled in size. I check mine after a few hours and it hadn't risen too much so I left it overnight and it had a lovely rise by the morning. I also see the added benefit of this is that you can bake it fresh for breakfast and eat it warm from the oven. Yum :)

I also forgot to glaze the brioche with egg wash before going in the oven. Doh! (or should that be *dough*!!) I didn't get the usual lovely shiny top customary of a brioche but I will not forget my egg wash next time! Also a warning that you do really need to let it cool a little before trying to get it out of the tray. If mine (tin-less) looks a little misshapen it's because I decided I needed it out of the tin the moment it was from the oven which also meant it collapsed a little...

This brioche was absolutely delicious. So delicious that I'm thinking of making another one this week. Hmmm...what flavour combinations to try next? Or maybe just a plain simple brioche that everyone can dress as they like. The possibilities are endless.

In my quest to perfect my bread-making, I am going to keep reading up on brioche recipes but this one is definitely a keeper :)

Raspberry Swirl Brioche (from Hint Of Vanilla)

Brioche Dough

  • 335G BREAD FLOUR
  • 9G SALT
  • 50G SUGAR
  • 4G INSTANT DRIED YEAST
  • 78G WHOLE MILK AT ROOM TEMPERATURE
  • 135G EGGS AT ROOM TEMPERATURE
  • 2G VANILLA EXTRACT
  • 170G UNSALTED BUTTER (this needs to be softened slightly so it's pliable, but if it's too soft you should refrigerate it again)

 Raspberry Smear

  • 100g UNSALTED BUTTER AT ROOM TEMPERATURE
  • 7G RASPBERRY POWDER (I used a tube of freeze dried raspberries that I blitzed in the blender although this only made 5g raspberry powder)
  • 30G VANILLA SUGAR (or regular caster sugar)
  • ½ LEMON, JUICED

Brioche Method

  1. Combine the flour, salt, sugar, and yeast in a bowl
  2. In a mixer, combine the milk, vanilla extract and 117 g of the eggs and stir to combine
  3. Pour the dry ingredients on top and mix on low speed until just incorporated
  4. Add 1/3 of the butter and switch the mixer to medium speed
  5. Ensure the butter is fully incorporated and add the next 1/3 butter
  6. Repeat with the final 1/3 butter
  7. Continue to mix until full gluten development is achieved*
  8. Add the remaining 18g of egg and mix until just incorporated (keep the remaining egg for the egg wash before baking)
  9. Check the temperature doesn't exceed 27 degrees (insert a thermometer in the middle and check this)
  10. Remove the dough and place on a lightly floured surface, cover it with plastic wrap and leave it to ferment for 45 mins
  11. Transfer the dough to a baking tray lined with silpat or greaseproof paper, wrap it with plastic wrap and refrigerate for 1 - 12 hours.
  12. To make the Raspberry Smear, mix all the ingredients together until you get a smooth pinkish butter
  13. Grease a bread tin
  14. Roll out the brioche into a rectangle 12 inches by 6 inches, keeping it all as straight as possible
  15. Cover the whole surface with the Raspberry Smear
  16. Tightly roll the brioche from the long side and trim both ends
  17. Cut the dough in half along the length leaving around 2 inches at one end
  18. Twist the two lengths so the cut sides are facing up
  19. Gently braid the dough by putting the left-hand one over the right, then keep repeating until you get to the end of the dough and press the end together
  20. Carefully tuck the ends of the loaf under and put it in the bread tin
  21. Cover with plastic wrap and let it prove the bread for 1.5 - 2 hours until doubled in size (or leave overnight) in a cool place
  22. When you're ready to bake it, preheat the oven to 170 degrees celsius
  23. Brush the top of the brioche with eggwash
  24. Bake the loaf for 16 minutes then lower the temperature to 160 degrees and bake for around 30 minutes until the loaf is golden all over
  25. Remove from the oven and let it cool for 10 minutes
  26. Transfer to a cooling rack and let it cool completely
  27. Try not to eat it all at once!!
In Bread, Weekend Brunch Tags Bread, Raspberry
Comment

S'mores Cupcakes

September 15, 2015 Nicola King

We're back to school! Great to have the boys back with their friends but our house has felt awfully empty these last few days. So plenty of time to reminisce about our wonderful holidays and favourite moments. The boys absolutely loved our time in Canada back in July and if you ask them their favourite part, it would be when daddy insisted we make an impromptu camping expedition into the Algonquin National Park.

Cue an overnight stay in the wild (with bears, loons, chipmunks and rutting moose!) It took us around three hours to paddle to our lake and we pitched our tent on a little deserted island, a little different to camping in the UK where you're in a field surrounded by tons of other people - you definitely feel out in the wilds. We'd been warned that a wild bear had been into one of the camps the previous night and stolen all the food and guess which was the only campsite left on the lake? You guessed right! I spent the whole night listening for the padding of bears' paws outside our tent and hubby and I had a rather comical time balancing me on his shoulders whilst I tried to suspend all of our food and cooking equipment in a giant plastic barrel six feet in between two trees out of the bears' reach. We collected our own firewood, started a fire for warmth and cooked dinner over the open flame. I rustled up a mean chicken and rice stew and then had my first attempt at making S'mores. I don't think I got it quite right, but I swear they were the best dessert - although I think that was a lot to do with being in the wild and cooking them over an open fire! Yum :)

I wanted to recreate a taste of the summer to reward the boys for their return to school. I returned from Canada with Graham's crackers and found some Hershey's chocolate to go with them. When I was looking for a S'mores creation, I found this lovely recipe for S'mores Cupcakes from Pastry Affair. I decided to make just 8 cupcakes rather than the 24 in the original recipe so the quantities below are for just 8 and can be factored up to make as many as you like. What I love about these cupcakes is the Graham's cracker crust at the base of the chocolate cake which added not only a really delicious flavour, but also a little crunch. These are baked for 5 mins in the oven before adding the cupcake batter and they really crisp up in this time. Kristen suggests using whichever chocolate cupcake recipe we like at this point so I used my regular recipe here.

Then she adds a chocolate glaze which is where my Hershey bars came in handy and I like to think added an authentic S'mores touch to the little cupcakes! Finally a topping of marshmallow which is then browned under a blowtorch. The marshmallow didn't whip up quite as much as I'd like so I'd probably play around with the quantities next time but although it might look a little flatter than I'd like, it definitely tasted delicious astride these little cupcakes.

These cupcakes aren't difficult to make, they just have a couple of added stages to regular buttercream cupcakes with the crumb base and chocolate glaze. And they are delicious! The boys both loved them and scoffed them within minutes. The added chocolate glaze and marshmallow topping make a slightly more decadent treat but one well worth indulging :)

The only thing that would have make these better would have been eating them back on our little island. I mean, who could resist a view like this and something so delicious to eat?

S'mores Cupcakes Makes 8 cupcakes (recipe idea from Pastry Affair) 

Graham Cracker Crust Ingredients

  • 3 GRAHAM CRACKER (makes around 1 cup and the crumbs are crushed in a plastic bag with a rolling pin)
  • 2 TBSP CASTER SUGAR
  • 30G BUTTER, MELTED

Chocolate Cupcakes Ingredients

  • 75G DARK CHOCOLATE - MIN 70% COCOA SOLIDS (broken down into pieces) 
  • 45G BUTTER, SOFTENED
  • 90G SOFT BROWN SUGAR
  • 1 LARGE EGG, SEPARATED
  • 95G SIFTED PLAIN FLOUR
  • 1/3 TSP BAKING POWDER
  • 1/3 TSP BICARBONATE OF SODA
  • PINCH OF SALT
  • 125ML SEMI-SKIMMED MILK AT ROOM TEMP
  • 1/2 TSP VANILLA EXTRACT

Chocolate Glaze Ingredients

  • 55G DARK CHOCOLATE (I used Hershey's here for an authentic S'mores taste!)
  • 30G BUTTER
  • 1/2 TSP GLUCOSE

Marshmallow Topping

  • 80G LIQUID EGG WHITES
  • 115G CASTER SUGAR

Method

  1. Preheat the oven to 180 degrees (fan) and line a cupcake tin with 8 cupcake cases
  2. Mix together the Graham Cracker Crust ingredients and then put a tablespoon into the bottom of each cupcake case
  3. Using a glass, squash the crumbs gently until they form a solid base
  4. Bake for 5 mins
  5. Allow to cool for 10 mins before adding the cupcake batter
  6. Turn down the oven to 170 degrees (fan)
  7. To make the Chocolate Cupcake batter, firstly melt the chocolate in the microwave taking care not to burn your chocolate - I remove mine from the microwave when there are still a few smaller lumps and then stir it until it's all fully melted
  8. Put the chocolate to one side to cool a little
  9. Cream together the butter and sugar for around 5 minutes until light and smooth
  10. Beat the egg yolks in a separate bowl and then add them slowly to the butter mixture with the mixer on a medium speed
  11. Scrape down the sides of the bowl and ensure the mixture is fully mixed
  12. Add the melted chocolate and ensure this is fully mixed in, scraping down the sides and bottom of the bowl
  13. Combine the flour, salt, bicarbonate of soda and baking powder in a separate bowl
  14. Add the milk to a jug (must be at room temperature else if it's really cold, when it's added to the melted chocolate it tends to solidify some of the chocolate) and mix in the vanilla extract
  15. Add 1/3 of the flour mixture to the mixer and ensure it's fully incorporated and then add 1/3 milk mixture and ensure that is fully incorporated
  16. Do this twice more until all the flour and milk are mixed in
  17. Again, scrape down the sides to ensure that the mixture is all fully incorporated
  18. Whisk the egg whites in a separate bowl until they're whipped to soft peak
  19. Fold in the egg whites to the cake batter with a metal spoon ensuring that you don't knock the air out of the mixture
  20. Spoon the batter into the cupcakes cases until they're 2/3 full
  21. Bake for around 20 mins and ensure that a skewer inserted in the middle comes out clean
  22. Leave the cupcakes in the tin for 10 mins before removing them and cooling them on a rack
  23. To make the Chocolate Glaze, mix all the ingredients for this in a saucepan over a medium heat until they're combined
  24. Leave to stand at room temperature for 30 minutes stirring from time to time
  25. When this is a spreadable consistency, coat the top of each cupcake with the glaze
  26. To make the Marshmallow Topping, mix the egg whites and sugar and warm in the microwave until they're at body temperature (around 37 degrees celcius)
  27. Transfer to a mixer and mix for around 5 to 10 minutes until they're glossy and whisked to stiff peaks
  28. Using a piping bag, add a swirl of meringue topping to each cupcake
  29. Using a kitchen torch, lightly brown the marshmallow topping (or you can put this under the grill - in either case, watch them very carefully as they brown VERY quickly!)
  30. Enjoy :)
In Cupcakes Tags Marshmallows, Chocolate, Grahams Crackers, S'mores
Comment

Monte Carlo Biscuits

September 8, 2015 Nicola King

We're back from our final fling of the summer in Tuscany and appear to have left the sunshine behind us! There are only two days left until the boys go back to school. Wow, where did nine weeks go? It's been a whirlwind of going away, entertaining the boys and having lots of visitors as well as a very important fifth birthday for my youngest. I've baked many of my favourite recipes time and again, recipes I've discovered through this blog. And when my gluten-free niece came visiting from New Zealand,  I didn't bat an eyelid at baking some special cakes and puds for her when a year ago the idea of gluten free baking would have sent me into a spin!

I have a stack of recipes I'm looking forward to trying when a little more of the day is my own again but for today, the weather is grey and gloomy so we're having our last lazy day of the summer hols and the boys wanted to turn their hands to baking something yummy. It had to be something whose ingredients are store cupboard essentials as we haven't been near a supermarket since our return from sunnier climes.

We decided upon Monte Carlo Biscuits. These Australian classic biscuits are sweet and filled with jam and buttercream and have been made by Arnott's Biscuits since 1926. I must confess I have never had one before. I saw a version of the recipe on the Australian Good Food website and Frank Camorra's comment on there made me smile: "I remember the first time I saw a Monte Carlo, I couldn't believe how big it was". Having made them today, I can completely relate to that. They are enormous.

I love coconut so for me, this is my favorite part of the cookie but the addition of golden syrup (or you could use honey) also makes them lovely and chewy too. As I said before, they are enormous and I would definitely make something a little daintier next time - I mean, my youngest struggled to get it in his mouth for a bite! There are a lot of recipes available for these biscuits, very similar in ingredients and method. Not having tasted one of these before, I opted for Donna Hay's vanilla buttercream filling which is pretty sweet and has a higher butter content than most of the other recipes - and is exceptionally yummy :)

As the finished biscuits are 7cm in diameter, next time I would divide the dough in half again and make 20 sandwiched biscuits. But these biscuits are gorgeous. I can see why they're such a favourite down under.

Not sure they'll be hanging around for long in this house. Especially when my antipodean hubby spots them ;-)

Monte Carlo Biscuits Makes 10 biscuits sandwiched together (adapted from Donna Hay and Modern Australia | Good Food)

Biscuit Ingredients

  • 125G UNSALTED BUTTER, SOFTENED
  • 160G LIGHT BROWN SUGAR
  • 2 TBSP GOLDEN SYRUP (or you could use honey here as an alternative)
  • 1 EGG
  • 300G SELF-RAISING FLOUR
  • 50G DESSICATED COCONUT
  • 70G STRAWBERRY JAM (or you could use raspberry jam)

Buttercream Ingredients

  • 160G UNSALTED BUTTER, SOFTENED
  • 200G ICING SUGAR
  • 1 TSP VANILLA EXTRACT

Method

  1. Preheat the oven to 180 degrees (fan)
  2. Line two baking trays with greaseproof paper
  3. Beat together the butter, sugar and golden syrup until light and creamy - this should take 2-3 minutes
  4. Add the egg and mix it until just combined
  5. Sift the flour over the dough and add the coconut, then mix together until they're combined
  6. Divide the mixture into 20 balls (around 35g per ball) and place them on the prepared trays ensuring enough space for them to spread
  7. Bake for 12 minutes until they're golden brown
  8. Leave them to cool on their trays for 5 mins and then transfer them to a cooling rack until they're cool
  9. Make the buttercream by placing the butter, icing sugar and vanilla extract in the mixing bowl and beating the buttercream for around 5 mins until smooth and creamy
  10. Either spread or pipe a dollop of buttercream on half of the cooled biscuits
  11. Add jam on top of the buttercream and then sandwich the biscuits together using one of the halves without cream or jam
  12. Enjoy :)
In Biscuits & Cookies Tags Coconut, Golden Syrup, Strawberry Jam, Buttercream, Monte Carlo
Comment

Chocolate and Hazelnut Brioche

August 26, 2015 Nicola King

I really wanted to make brioche. It's one of my favourite breads. But I'm always a little nervous of bread. Making it, that is. I've faced my inner demons and made this and this but I still take a deep breath every time I embark on a new bread project. Still, I decided I wanted to make brioche and found this delicious Chocolate & Hazelnut Pull-Apart Brioche from Butter and Brioche.  Thalia photographs her bakes perfectly and has really detailed instructions on how to make everything so I just love following her blog.

The dough recipe is pretty straightforward. Making the initial dough is a 2 step process and then the butter is added giving it the richness you'd expect from brioche. I used my standalone mixer and dough hook to get me to the stage when I was ready to roll out. The brioche dough looked as I expected it to but I found it really sticky when I was to roll it out. Thalia suggests that the work surface should be lightly floured but I found that I needed much more flour (probably too much) to be able to keep the dough moving. When the dough is shaped into a rectangle, it is then spread with Nutella (yum) and sprinkled with hazelnuts. The original recipe adds extra chocolate chips here which I didn't use, but I think it would work with and without.

The cutting of the dough requires some precision but is at the same time fairly forgiving. You cut the rectangle into long strips and place them on top of each other. Then cut this thin tower into equal squares and stack them in the tin. I had a little bit left over which I squeezed down the side and as it's tear and share bread, it just merges into the one loaf (why I say it's pretty forgiving). Then we leave this to prove and then bake it in the oven. Now the original recipe says that it will increase in volume during proving until it's above the top of the tin. Mine didn't rise that much but I decided that I would still put it in the oven after the 1½ hours so mine looks a little flatter than Thalia's lovely loaf.

There are other brioche recipes I'd like to try but this was a great recipe to start with. I love naked brioche with jam for breakfast but the Nutella adds an extra richness. I'm not a huge fan of the chocolate spread but I think it works really well here. I might, in fact, reduce the amount of hazelnuts and add in the chocolate chips next time  as well as the Nutella.

I love tear and share bread. It's really convivial to have sharing platters of food and long lunches or dinners with good friends. I haven't had a sharing sweet bread before and this is a wonderfully yummy one for my initiation.

This would be a lovely (naughty) addition to the breakfast table but I would love to share this for brunch with family and friends. Can't wait to make this again :)

Chocolate and Hazelnut Brioche (from Butter and Brioche)

Ingredients

  • 240G PLAIN FLOUR
  • 25G CASTER SUGAR
  • 5G SALT
  • 7G INSTANT YEAST
  • 70ML MILK
  • 2 EGGS + 1 EGG YOLK (these need to be at room temperature)
  • 125G BUTTER, CUBED (this needs to be at room temperature)
  • 160G (½ CUP) NUTELLA
  • 75G CHOPPED HAZELNUTS
  • 1 EGG YOLK WHISKED WITH 2 TBSP MILK
  • Optional: 90G DARK CHOCOLATE CHIPS

Method

  1. Place the flour, salt, sugar and yeast in a standalone mixer with a dough hook
  2. Combine the ingredients on a slow speed
  3. Add the milk and eggs and mix on slow for 2 minutes
  4. Increase the speed to medium and mix for 6-8 minutes until the dough is soft and smooth and elastic
  5. Add the cubed butter piece by piece and mix until it's all fully incorporated in the dough which should take around 5 minutes
  6. Make sure that the butter is properly distributed throughout the dough, scraping down the sides of the bowl to ensure it's all mixed together well
  7. On a lightly floured surface, place the dough and roll into a rectangle, roughly 30cm by 40cm (you need to be able to move the dough around so ensure it's not sticking to the surface by dusting the surface with more flour if necessary)
  8. Spread the Nutella across the dough and then sprinkle the hazelnuts across the surface - this is where you would add the optional chocolate chips from the Ingredients list
  9. Cut the dough into 6 long strips (lengthwise) and then place them on top of each other so you have a long, tall stack
  10. Cut the stack into 6 even squares
  11. Place the squares side by side in the baking tin, filling it 2/3 full
  12. Brush the surface of the loaf with the egg yolk mixed with milk
  13. Leave it to rise in a warm area for 1½ hours until the dough has puffed up and risen above the top of the tin and there should be a "skin" when touched lightly 
  14. Once risen, pre-heat the oven to 180C degrees and bake for 20 to 30 minutes (mine took around 25 mins) but you want a skewer inserted in the middle to come out clean (if during baking, it looks like it's browning too quickly, you can cover the top with foil)
  15. When it's cooked and out of the oven, leave for 5 mins in the tin and then turn it out onto a rack to cook
  16. Enjoy :)
In Bread, Weekend Brunch Tags Chocolate, Hazelnuts, Nutella, Brioche
Comment

Rainbow Swirl Lollipops

August 23, 2015 Nicola King

Lollipops are so much fun. I stumbled across a great blog recently called Dessert First and there was a very pretty picture of Rose Saffron Lollipops for National Lollipop Day. These were in Anita Chu's book Lollipop Love which I bought in a heartbeat, if only for the stunning photography!

I decided to give her simple lollipops a go today and make the Rainbow Swirl Lollipops. I plan to experiment further but I chose the simplest recipe to try as it needed very few ingredients - water, sugar, glucose, lemon flavouring and some food colouring - plus a candy thermometer. I already had the lollipop mold and some sticks (my lollipop mold has 7 x 4cm cavities).

The process moves at a fast pace and you want to have everything lined up ready to go. And it's not the kind of recipe you want to be working on with little children around your feet. The temperature of the sugar mixture needs to reach 149 degrees celcius so it's hot hot hot - and my little thermometer lit up red to show just how hot it really was. The biggest learning from making these was that the mold cavities need to be extremely well greased - I started off lightly as the recipe suggested but struggled to get my lollipops out and most of the first ones cracked.

At the point when it comes off the stove, I decided to flavour mine with lemon extract. When pouring the hot liquid into the mold, the recipe calls for a candy funnel or a jug with a spout (and I can see how a little funnel would really help here) but I just used my jug. I used a lollipop mold that has 7 cavities and the sugar solution does start to set before you get to the last cavity making it a little more tricky to fill. Then I also wanted to swirl colour through the lollies so you need to work super-fast. I used Sugarflair Spectral Paste to colour my lollipops which give a vibrant colour but I found when the lollipops set the gel colour would rub off on my fingers so I need to experiment a little more with these.

There's so much fun to be had with these. I've just dipped my toe into the Lollipop world today and it's sort of addictive. You can make them in a relatively short space in time, exercise a little creativity and create lovely unique lollipops that would make lovely gifts with cellophane and ribbon - or just bring a smile to a child's face.

Watch this space for more lollipop creations!

Rainbow Swirl Lollipops Makes 7 x 4cm lollipops (from Anita Chu's Lollipop Love) 

Ingredients

  • 100G SUGAR
  • 60ML WATER
  • 30ML LIGHT CORN SYRUP (GLUCOSE)
  • 1 TSP LEMON EXTRACT
  • FOOD COLOURING (I used Sugarflair Spectral Colour Paste)

Method

  1. Ensure that the lollipop cavities are well greased with non-stick cooking spray and pop the sticks into the mold
  2. Combine the sugar, water and glucose in a saucepan and bring to the boil over a medium-high heat
  3. Continue cooking until the temperature reaches 149 degrees celcius on a candy thermometer and immediately remove from the heat
  4. Stir through your chosen flavouring
  5. Put the mixture into a heatproof jug with a spout and moving quickly before it sets, fill each of the cavities
  6. Again working fast, mix a little food colouring into each lollipop, swirling the colour with a toothpick
  7. Allow the lollipops to cool and harden for 15 minutes and then remove from the molds
  8. Store them wrapped in cellophane bags in a cool place for up to a month
In Chocolates & Sweeties Tags Lollipops, Lemon
Comment

Semlor "Bollos De Pascua Suecos"

August 18, 2015 Nicola King

I know it's not Easter. It should, in fact, be summer but you could be mistaken for thinking it was autumn going into winter most days here in London right now. So back to Easter. Or rather not being Easter, but these lovely little buns that are traditionally served at Easter in Sweden should be served all year around. Doesn't the name sounds romantic "Bollos de Pascua suecos"? Much nicer than "Swedish Easter Buns"!

I hadn't tried these before, but saw a photo on Pinterest that stayed somewhere in the back of my mind for a day such as this one. When we were recently in Canada, out in the Algonquin National Park, we made many visits to our favourite bakery, Henrietta's Bakery, where they had lots of traditional buns filled with jam and cream, fresh cakes and pies and somewhere amongst all of this I was reminded of these little buns. Incidentally, if you ever find yourself in the Algonquin National Park with a craving for something sweet, I thoroughly recommend a visit to that lovely bakery for their amazing sticky buns :)

But back to my Semlor buns which are in essence bread flavoured with cardamom. The cardamom is freshly ground so it has a really vibrant flavour and smell.  I'm not a huge cardamom fan (especially if you find me accidentally chewing on one in my pilau rice) but the 1 teaspoon in these buns is not too overbearing and adds a rather pleasant flavour.

Once they are baked and cooled, it's time for their little hats to come off.  Then a small amount of the insides are scooped out ready to be mixed with almond paste and then layered back inside the bun. I made my own almond paste which meant I could make it to my desired consistency and as sweet as I liked it. This is then topped with a generous swirl of the most delicious mascarpone cream mixed with vanilla paste, icing sugar, milk and cream. Its little hat goes back on top and then it's dusted with icing sugar. There.  Easy, right?

There are a few different sources that inspired these which found me translating Swedish recipes (and as such missing important stages!) but my recipe was in the main adapted from Swedish Food and Mercaditas Bakery. These buns do have a few different stages but it's totally worth the effort. The freshly ground spice really does give this a lift and transforms it from just a bread bun whilst pairing really well with the almond and mascarpone cream.

They're lovely enjoyed with a cup of coffee - but in my world it's always a hot chocolate :)

Semlor "Bollos De Pascua Suecos"

Dough Ingredients

  • 75G BUTTER
  • 300ML MILK
  • 10G FAST ACTION DRIED YEAST
  • ½ TSP SALT
  • 55G SUGAR
  • 1 TSP FRESHLY GROUND CARDAMOM
  • 500G PLAIN FLOUR
  • 1 EGG

Almond Paste Ingredients

  • 125g GROUND ALMONDS
  • 60ML MILK
  • ICING SUGAR TO TASTE

Mascarpone Cream Ingredients

  • 250G REFRIGERATED MASCARPONE
  • 120ML WHIPPING CREAM
  • 60G ICING SUGAR
  • 1 TSP VANILLA PASTE

Method

  1. Melt the butter in a saucepan
  2. Add the milk and heat until it's lukewarm and mixed well
  3. Add the yeast and mix until it's all dissolved
  4. Put the salt, sugar, cardamom and flour in a mixer and make a well in the centre
  5. Add the buttery milk mixture and egg and then mix for 5 mins with the dough hook (or alternatively knead it by hand)
  6. The mixture should be sticky but not stick to your hands when it's ready
  7. Place in an oiled bowl covered loosely with clingfilm and leave to prove for a half hour
  8. Gently turn out the dough onto a lightly floured surface and knead until smooth
  9. Divide the dough into equal balls (I wanted 8 so just calculated what each ball needed to weigh and used the weighing scales to make sure they were all even sized at around 95g)
  10. Put the dough balls onto 2 baking sheets lined with baking paper, cover with a tea towel and leave for another 40 mins
  11. Preheat the oven to 170 degrees (fan)
  12. Bake for 25 mins until the tops are browned and then allow to cool
  13. If you're not filling the buns immediately, store them in an airtight container as they tend to dry out quickly
  14. Make the almond paste by mixing all the ingredients together - the icing sugar is at your discretion until the paste is sweet enough for you, but as a guide, I added 3 tablespoons
  15. Cut a small hat off the top of each bun and place aside
  16. Then scoop out a little of the bread from inside each bun and add this into the almond paste, then mix together
  17. At this stage, I added a little more milk until I had a creamy paste
  18. Divide the paste between each of the buns
  19. Then beat the mascarpone, icing sugar and vanilla paste until mixed together
  20. Add the whipping cream and beat on high until it holds its shape and forms stiff peaks
  21. Using a star nozzle, pipe the cream onto each bun
  22. Then replace their hats
  23. Sprinkle liberally with icing sugar!
In Bread, Everyday Cakes, Celebrations Tags Semlor, Almonds, Mascarpone
Comment

Lavender & Lemon Shortbread

August 14, 2015 Nicola King

I discovered last week that I have a slight addiction to lavender shortbread. A slight addiction being that I can demolish most of a packet in around 10 minutes. You really don't want to know the calory count of each biscuit. I thought I was pretty safe that this weird craving would be reserved for me - I mean my fussy boys would never eat these biscuits once they knew they had FLOWERS in them - and believe me, I was quick to emphasise that the purple speckles were FLOWERS. Wrong! They loved them as much as me *sighs with disappointment*.

I adore shortbread still warm from the oven. Freshly baked shortbread is just one of my absolute favourites. Whenever we go to anywhere with lovely little cafes (like National Trust venues) that sell fresh cakes and biscuits, I immediately make a beeline for the domed glass lidded cake stands in the middle and check out their shortbread offering, tailoring my meal to this little treat at the end. Although I love classic shortbread, the addition of lavender and lemon just adds a certain lift to the biscuit - it's just a hint of flavour - and the few people that have tried some of these home-baked biscuits said they were really moreish.

I posted a while back after my vain attempts to find dried lavender in shops that I could bake with. I struggled and so I decided that I'd grow my own lavender after this and my parents grow it in abundance in their garden. The lavender for these biscuits came from their crop and it is really lovely to be cooking with something you've grown yourself, even if it's only a small part of the overall bake.

This is a simple classic shortbread recipe. I like using rice flour in my shortbread as it gives an added crunch to the texture so this recipe uses a blend of plain flour and rice flour. The main thing to remember is not to overwork the dough. I also find that chilling the dough for 30 minutes or so (you don't want to leave it in the fridge for too long as it turns too hard and then you have to soften it again before using) really helps it keep shape before you roll it and use your cutters. I decided to use heart cutters as the biscuits I became so addicted to were heart-shaped but they would be great as any shape.

If you love shortbread as much as me, there's really nothing better than eating freshly baked. The dough can also be frozen (use your cutters to cut them into shapes and then freeze them at this point between layers of baking parchment) and defrost at room temperature for an hour. Super useful for any unexpected guests! You can also take this further and decorate them with royal icing although I like the simplicity of my biscuits so you can see the purple and yellow flecks throughout the biscuits. Or even change the flavour combinations like vanilla or orange.

Very happy I made enough to stash some in the freezer. They might just stay there until the summer holidays are over and school starts again. Party for one at my house!

Lavender & Lemon Shortbread Makes around 30 biscuits

Ingredients

  • 250G SOFTENED BUTTER
  • 100G GOLDEN CASTER SUGAR
  • 250G PLAIN FLOUR
  • 125G RICE FLOUR
  • 2 TSP LAVENDER FLOWERS
  • ZEST OF 1 LEMON

Method

  1. Cream together the butter and sugar in a bowl
  2. Add the lavender and lemon and mix until combined (I added mine after the flour but it would have been better the combine them before this addition)
  3. Sift the flour and cornfour into a separate bowl
  4. Add the flours in 3 additions, mixing the dough briefly each time
  5. Gently knead the dough until it's smooth but be careful not to over-work it
  6. Wrap the dough in clingfilm and refrigerate for 30 minutes
  7. Preheat the oven to 160 degrees (fan)
  8. Lightly flour your work surface and roll out the dough until it's around ½cm thick
  9. Stamp out your shapes with your chosen cutters - I used hearts but circle or fluted edged cutters would work well or anything you really fancy
  10. Place the biscuits on 2 baking trays lined with baking paper, leaving a little space between each biscuit as they will swell slightly
  11. Bake for 15 to 20 minutes until lightly golden
  12. Remove from the oven and sprinkle with sugar
  13. Allow to cool for 10 minutes before transferring them to a cooling rack
In Biscuits Tags Lavender, Lemon, Shortbread
Comment

Mascarpone Ice Cream With Salted Caramel

August 12, 2015 Nicola King

I am in SERIOUS ice cream heaven! I have just made the most deliciously yummy Mascarpone Ice Cream marbled with homemade salted caramel and filled with sugared almonds. I can't take all the credit though, as this recipe came from a wonderful blog I stumbled upon the other day from Sarah at Broma Bakery. There are so many lovely recipes on her blog all beautifully photographed and I have a list of her other recipes that I can't wait to try!

But back to this no churn, silky smooth Mascarpone Ice Cream. Yes, that's right - no churn. Which means you don't need any fancy equipment to make this apart from a vessel (ideally a loaf tin) in which to freeze your ice cream.

Sarah uses her favourite brand of Lush Gourmet Almonds, but since I didn't have access to these, I made my own sugared almonds that I chopped roughly and added in place of her suggestion. The only challenge I had with making these was trying not to eat them all before they went into the ice cream! They're lovely and sweet with a great crunch. 

The ice cream is simple to make but you need to cast a blind eye to the calories of this one with whipping cream, mascarpone and condensed milk - and that's before we come on to the homemade caramel sauce! It is made simply by whipping the whipping cream and then folding in the other ice cream ingredients before adding almonds. There are very specific instructions for adding the caramel - I would have been inclined to swirl it through the base but followed the recipe and it worked out well so can only suggest you do the same when making this. Then the finished ice cream needs to freeze overnight.

This ice cream is rich and creamy and would taste good without the salted caramel and almonds but I like the caramel ribbons and the nuts give an additional crunchy texture which pairs well with the caramel. I think it's quite a grown-up ice cream (which is no bad thing in our house otherwise it would disppear in a matter of seconds!) and I can't wait to see how this will work with other flavour combinations :)

Mascarpone Ice Cream With Salted Caramel & Sugared Almonds (from Broma Bakery)

Sugared Almonds Ingredients

  • 100G ALMONDS
  • 70G ICING SUGAR
  • 2 TBSP WATER

Ice Cream Ingredients

  • 570ML WHIPPING CREAM
  • 225G MASCARPONE
  • 395G SWEETENED CONDENSED MILK
  • 1 TBSP VANILLA EXTRACT
  • ½  TSP SALT

Homemade Salted Caramel Sauce

  • 100G (½ CUP) SUGAR
  • 40G BUTTER
  • 60ML (¼ CUP) WHIPPING CREAM
  • 1½ TSP SALT

Sugared Almonds Method

  1. Place all the ingredients in a saucepan over a medium heat
  2. Stir constantly until all the almonds are covered with the icing sugar
  3. Remove them when they are a sticky white and spread them out on a layer of greaseproof paper to cool
  4. Roughly chop the almonds

Homemade Caramel Sauce Method

  1. Place the sugar in a saucepan and heat on a medium heat for around 5 minutes
  2. Stir the sugar occasionally to ensure that it all melts, but just enough to remove the lumps, and until it turns a dark amber colour
  3. Remove from the heat and stir in the butter, taking care as it will start to bubble, until they are mixed together completely (around 1 - 2 minutes)
  4. Pour in the whipping cream and salt and mix until it's all thoroughly combined
  5. Place back on the heat for 30 seconds, stirring all the time
  6. Remove from the heat and allow to cool for at least 15 minutes

Ice Cream Method

  1. Prepare your loaf tin with greaseproof paper
  2. Put the whipping cream into a bowl and whip until soft peaks form
  3. Fold in the mascarpone, condensed milk, vanilla extract and salt and beat until stiff peaks form
  4. Reserve 2 tablespoons of almonds and fold the rest into the ice cream mixture
  5. Spoon half of the caramel over the top of the ice cream without stirring it through and then pour half of the ice cream into the prepared loaf tin
  6. Pour the rest of the caramel over the remaining ice cream and then pour this final half into the loaf tin
  7. Swirl the caramel very gently with a skewer
  8. Sprinkle the remaining nuts over the ice cream
  9. Freeze overnight and allow to soften slightly before serving


In Ice Cream, Puddings Tags Ice Cream, Mascarpone, Condensed Milk, Almonds, Salted Caramel
Comment

Summer Fruit Crumble Galette

August 7, 2015 Nicola King

I have fond memories of fruit picking with my family when I was a child. Sunny days collecting strawberries and other fruit, quality control taste testing as much as went into the basket and returning for weighing with stained fingers and lips. Happy days! I've been wanting to take the boys fruit picking for so long and took the opportunity now that we're in Dorset for a few days.

I googled local fruit farms and found Sopley Farm near Christchurch - after a quick phone call just to make sure they still had plenty of fruit in season, we packed up and headed off there. It didn't disappoint. The staff were really friendly and we collected punnets of strawberries, raspberries and blackberries. Far too much really, but it's kind of addictive.

So with all our fruit wares and being in someone else's kitchen without my usual baking tins and equipment, I decided to make a free-form Summer Fruit Crumble Galette in the style of Donna Hays. I did cheat and buy some pre-made sweet shortcrust pastry but you can make your own if you prefer. The main fruits were strawberries and raspberries but I wanted to add in some blackberries too for some extra colour and we agreed that they added an additional dimension to the taste.

I love the sweet shortcrust pastry pairing with fruit, but what I really loved about this was the crumble topping which added extra texture and flavour and was seriously delicious. I am a big fan of crumble so you'll always finding my doubling any recipe quantities for my desserts.

This was delicious warm straight from the oven. The fruit was so juicy against the crispy shortcrust pastry and using such fresh ripe fruit meant that we didn't have to add any sugar to bring out the sweetness. 

There are so many creations with such an abundance of fruit, but this is a really simple and delicious dish. I like the freeform style but what it lacks in straight sides, it definitely makes up in its wonderful flavours. A definite winner and gorgeous summer pud.

Summer Fruit Crumble Galette

Ingredients

  • 320G SWEET SHORTCRUST PASTRY (I bought pre-made chilled pastry)
  • 3 TBSP APRICOT JAM
  • SELECTION OF FRUIT (add at your discretion but I used several handfuls of strawberries and raspberries with a scattering of blackberries)
  • 60G BUTTER
  • 3 TBSP GROUND ALMONDS
  • 50G FLOUR
  • 3 TBSP CASTER SUGAR
  • 3/4 TSP GROUND CINNAMON

Method

  1. Preheat the oven to 180 degrees (fan)
  2. Prepare your fruit of choice and set aside
  3. Line a baking tray with greaseproof paper and unroll your pastry on to here (I didn't have to roll out my pastry any further but you're looking for it to be around 5mm thick)
  4. Spread the apricot jam over the base leaving a 5cm border around the pastry
  5. Pile your fruit over the jam
  6. Fold the edges of the pastry up over the fruit (you only have the 5cm border to do this with so it just forms a tray of sorts that the fruit sit in)
  7. Mix together the butter, ground almonds, flour, caster sugar and cinnamon with your fingertips to create a crumble
  8. Scatter the crumble across the top of the galette
  9. Bake in the oven for 25 minutes or until the pastry is golden brown and the fruit bubbling
  10. Serve with custard, cream or ice cream :)
In Patisserie, Puddings Tags Strawberry, Raspberry, Blackberry, Shortcrust Pastry
Comment

Viennese Swirls & Custard Creams

August 5, 2015 Nicola King

So as the whole of the UK gears up for GBBO (the Great British Bake Off's new series) tonight, we've been promised the most eclectic bunch of contestants yet. And with a special mathematical formula, predictions are that Flora and Nadiya will be going head to head in the final. And we haven't even met them yet!!!! Ooh err! The excitement. I, for one, will be firmly glued to my TV screen :)

Read more
In Biscuits & Cookies Tags Chocolate, Custard, Viennese Swirls
Comment

Banana & Coconut Muffins

August 2, 2015 Nicola King

So (as any parent already a few weeks into the hols knows all too well) school's out for the summer! Nine weeks of fun and looking for things to keep the boys amused lie ahead. I baked these on the last day of school when entertaining my boys and decided to whip up a batch of these Banana & Coconut Muffins that I found onPinterest a while ago. I had some bananas to use up and hungry tummies to fill and these were really yummy, particularly warm from the oven.

Read more
In Everyday Cakes Tags Banana, Coconut, Muffins
Comment

Chocolate Brownie Waffles

July 29, 2015 Nicola King

Hello! We're back and after a few days of jet lag and the worst cold and crazy party planning for my littlest's 5th birthday party at the weekend, today I made the yummiest chocolate brownie creation - in my waffle iron!

It made me giggle last week when I read an article somewhere about epic pinterest fails - and one of them being the chocolate cakes (or was it cookies?) in the waffle iron. But why should that stop me having a go?

Read more
In Weekend Brunch, Puddings Tags Chocolate, Brownies, Waffles
Comment
← Newer Posts Older Posts →

To subscribe, please enter your email address:

Delivered by FeedBurner

Yay for the weekend!! If you saw how I made pineapple flowers earlier this week, here they are adorning my very first Hummingbird cake. I am totally in love with them! I also added a few @edible_flowers to complement them and this makes the perfect w
I was so grateful to be #gifted some beautiful @cotswoldflour flour recently with a challenge to make something from my #bakingbucketlist and so I set about making a Nutella babka and scrolls with them. I’ve had a mixed love affair with bread m
I found the cutest miniature pineapple in the local petrol station co-op so decided to make these roasted pineapple flowers. I think they’re so pretty and remind me of lovely sunflowers. I thought they’d go well with a Hummingbird cake so
We had great fun baking this Malteser Millionaire’s Shortbread which is absolutely delicious! This was something the boys wanted to bake - who can resist a delicious shortbread base, topped with gooey caramel and then a final layer of swirled m
As the rain and clouds returned to our skies this weekend, we’ve been looking for comforting lockdown treats. These Blackberry & Star Anise Friands, dripping with sticky blackberry juice icing are the perfect choice 💗 The recipe is from Sw
You might have seen from my Stories this weekend that I made cinnamon buns. I don’t have the best track record with bread but I’m overcoming my inner fear! These buns were so delicious. It was an amalgamation of a few recipes but the base
  • Serendipity Bakes
    Coconut & Raspberry Friand Muffins
    May 29, 2019, 9:38 PM
  • Serendipity Bakes
    Thank you for sharing my photo of your delicious recipe 😋 @rkhooks Happy Sunday! https://t.co/niKamgfjvt
    Mar 3, 2019, 2:38 PM
  • Serendipity Bakes
    RT @BiscuiteersLtd: Our friends at @thewhitecompany asked us to design something special to celebrate their New York stores first birth… https://t.co/kTsMH57wRv
    Jun 28, 2018, 11:09 AM

Enter your email address:

Delivered by FeedBurner

Powered by Squarespace

Nicola King at Serendipity Bakes Follow my blog with Bloglovin Follow