• About
  • Blog
  • Recipe Index
  • Your Celebrations
  • Contact Me
Menu

Serendipity Bakes

Street Address
City, State, Zip
Phone Number

Your Custom Text Here

Serendipity Bakes

  • About
  • Blog
  • Recipe Index
  • Your Celebrations
  • Contact Me

Chocolate Cupcakes With Coconut Cream Frosting (Gluten & Dairy Free)

February 4, 2015 Nicola King

I've always loved eating cakes and sweet things. I don't eat a lot of them but I need my regular fix. The thing about baking is that when you make things yourself, you get to see what actually goes into them. I have my favourite bakeries across London and then when I bought their recipe books, I realised that there's an awful lot of sugar and chocolate and other things that you probably should eat in moderation in one tiny slice. I remember once using a kilo of sugar in one 8 inch celebration cake. It definitely makes you think!

I was flicking through Bloglovin' the other day and stumbled across a few recipes that were really exciting.  They were really exciting because there's a little boy in my son's class who's both gluten and dairy intolerant.  I took in a batch of cupcakes for Hallowe'en (completely over-the-top full of dairy and gluten) and I still remember the disappointment on his face when he asked me if they were dairy free.  And then there's another mum who's highly allergic to eggs (can you imagine a life without eggs?) So I've been wanting to find a cake that tastes and looks as good as normal cupcakes that will pass my test of yumminess and that they can enjoy too.  And I found a few recipes to try.

This one is a hybrid of a couple of recipes.  The chocolate cake is very simple to make and I've deliberately used ingredients that are easy to find in the supermarket but any items like cocoa nibs (if you want to use them) can be picked up in a health food shop.  

Now on to the coconut cream frosting. Hmmm...this was a little trickier!  Coconut cream frosting has been around for years and promises fluffy delight but this is the first time I've made it. Any recipes ask you to chill the cans of coconut milk in the fridge for at least 5 hours, but preferably overnight. This is because you only want the solid part (the cream) and you then drain the water away before using.  What they don't tell you is that this process of refrigerating doesn't always work! So I went through 4 cans of failure; then I tried freezing it; adding pure coconut cream; and whipping it for 20 mins in the hope that it would magically set.  It didn't.  I then reverted to google looking for any tips for success.  I read a lot of blogs and conversations and recommendations.  This is the sum of my findings: ideally use cans that only contain coconut and water; avoid guar gum; brands change their recipes all the time so you may find one that works and then the next time it doesn't; it's often down to the contents of an individual can itself; and then I finally found a recommendation from someone to use Waitrose Full Fat Coconut Milk.  Now this does contain guar gum and there's also no guarantee that it will work every time, but it was great to have some sort of recommendation - and it actually worked for me!

Coconut cream frosting is very different from the buttercream that I'd normally use.  It's much lighter in texture and fluffier, but it does have a very distinct taste of coconut (obviously!) although you can flavour it with vanilla or honey.  It won't replace regular buttercream for me as it doesn't hold its shape for celebration cakes and cupcakes, but it's very refreshing and much lighter - and has the added benefit of being much healthier!

Chocolate Cupcakes With Coconut Cream Frosting (Gluten & Dairy Free) (recipe adapted from Local Milk and How Sweet It Is) Makes 12 cupcakes

Ingredients

  • 250G RICE FLOUR
  • 1 TSP XANTHUM GUM
  • 1½  TSP BAKING SODA
  • 1 TSP SALT
  • 270G SUGAR
  • 60G COCOA POWDER
  • 320G ALMOND MILK AT ROOM TEMPERATURE
  • 150G MELTED COCONUT OIL AT ROOM TEMPERATURE
  • 2½ TBSP APPLE CIDER VINEGAR
  • 2½  TSP VANILLA EXTRACT
  • 2 TINS FULL FAT COCONUT MILK
  • 2TBSP ICING SUGAR
  • COCOA NIBS TO DECORATE

Method

  1. At least 5 hours before baking or preferably overnight, put the cans of coconut milk in the fridge.
  2. Heat the oven to 175 degrees and line a 12 hole muffin tin with cupcake papers.  Melt the coconut oil and put to one side to cool down. Ensure that the almond milk is out of the fridge and at room temperature.
  3. In one bowl, mix together the dry ingredients: the rice flour, xanthum gum, baking soda, salt, sugar and cocoa powder and mix well.  Then in another bowl, mix together the wet ingredients: the almond milk, coconut oil, vinegar and vanilla.  If you put the milk and coconut in first and the milk is not at room temperature, the coconut oil will start to solidify.  This can be rescued by warming gently in the microwave with short 15 second bursts until the coconut oil re-melts.
  4. Pour the wet ingredients into the dry ingredients and mix by hand with a wooden spoon.
  5. Fill each of the 12 cupcake papers with around 1/3 cup of batter and then bake for 18-20 minutes or until a toothpick inserted into the middle comes out clean.
  6. Remove the cupcakes from the tin and leave to cool.  It's important that they're completely cool before you frost them otherwise the frosting will start to melt.
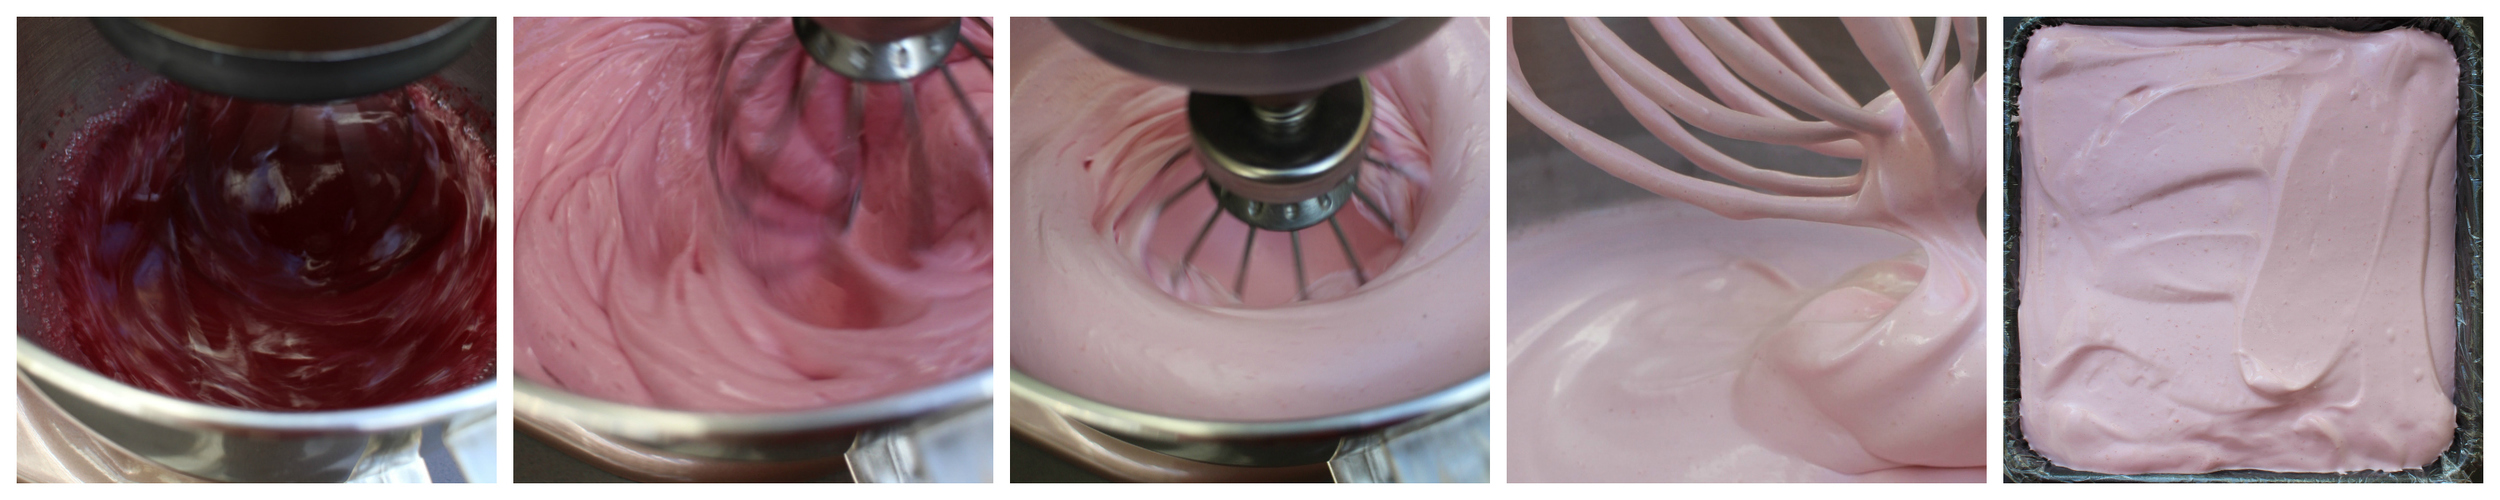
  7. Turn your chilled coconut cans upside down, open and pour out the liquid.  Scoop out the remaining cream and whisk until the frosting is light and fluffy.  This should take around 3 minutes. Then add any favouring that you choose: I added 2 tbsp icing sugar but you could use vanilla, honey or something of your own choosing. Mix through and then your frosting is ready to use.  Refrigerate if you don't use immediately.
  8. Frost the cupcakes and add some garnish.  I used cocoa nibs.  Then enjoy!
In Free From, Cupcakes Tags Chocolate, Cupcakes, Coconut Oil, Almond Milk
Comment

Raspberry & Champagne Marshmallows

January 31, 2015 Nicola King

I mean, yum!  Three of my favourite things all bundled up into a little square of squishy delight that makes you feel like a kid and a grown-up at the same time. I've made marshmallows once before but have been intrigued by the hip and happening Marshmallowists and their very grown-up flavours, so this time I wanted to make us a little treat for a special birthday weekend.  The whole marshmallow process is very therapeutic, from the sweet aroma of raspberries wafting around the kitchen to watching the marshmallow mix billow up into complete fluffiness.  

There are all sorts of interesting flavours to experiment with: Blackcurrant & Mint, Coconut, Passionfruit & Ginger, Blueberry & Gin - and these are just a few of the Marshmallowist flavours but you could come up with your own dream blend.  Then it's so easy to cut them into fun shapes.  These marshmallows have a sort of soufflé texture and are very light.  I thought the Raspberry & Champagne flavour might put the boys off (fingers crossed) but they absolutely loved them too!

The process is very straightforward...the hardest part is waiting so long to eat them!  And they would make a wonderful home-made Valentine's present for a loved one :)

Raspberry & Champagne Marshmallows (recipe from The Marshmallowists)

Ingredients

  • 15 LEAVES OF DR OETKER GELATINE
  • 300G RASPBERRIES
  • VEGETABLE OIL
  • 300G WHITE GRANULATED SUGAR
  • 240G LIQUID GLUCOSE SYRUP
  • 2TBSP CHAMPAGNE (I USED PROSECCO IN PLACE OF THIS)
  • 75G CORNFLOUR
  • 75G ICING SUGAR

Method

  1. Measure 200ML cold water into a shallow, microwaveable bowl and then add the gelatine leaves one by one ensuring that each leaf is fully covered with water. Leave them to soak for 10 minutes.  Next make the raspberry purée by blitzing the raspberries in the food processor and then sieving them to remove the pips - you will need 175G raspberry purée.  Line a square tin (I used a square 24CM x 24CM tin but a square or rectangular one of a similar size will work) with clingfilm trying to get it as smooth as possible and then lightly grease it with a little vegetable oil.  
  2. Heat the soaked gelatine and water in the microwave for 1 minute until it's fully dissolved.
  3. Put the sugar, 120G of the glucose syrup and 100G raspberry purée into a medium pan and bring to the boil.  Keep heating until it reaches 112°C on a sugar thermometer (this should take around 5 mins) and then pour it into a mixer.  Add the remaining 80G raspberry purée and the remaining glucose and mix on low speed.
  4. Whisking all the time, add the melted gelatine and its liquid and then increase the speed to medium.  You need to wait for it to thicken so that it doesn't splash out of the mixer as it's scalding hot.  Then increase the mixer to maximum for a further 12 minutes until you can lift the whisk out and the mixture holds its shape.  It should have quadrupled in size.
  5. Reduce the mixer to low and add the Champagne (or Prosecco) and continue mixing for a further minute.  Then tip the marshmallow mixture into the prepared tin, level it and leave it to set at room temperature for 4-6 hours (or overnight).
  6. Sift the cornflour and icing sugar into a bowl.  Cut the set marshmallows with a hot, wet knife and dust with the icing sugar mixture. If you prefer to cut them into shapes, like the hearts above, dip your cutters into hot water and then cut your shapes out of the marshmallow.
In Chocolates & Sweeties Tags Raspberry, Marshmallows
Comment

Chocolate Sables

January 28, 2015 Nicola King

I've been meaning to master sables. Or at least have a go at them.  I've had so many yummy desserts lately that have involved Sables Breton.  But they're for another day.  Remember I said I had about a hundred zillion cookery books?  Well, this baking journey meant that I had to invest in just a couple more and I was really excited when Edd Kimber's Patisserie Made Simple arrived the other day.  The photo of yummy Chocolate Sables jumped out at me and I knew they would be the first recipe to try.  It would also involve tempering chocolate and until now that's kind of scared me.  But no more!  A great result on my very first attempt.  Thanks, Edd :)

The trickiest part of this recipe for me was rolling the dough into uniform logs when the dough was kind of crumbly which meant that I didn't quite achieve Edd's 4cm thick logs and they ended up being nearer 7cm which I only realised when I was ready to cut them up into the individual biscuits.  Of course, being me, I needed them to be more precise and armed with the smallest cutter I have (5cm) I used this to make them neater and all the same size.

The chocolate tempering went very smoothly.  The only bit that had me unsure was after the initial temperature of 50 degrees had been achieved, I had to stir constantly until the temperature dropped to 28 degrees and I'd assumed this would be quick.  Aha, not so!  It took about 15 minutes but with a little patience it all worked out well.

These little biscuits are very rich so I decided to sprinkle them with chopped hazelnuts to cut through some of the intense chocolate flavour and for me, this worked really well.  Hubby thinks they'd be good with ice-cream.  Hmmm...looks like dessert tonight is sorted :)

Chocolate Sables Tea_rectangle_edited-1.jpg

Chocolate Sables (recipe from Edd Kimber's Patisserie Made Simple)

Ingredients

  • 275g PLAIN FLOUR

  • 40g COCOA POWDER

  • 3/4 tsp BICARBONATE OF SODA

  • 200g UNSALTED BUTTER AT ROOM TEMPERATURE

  • 50g CASTER SUGAR

  • 100g LIGHT SOFT BROWN SUGAR

  • 1/2 tsp VANILLA EXTRACT

  • 175 g DARK CHOCOLATE, 65-70% COCOA SOLIDS PREFERRED, ROUGHLY CHOPPED

Method

Sift the flour, cocoa powder, baking soda and 1½ teaspoons salt together into a medium bowl and stir to combine. Set aside.  Place the butter in a large mixing bowl and beat until smooth and light.  Add the sugars and vanilla extract and beat together for 2 minutes until smooth.  Add the dry ingredients and with the mixer on low speed, mix together until the mixture is sandy.  Add the chocolate and mix to combine.The final dough should look like soil and should not be over-beaten.  Tip the mixture onto the work surface and very gently knead to bring together. Divide the dough in half and roll into logs, about 4cm in diameter. Wrap in clingfilm and refrigerate. 
 

Preheat the oven to 180 degrees | 160 degrees fan and line two baking trays with parchment paper. Using a thin sharp knife, cut the log into cookies about 1cm thick - don’t worry if the cookies crumble, just press them gently back together.  Place onto the prepared baking trays and bake for 10-12 minutes or until they have spread and are lightly set around the edges but still soft in the middle. Allow to cool on the tray for 10 minutes before transferring to a wire rack to cool completely. 

Tempering Chocolate

The amount of chocolate you start with will make the same amount of tempered chocolate.  I used 150g roughly chopped dark chocolate (it should be good quality chocolate and have been stored in a cool place - I used 85% cocoa solids but you can use your own favourite chocolate here).

Put 3/4 of the chocolate in a heatproof bowl and set this over a saucepan of gently simmering water, making sure that the water does not touch the bottom of the bowl.  Stirring regularly, heat the chocolate to 50-55 degrees (this is the temp for dark chocolate; milk and white chocolate are different).  Then remove the bowl from the heat and add the remaining chocolate, stirring constantly until the temperature drops to 28-29 degrees.  Return the bowl to the heat and stirring constantly, heat again until the temperature increases to 31-32 degrees.  The chocolate should now be tempered.  Drop a little bit onto baking parchment and let it set for a couple of minutes.  If no streaks appear, you are good to go!  If you do see streak, you will have to start again :( 

Now that the biscuits are cool, dip them into the chocolate and then sprinkle on a little of whatever you fancy!

In Biscuits & Cookies Tags Chocolate, Sables
Comment

Harry Potter Cupcakes

January 25, 2015 Nicola King

This weekend we've enjoyed an early birthday party for one of my sons that he shared with a few of his friends from school.  Thirty of the most energetic six year olds (and younger) gathered for madness and mayhem.  I've kind of (unwittingly) introduced a tradition in our household for three celebration cakes for every birthday (one for the party, one to take into school and one for tea on the big day itself).  It's quite a challenge!  Especially coming up with three cake designs that have male street cred!  As there were going to be four (!) party cakes, we decided that I'd make cupcakes as they're so much easier to hand out whilst the big cakes were being cut up.

This year, it's all about Harry Potter.  We're reading each of the books before he's allowed to watch the film and he LOVES it.  So he challenged me with designing a set of cupcakes that reflected the most memorable things and for us they were: Harry, Ron, Hermione, snitch, firebolt, book of spells, sorting hat, Harry's glasses and wand and his scarf.  It was great fun creating them.  And the hardest bit?  Crazily it was creating the base board which was covered with sugarpaste, impressed with woodgrain and then painted with (edible) brown airbrush paint.  But I really wanted something to set off  the cupcakes so it was completely worth it.

The cupcakes were chocolate with chocolate buttercream (my most favourite recipe is the Primrose Bakery chocolate cupcakes) and the toppers were completely edible, made from sugarpaste.  Any painted features were added with Sugarflair Edible Tints mixed with a little vodka.  Although they did take a little time to create, the toppers were made earlier in the week and then added to cupcakes made fresh on the day so it felt relatively easy!

And the biggest reward for all the hard work is just looking at their little faces as the cakes are presented to the room with candles and the pride on my little boy's face that they were his birthday cupcakes, designed just for him.

I was just glad that I didn't have to do any of the tidying up :)

In Cupcakes, Celebrations Tags Birthday, Harry Potter, Cupcakes
Comment

Bacon & Chocolate Chip Cookies

January 23, 2015 Nicola King

Welcome to my very first blog post (ever!)  As this baking adventure is all about testing my  creative skills, challenging me to create new things and embracing new taste sensations, I decided to make these Bacon & Chocolate Chip Cookies from the fabulous I Am A Food Blog (Stephanie Le's website is very cool and as well as having amazing food photography, she has so many fun recipes to try).  

Now I'm not a savoury and sweet kind of girl (I mean, I like my pancakes with maple syrup but I'm just not that sure about the bacon on the side bit) although I liked the sound of trying a new tasting cookie - and as I was going to my very first coffee morning of the year, what better opportunity than gifting some of these cookies?  What I love about cookies is being able to prepare the dough the day before and then get them out of the fridge the morning of, all ready to go on their baking trays, and you have freshly baked yummy treats in no time.  So the verdict? Well, I just loved them and everyone else thought they were pretty scrummy too (especially the little bits of rock salt on top of a sweet cookie and the salty bacon throughout).  Pretty darn good.  And I will DEFINITELY be making them again.  So I think that qualifies as a very successful first official bake...and coffee morning :) 

Bacon and Chocolate Chip Cookies

This is taken from I Am A Food Blog but I've added some extra info that will help me next time I make them.  Stephanie makes 9 cookies out of the dough and these are huge so next time I may split this into 18 dough balls and cook them for less time.

Ingredients

  • 1 ¾ CUPS PLAIN FLOUR

  • ½ TSP BAKING SODA

  • ¾ TSP BAKING POWDER

  • 145g BUTTER AT ROOM TEMPERATURE

  • 115g CASTER SUGAR

  • ½ CUP + 1 TBSP SUGAR

  • ½ CUP + 2 TBSP BROWN SUGAR

  • 1 EGG

  • 1 TSP VANILLA EXTRACT

  • ½ CUP DARK CHOCOLATE CHIPS

  • 6 SLICES ENGLIGH BACON, FINELY CHOPPED & PAN-FRIED UNTIL CRISPY & DRAINED ON PAPER TOWER (THIS MAKES AROUND A ½ CUP OF BACON BITS)

  • SEA SALT

Method

  1. Sift the flour, baking soda and baking powder into a bowl and set aside.  Cream the butter and sugars until light and fluffy. Add the egg and mix well, ensuring you scrape down the sides of the bowl. 
  2. Now add the dry ingredients and mix until just combined.  Drop in the chocolate and bacon and mix through until evenly distributed.  Refrigerate for 24 hours. 
  3. The evening before baking, line a baking tray with parchment paper and divide the mixture into 9 balls and then pop them back into the fridge until ready to bake.
  4. When ready to bake, pre-heat the oven to 175 degrees and sprinkle the dough balls with a little sea salt.  Bake for around 18-20 minutes until the cookies are golden brown but still soft. 
  5. Cool on their baking tray for 10 minutes before moving to a cooling rack.  Then – ENJOY!
In Biscuits & Cookies Tags Bacon, Chocolate, Cookies
1 Comment
← Newer Posts

To subscribe, please enter your email address:

Delivered by FeedBurner

Yay for the weekend!! If you saw how I made pineapple flowers earlier this week, here they are adorning my very first Hummingbird cake. I am totally in love with them! I also added a few @edible_flowers to complement them and this makes the perfect w
I was so grateful to be #gifted some beautiful @cotswoldflour flour recently with a challenge to make something from my #bakingbucketlist and so I set about making a Nutella babka and scrolls with them. I’ve had a mixed love affair with bread m
I found the cutest miniature pineapple in the local petrol station co-op so decided to make these roasted pineapple flowers. I think they’re so pretty and remind me of lovely sunflowers. I thought they’d go well with a Hummingbird cake so
We had great fun baking this Malteser Millionaire’s Shortbread which is absolutely delicious! This was something the boys wanted to bake - who can resist a delicious shortbread base, topped with gooey caramel and then a final layer of swirled m
As the rain and clouds returned to our skies this weekend, we’ve been looking for comforting lockdown treats. These Blackberry & Star Anise Friands, dripping with sticky blackberry juice icing are the perfect choice 💗 The recipe is from Sw
You might have seen from my Stories this weekend that I made cinnamon buns. I don’t have the best track record with bread but I’m overcoming my inner fear! These buns were so delicious. It was an amalgamation of a few recipes but the base
  • Serendipity Bakes
    Coconut & Raspberry Friand Muffins
    May 29, 2019, 9:38 PM
  • Serendipity Bakes
    Thank you for sharing my photo of your delicious recipe 😋 @rkhooks Happy Sunday! https://t.co/niKamgfjvt
    Mar 3, 2019, 2:38 PM
  • Serendipity Bakes
    RT @BiscuiteersLtd: Our friends at @thewhitecompany asked us to design something special to celebrate their New York stores first birth… https://t.co/kTsMH57wRv
    Jun 28, 2018, 11:09 AM

Enter your email address:

Delivered by FeedBurner

Powered by Squarespace

Nicola King at Serendipity Bakes Follow my blog with Bloglovin Follow