

This delicious Salted Caramel Magic Custard Cake is perfect for sharing with friends this bank holiday. Layers of Genoise sponge, silky caramel custard and a moist cake base. And the magic? All this from one simple batter!
Read moreSpinach and Feta Rolls

The great thing about living in London (and one of my favourites) is that we're so close to amazing cafes, shops and restaurants within a stone's throw of us. It's perfect if you run out of some ingredient, fancy popping out for a drink with friends and we walk everywhere. The cafe culture has certainly given us fantastic eateries, delis and patisseries!
We have a cafe close to us which is the place for meeting up with friends for a cuppa and enjoying some of their freshly baked goods. But as much as I enjoy eating their wares, it always inspires me to want to make my own versions at home. One of my lunchtime favourites is the Spinach and Feta Roll and now I've created a homemade version, I can see it frequenting my kitchen on a regular basis :)

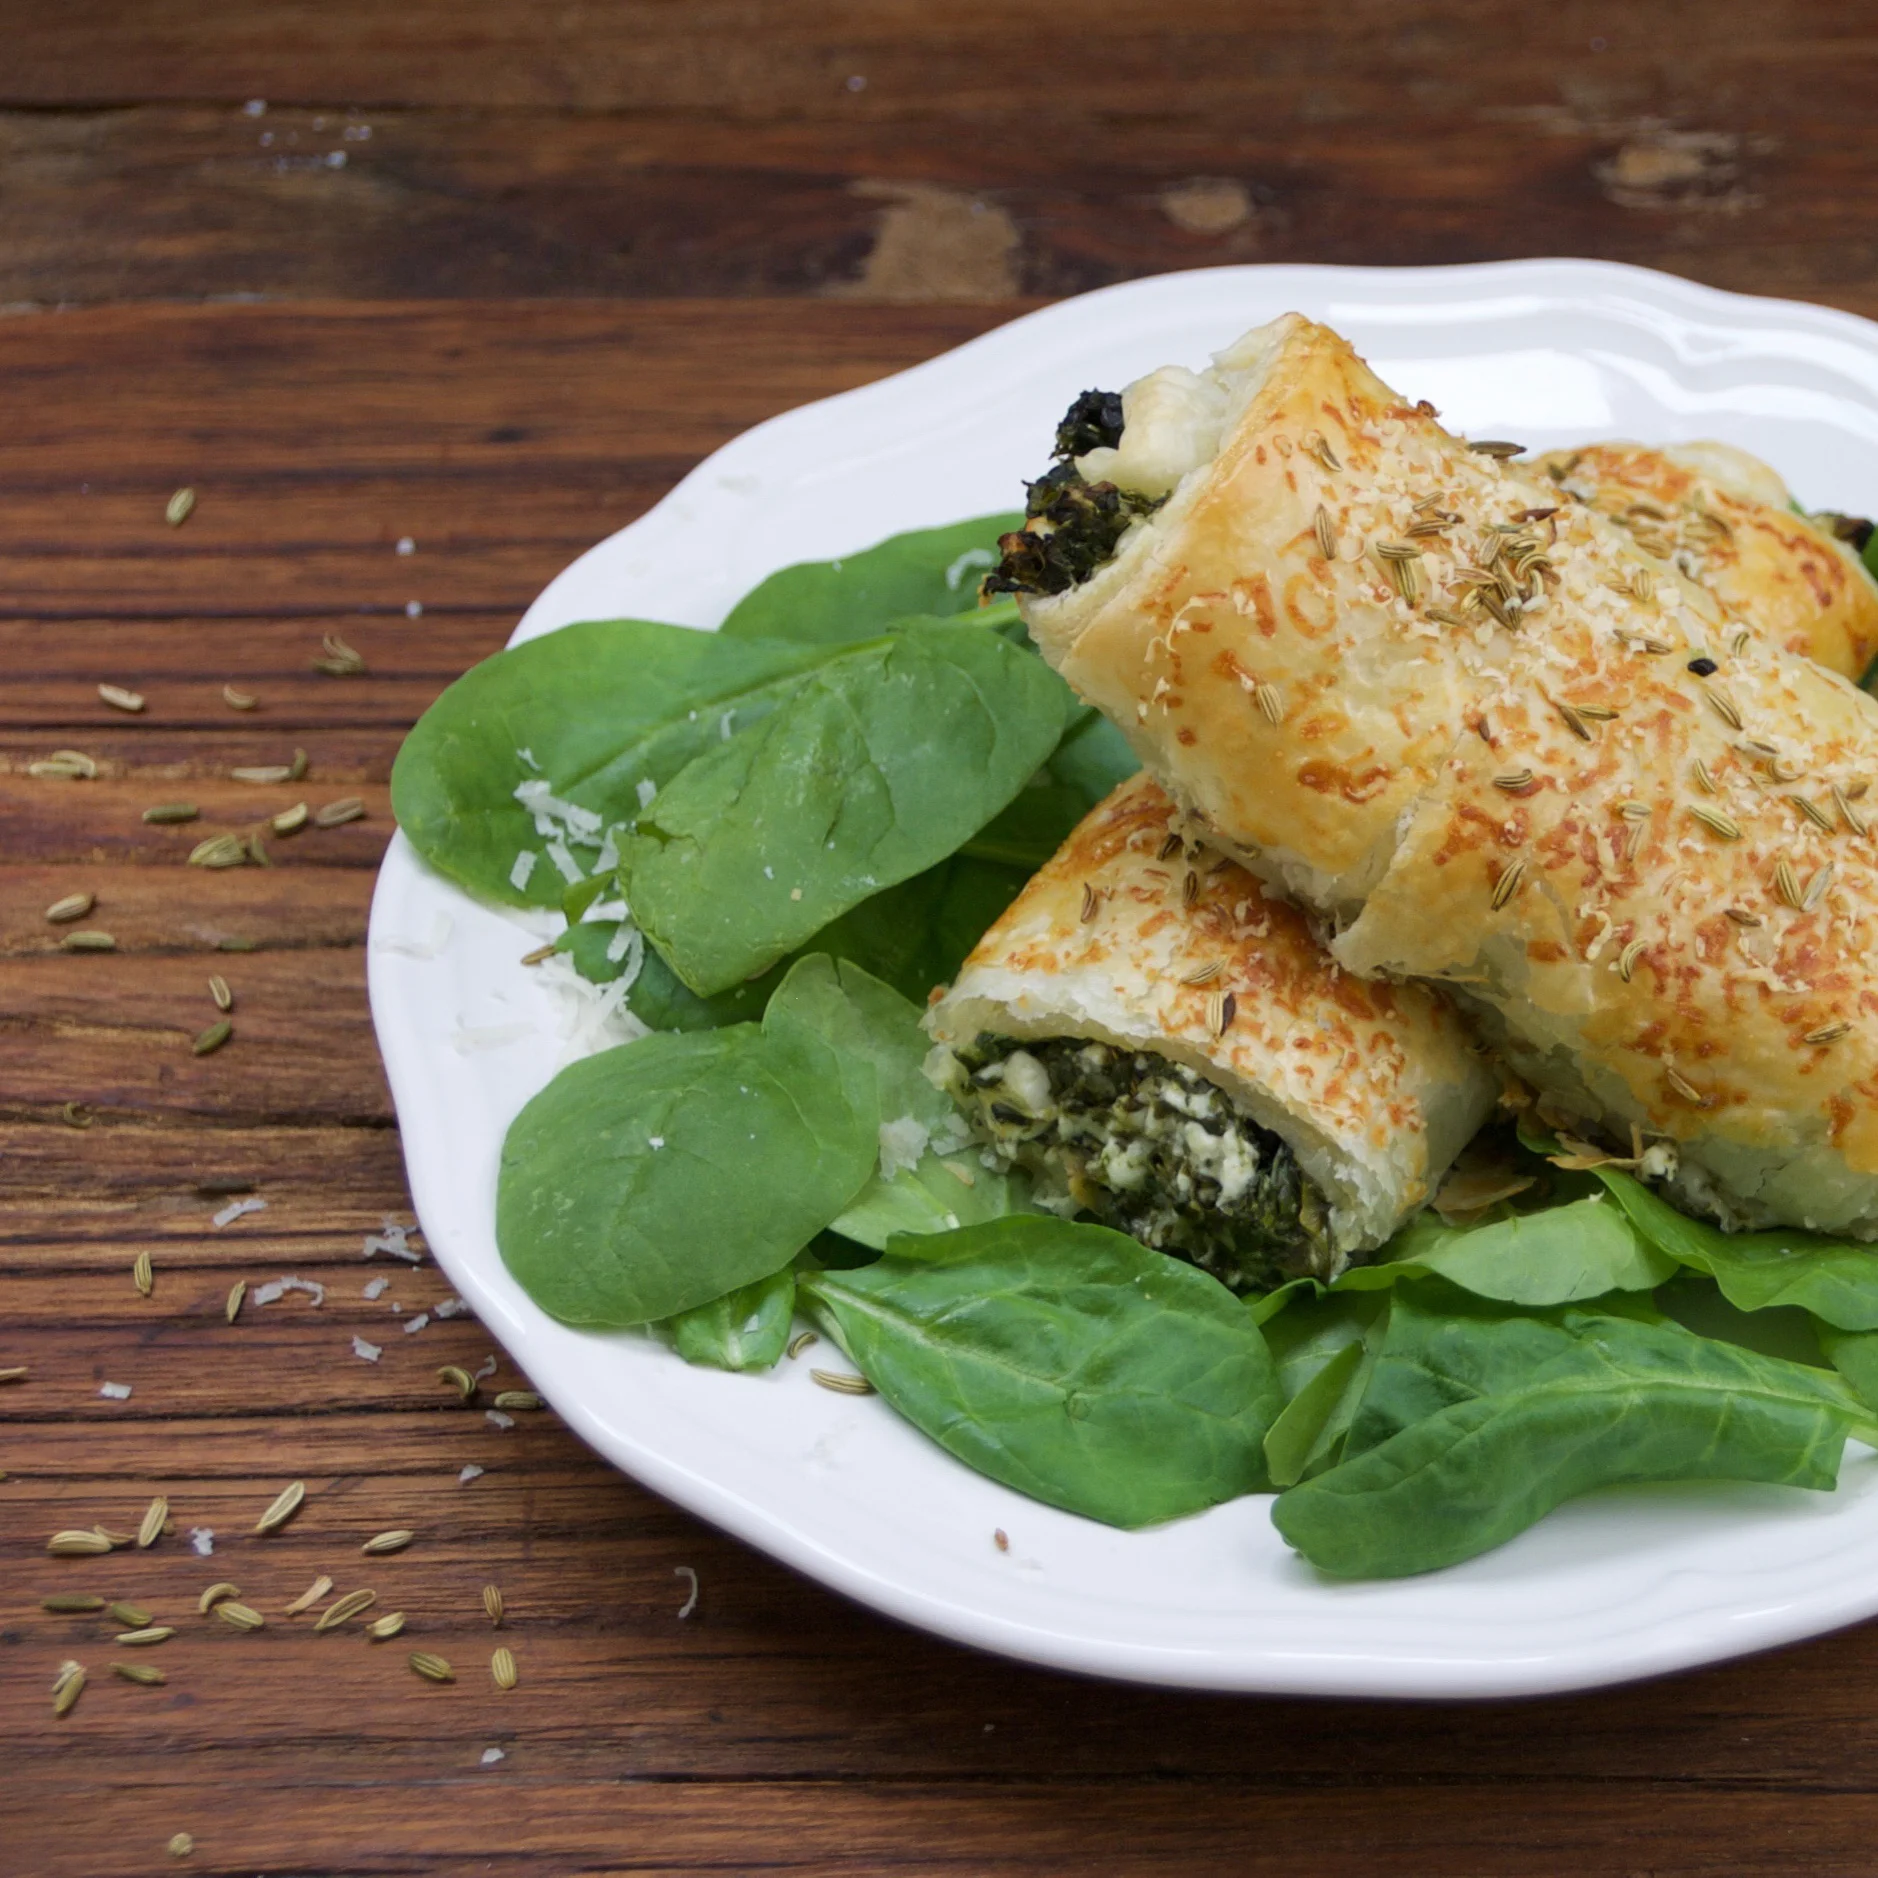
This little roll is super tasty and is filled with a mixture of spinach and feta, rolled in a blanket of puff pastry and then topped with eggwash, parmesan and fennel. They are simple to make but are delicious and you can have them freshly baked on your table in next to no time. I've never been a fan of aniseed but the fennel really does add a lovely twist to these and with the parmesan, a perfect crisp exterior to the little rolls.
We start by making the filling. I use frozen spinach and cook it in a small saucepan with a couple of tablespoons of water for around 5 minutes or until the spinach fully defrosts. Then we need to remove some of the water, so it's placed in a sieve and the water squeezed out by pressing the spinach against the sieve sides with the back of a spoon. Once we've removed most of the water, the spinach goes into a small bowl. The chopped feta is added and mashed together with the spinach using a fork. You're not looking for a puree consistency, but for it to be combined with small chunks of feta remaining. Next we season with a dash of nutmeg and a little salt and pepper.

Once the filling is ready, we unwrap our puff pastry and lay it on a lightly floured work surface. The pastry needs to be cut in half horizontally to make two rectangles (each rectangle will make two rolls) and then half of the filling is laid half-way down, in a line horizontally across the first rectangle. The pastry is rolled up from the bottom side to the top to make a long sausage roll and then sealed with eggwash. This is then repeated with the second piece of pastry.

Finally we brush the tops of the rolls with egg wash and then grate parmesan across the surface and sprinkle fennel seeds on top. They're popped into the oven for around 15-20 minutes. Once they're out of the oven, the rolls can be cut in half to make four rolls for sharing (or you can eat one long roll if you're really hungry!)

When we all lead such busy lives, it's nice to be able to treat yourself to a tasty lunch which doesn't take too much time to prepare but which has lots of amazing flavours and is freshly baked.
And if you're working away from home, the rolls can also be made the previous day ready for you to take with you.
Nothing's better than one of these rolls on the run!
Spinach & Feta Rolls
Makes 4 rolls (1 roll per person)
Ingredients
- 200G FROZEN SPINACH
- 120G FETA, CRUMBLED INTO PIECES
- 320G PUFF PASTRY
- 1 TSP NUTMEG
- SALT AND PEPPER (for seasoning)
- 1 EGG, LIGHTLY BEATEN (this is the eggwash)
- 2 TBSP FENNEL SEEDS
- 2 TBSP PARMESAN, GRATED
Method
- Preheat the oven to 180 degrees (fan)
- Place the frozen spinach into a small saucepan with a couple of tablespoons of water and heat on a medium heat until the spinach is completely defrosted
- Transfer the spinach to a sieve and using a fork, press the spinach against the sides of the sieve to remove as much water as possible
- Put the spinach in a small bowl and add the crumbled feta cheese
- Add the nutmeg, salt and pepper to taste and then combine them with a fork -- you're looking for the ingredients to be combined but not over-mixed as you don't want a puree consistency
- Remove your puff pastry from the fridge
- Lay it on a lightly floured board with the long sides at the top and bottom of your board
- Cut the pastry in half down the middle from left to right so you have two pieces of pastry
- Half-way down each piece of pastry, spread a line of filling evenly from left to right
- Roll each piece of pastry from top to bottom so you have a long sausage roll and then seal the pastry with a line of eggwash
- Brush the top of each roll all over with eggwash, then grate parmesan across the surface and then sprinkle the fennel seeds on top
- Place on baking paper on baking trays and then bake for around 15-18 mins -- when they're ready the tops should be a lovely golden brown
- Remove from the oven and eat immediately -- or allow to cool and eat the next day :)
Strawberry and Rhubarb Crumble Muffins

One of my favourite puddings ever is Fruit Crumble. It doesn't really matter that much what you pair the Crumble with (although my absolute favourite is apple and raspberry), it just needs as much flakey crumble as possible on the top (generally two to three times the amount regular recipes would suggest!) I always think of it being an autumnal-going-into-winter pud but I have a recipe for you that transforms it into a light, beautifully fresh cake that brings with it the sweetness and summery fruits that are just coming into season.

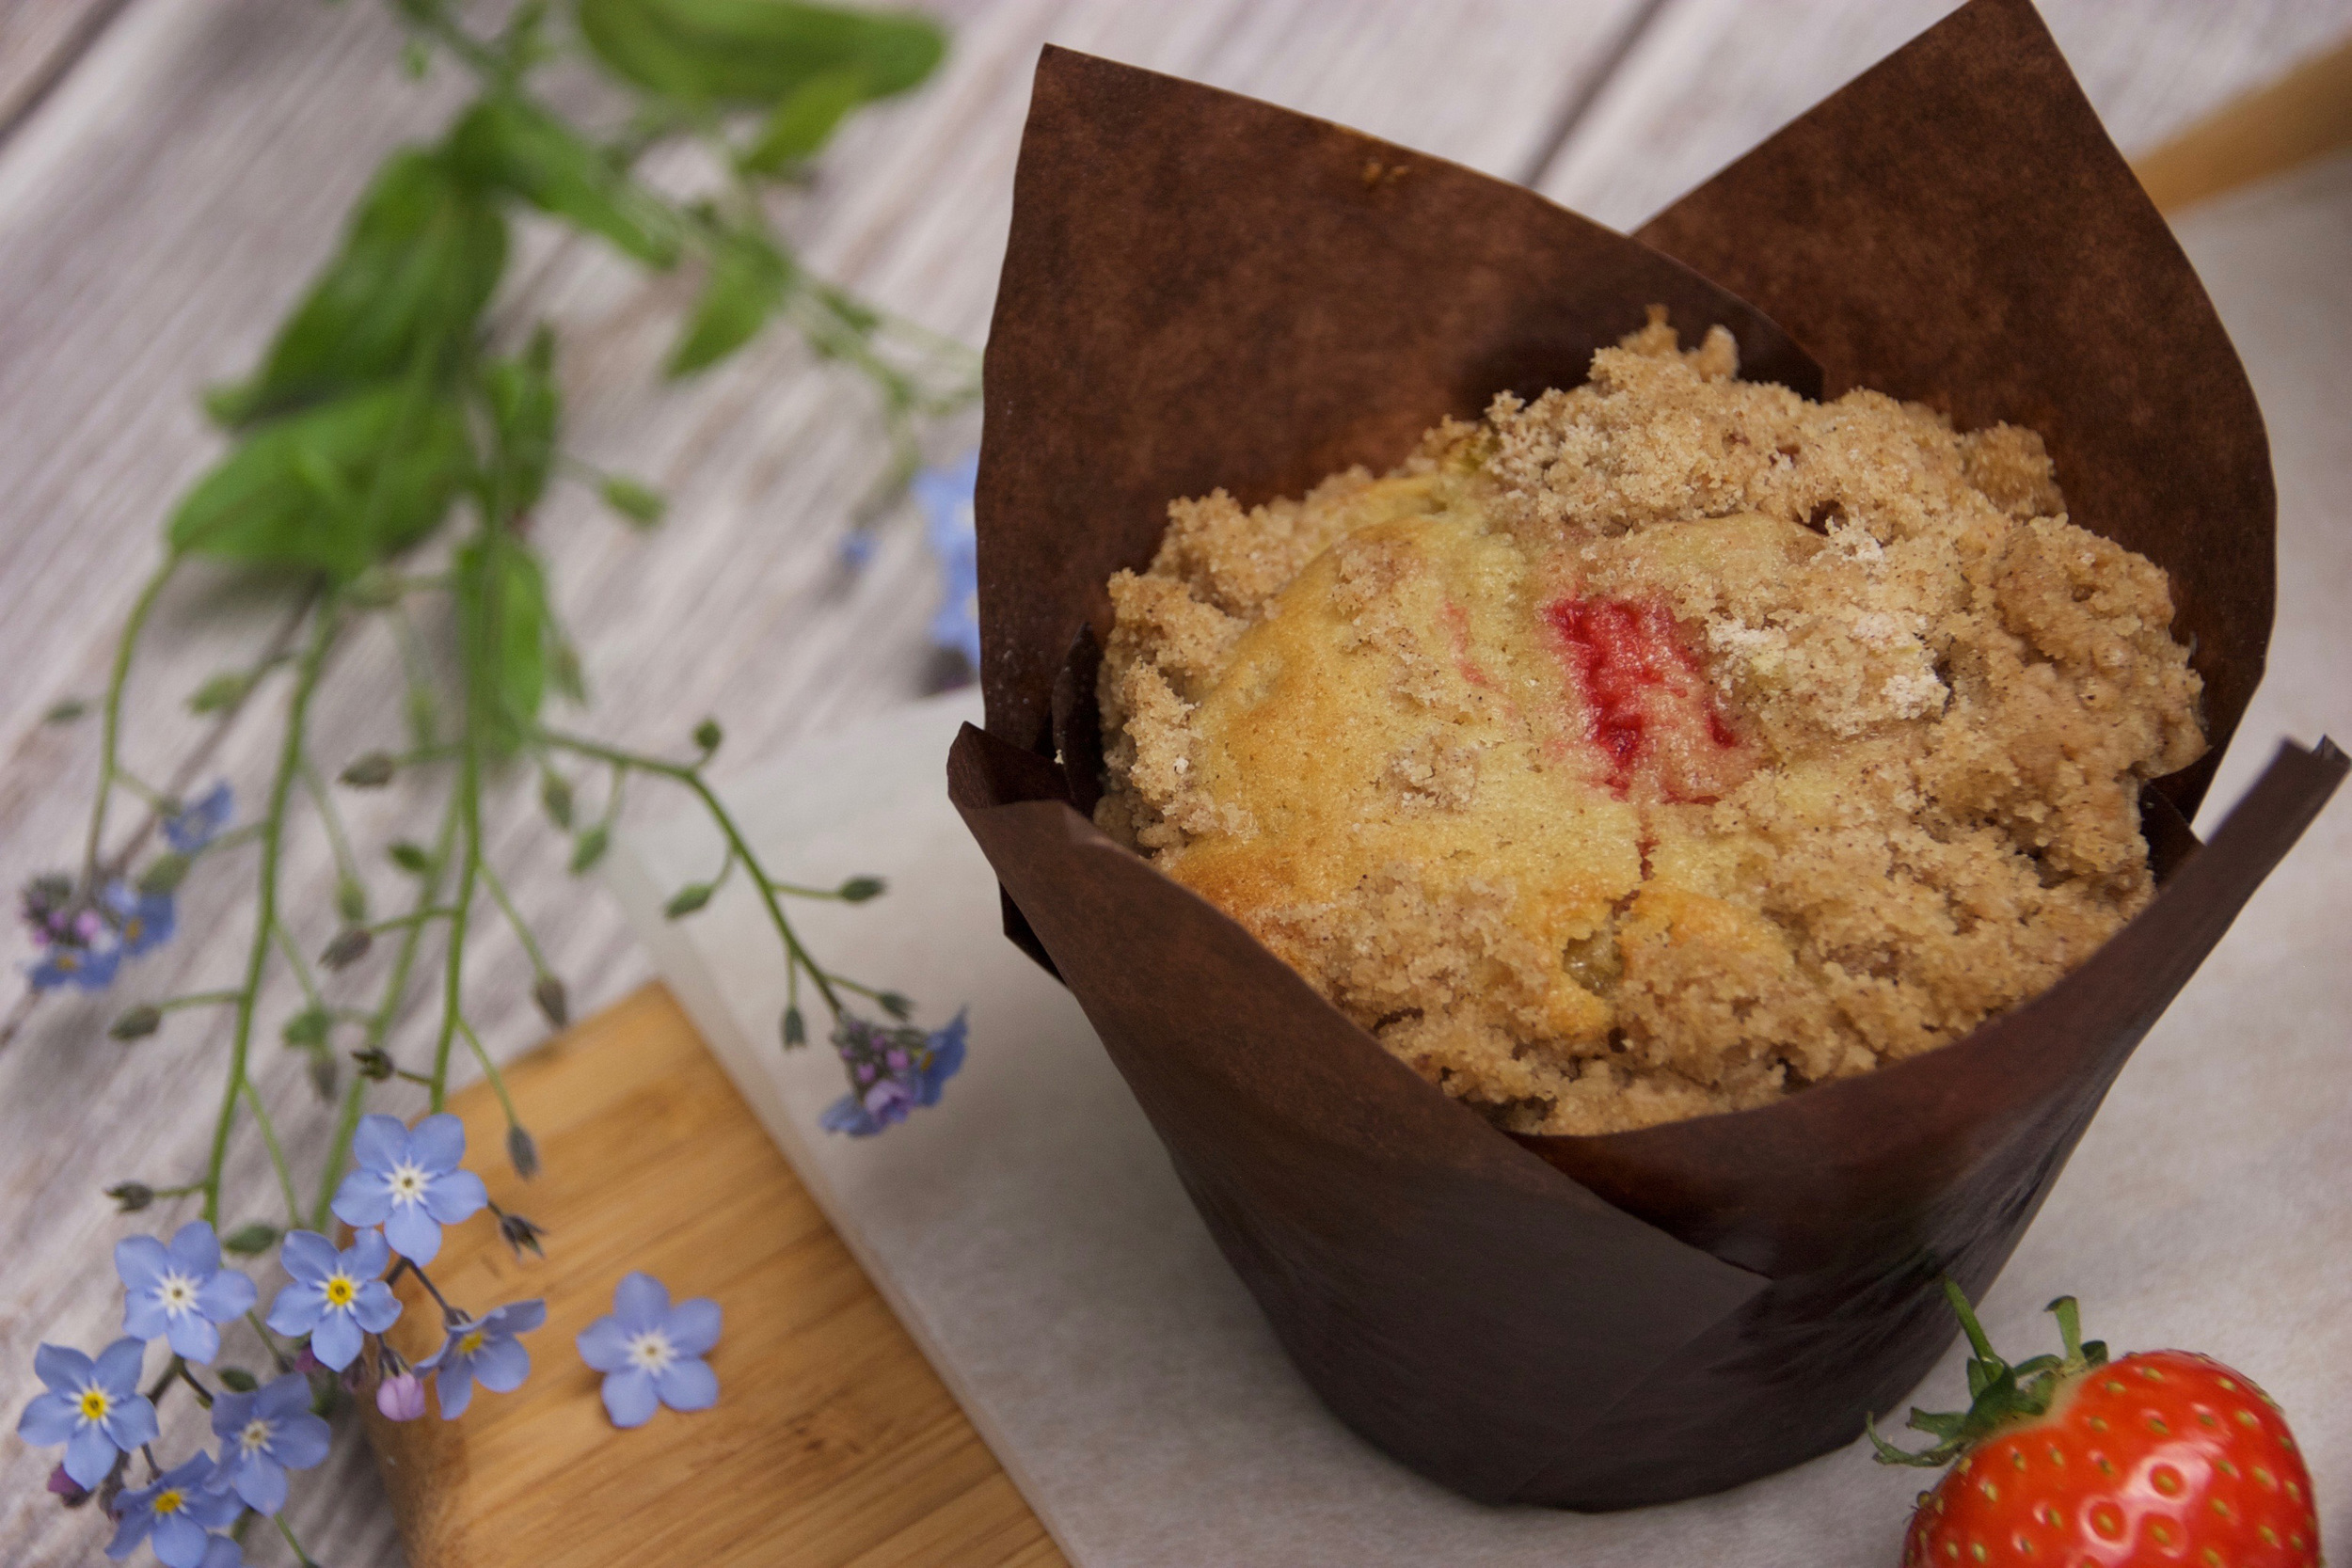
These Strawberry and Rhubarb Crumble Muffins are simply divine. Strawberries are so sweet at the moment and they add freshness and juice to the final cakes. The cakes themselves have a delicate crumb and with the moistness of the strawberries they are quite fragile. I tried making them straight in a muffin tin, but having a wrap around the outside really helps hold them together, although you could use cupcake papers instead. The idea for this came from my Apple and Rhubarb Crumble Cake which I was going to make the other day and then I decided I'd love to put some fruity strawberries into it instead. They are are stirred through the batter and then topped with rhubarb and finally the crumble.
The hardest part of making these muffins is the chopping! I suggest cutting up the fruit into very small pieces, particularly the rhubarb. And I always start making these by doing this job first. My recommendation is around four large strawberries for six muffins and one stick of rhubarb. Then I make them crumble -- you can either rub the butter into the flour and sugar with your fingers or blitz them in the food processor. The muffin batter itself is very simple. We cream the butter and brown sugar, then add the eggs and vanilla. Once they're all incorporated, sift the flour over the top, mix thoroughly and then finally stir through the milk and strawberries.

I use an ice cream scoop to fill my muffin cases and once the mixture is divided evenly amongst the cases, sprinkle the tops with rhubarb and then finally the crumble (and I like to completely cover the top of the muffin with the crumble layer, so you can't see any fruit peeking out). They should be baked for around 25 minutes and you can check them as you would with any other cake, by checking a skewer inserted in the middle comes out clean.

Once they're baked and out of oven, we leave them in the tin for around 10 minutes and then lift them out carefully to cool on a rack. I recommend leaving them in their wrappers for stability -- they do firm up as they get cooler but they are at their most delicious warm from the oven.
These muffins are perfect for coffee mornings, lunch or afternoon tea. They do have a sweet sugary hit from the crumble which might seem a bit over-indulgent for breakfast, but just amazing for brunch!
You could kid yourself that the fruit in them makes them healthy, but when something tastes this good, you should just enjoy it for what it is :)
Strawberry and Rhubarb Crumble Muffins
Makes 6 muffins

Crumble Ingredients
- 50G SELF-RAISING FLOUR
- 40G SOFT BROWN SUGAR
- 1/2 TSP CINNAMON
- PINCH OF SALT
- 40G BUTTER
Muffin Ingredients
- 100G BUTTER
- 100G SOFT BROWN SUGAR
- 2 EGGS
- 2 TSP VANILLA ESSENCE
- 175G SELF-RAISING FLOUR
- 2 TBSP MILK
- 4 LARGE STRAWBERRIES
- 1 STICK CHOPPED RHUBARB
Method
- Start by putting all the crumble ingredients in a bowl and rub the mixture with your fingertips until a fine crumble has formed and set this aside
- Preheat the oven to 170 degrees (fan)
- Line your muffin tin with paper cases
- Chop the rhubarb into small pieces and set aside
- Chop the strawberries into small pieces and set aside
- Cream the butter and sugar
- Beat in the eggs and vanilla
- Sift in the flour
- Fold in the strawberries and milk
- Spoon the batter into the prepared muffin wrappers
- Sprinkle the rhubarb over the top
- Scatter the crumble over the top, ensuring that no fruit can be seen
- Bake them for around 20-25 mins (you can test the muffin centres with a skewer to ensure they're cooked)
- Enjoy them warm from the oven for the best taste experience!
- If you're keeping some for another day, store them in an airtight container -- I always like to freshen up the muffins with around 10-15 seconds in the microwave :)
Chocolate Financiers

This week sees my little boy go on his first residential course with school. He's eight and so, so excited. Midnight feasts, fun activities, outdoor pursuits, sleepovers, disco dancing. He can't wait; I just know I'm going to be in pieces! So I'm over-compensating and spoiling my boys with some yummy goodies for the next few days. Cue these delicious Chocolate Financiers.
I love patisserie. It makes me think of Paris and the counters of stunning old-fashioned patisseries over-brimming with pastries, tarts, custard, cream, fruit. So many amazing delicacies to sample but the word patisserie when it comes to home-baking can be quite scary. You imagine huge complicated recipes with lots of stages and the truth is that it can be like that. But there are other more simple bakes that are much more manageable and don't need huge reams of fancy equipment or two days to prepare. The most important thing you need to do is follow the ratios of the ingredients and measure them accurately. If you do that, you too can create their delicious delicacies.

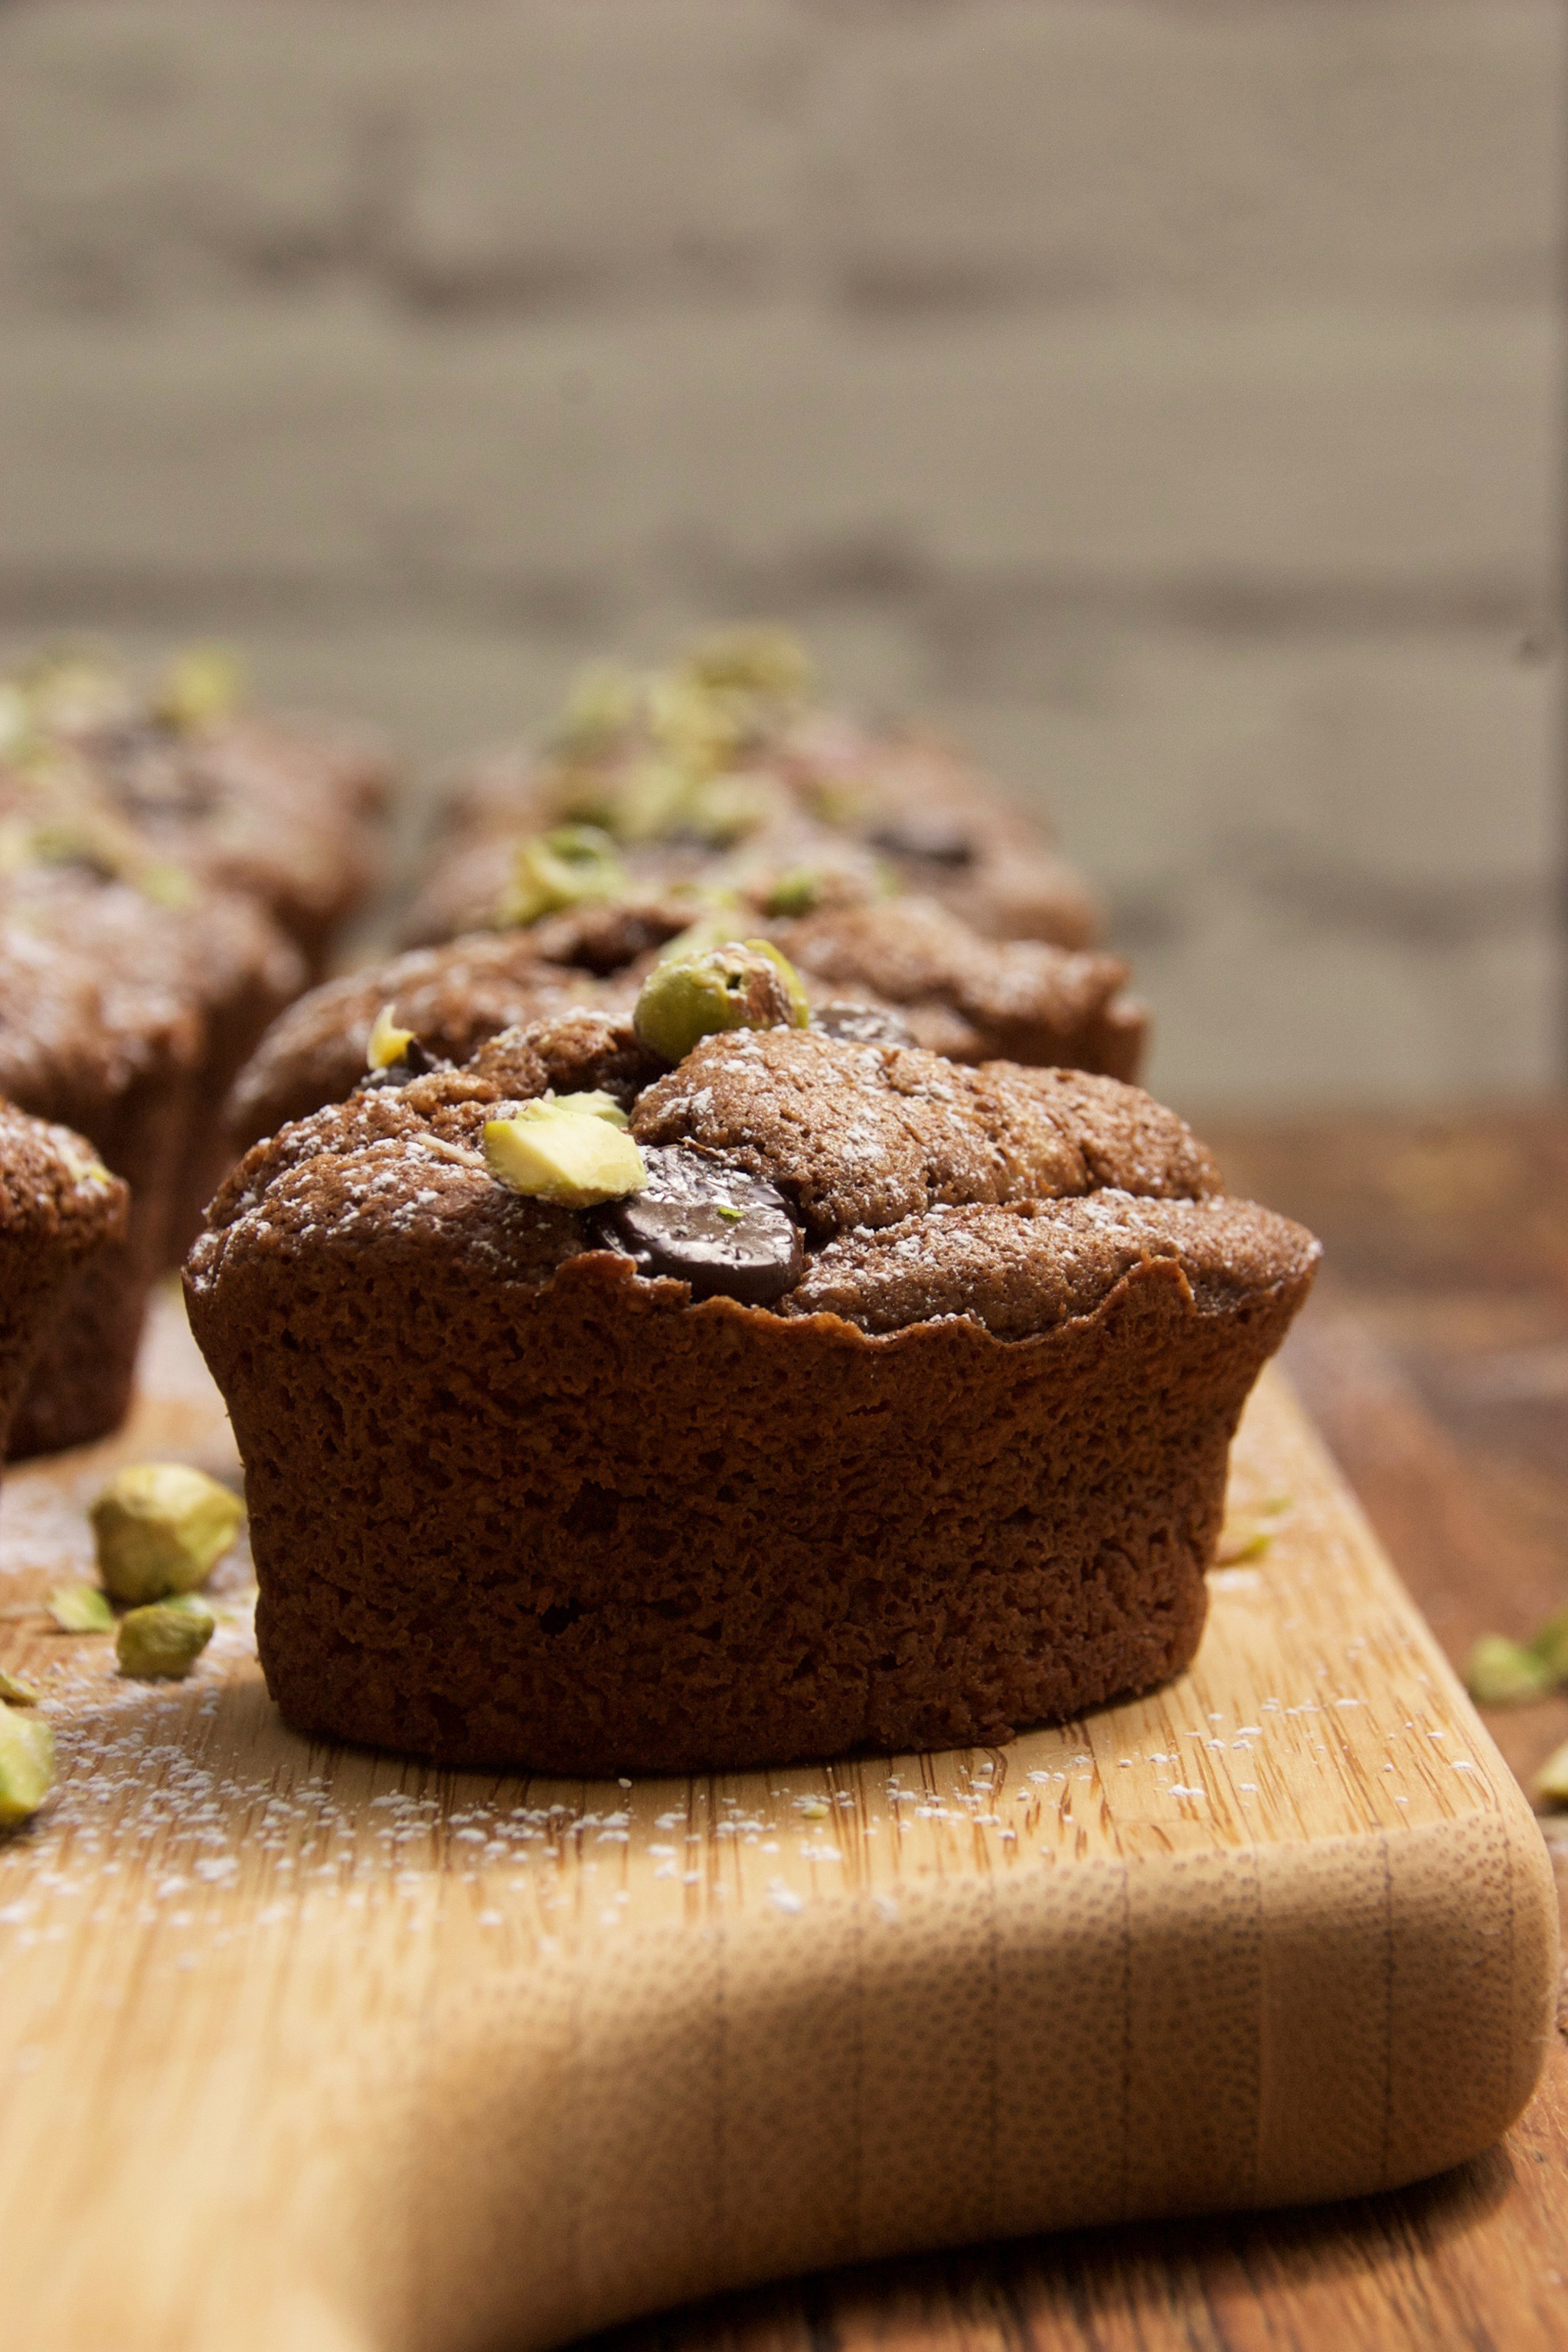
These Chocolate Financiers are incredible. Traditionally they would be little rectangles (like little loafs) but I don't have that tin and am already packed to the rafters with baking equipment and different types of tins. So I used my Friand tin where the shapes are little ovals - but you could also make these in cupcake tins or whatever you have to hand. Just be sure to adjust the baking times accordingly if your individual Financiers are a lot larger or smaller than mine.
I wanted to make chocolate financiers since my boys love chocolate and this is a special treat for them, after all. I would usually have put pistachios into the cake batter but my boys aren't fond of nuts in the cake itself so I held back and sprinkled them over the top and this way they can removed later! What I did do, was add a few chocolate chips onto the top of the batter before popping them in the oven and they melted deliciously.
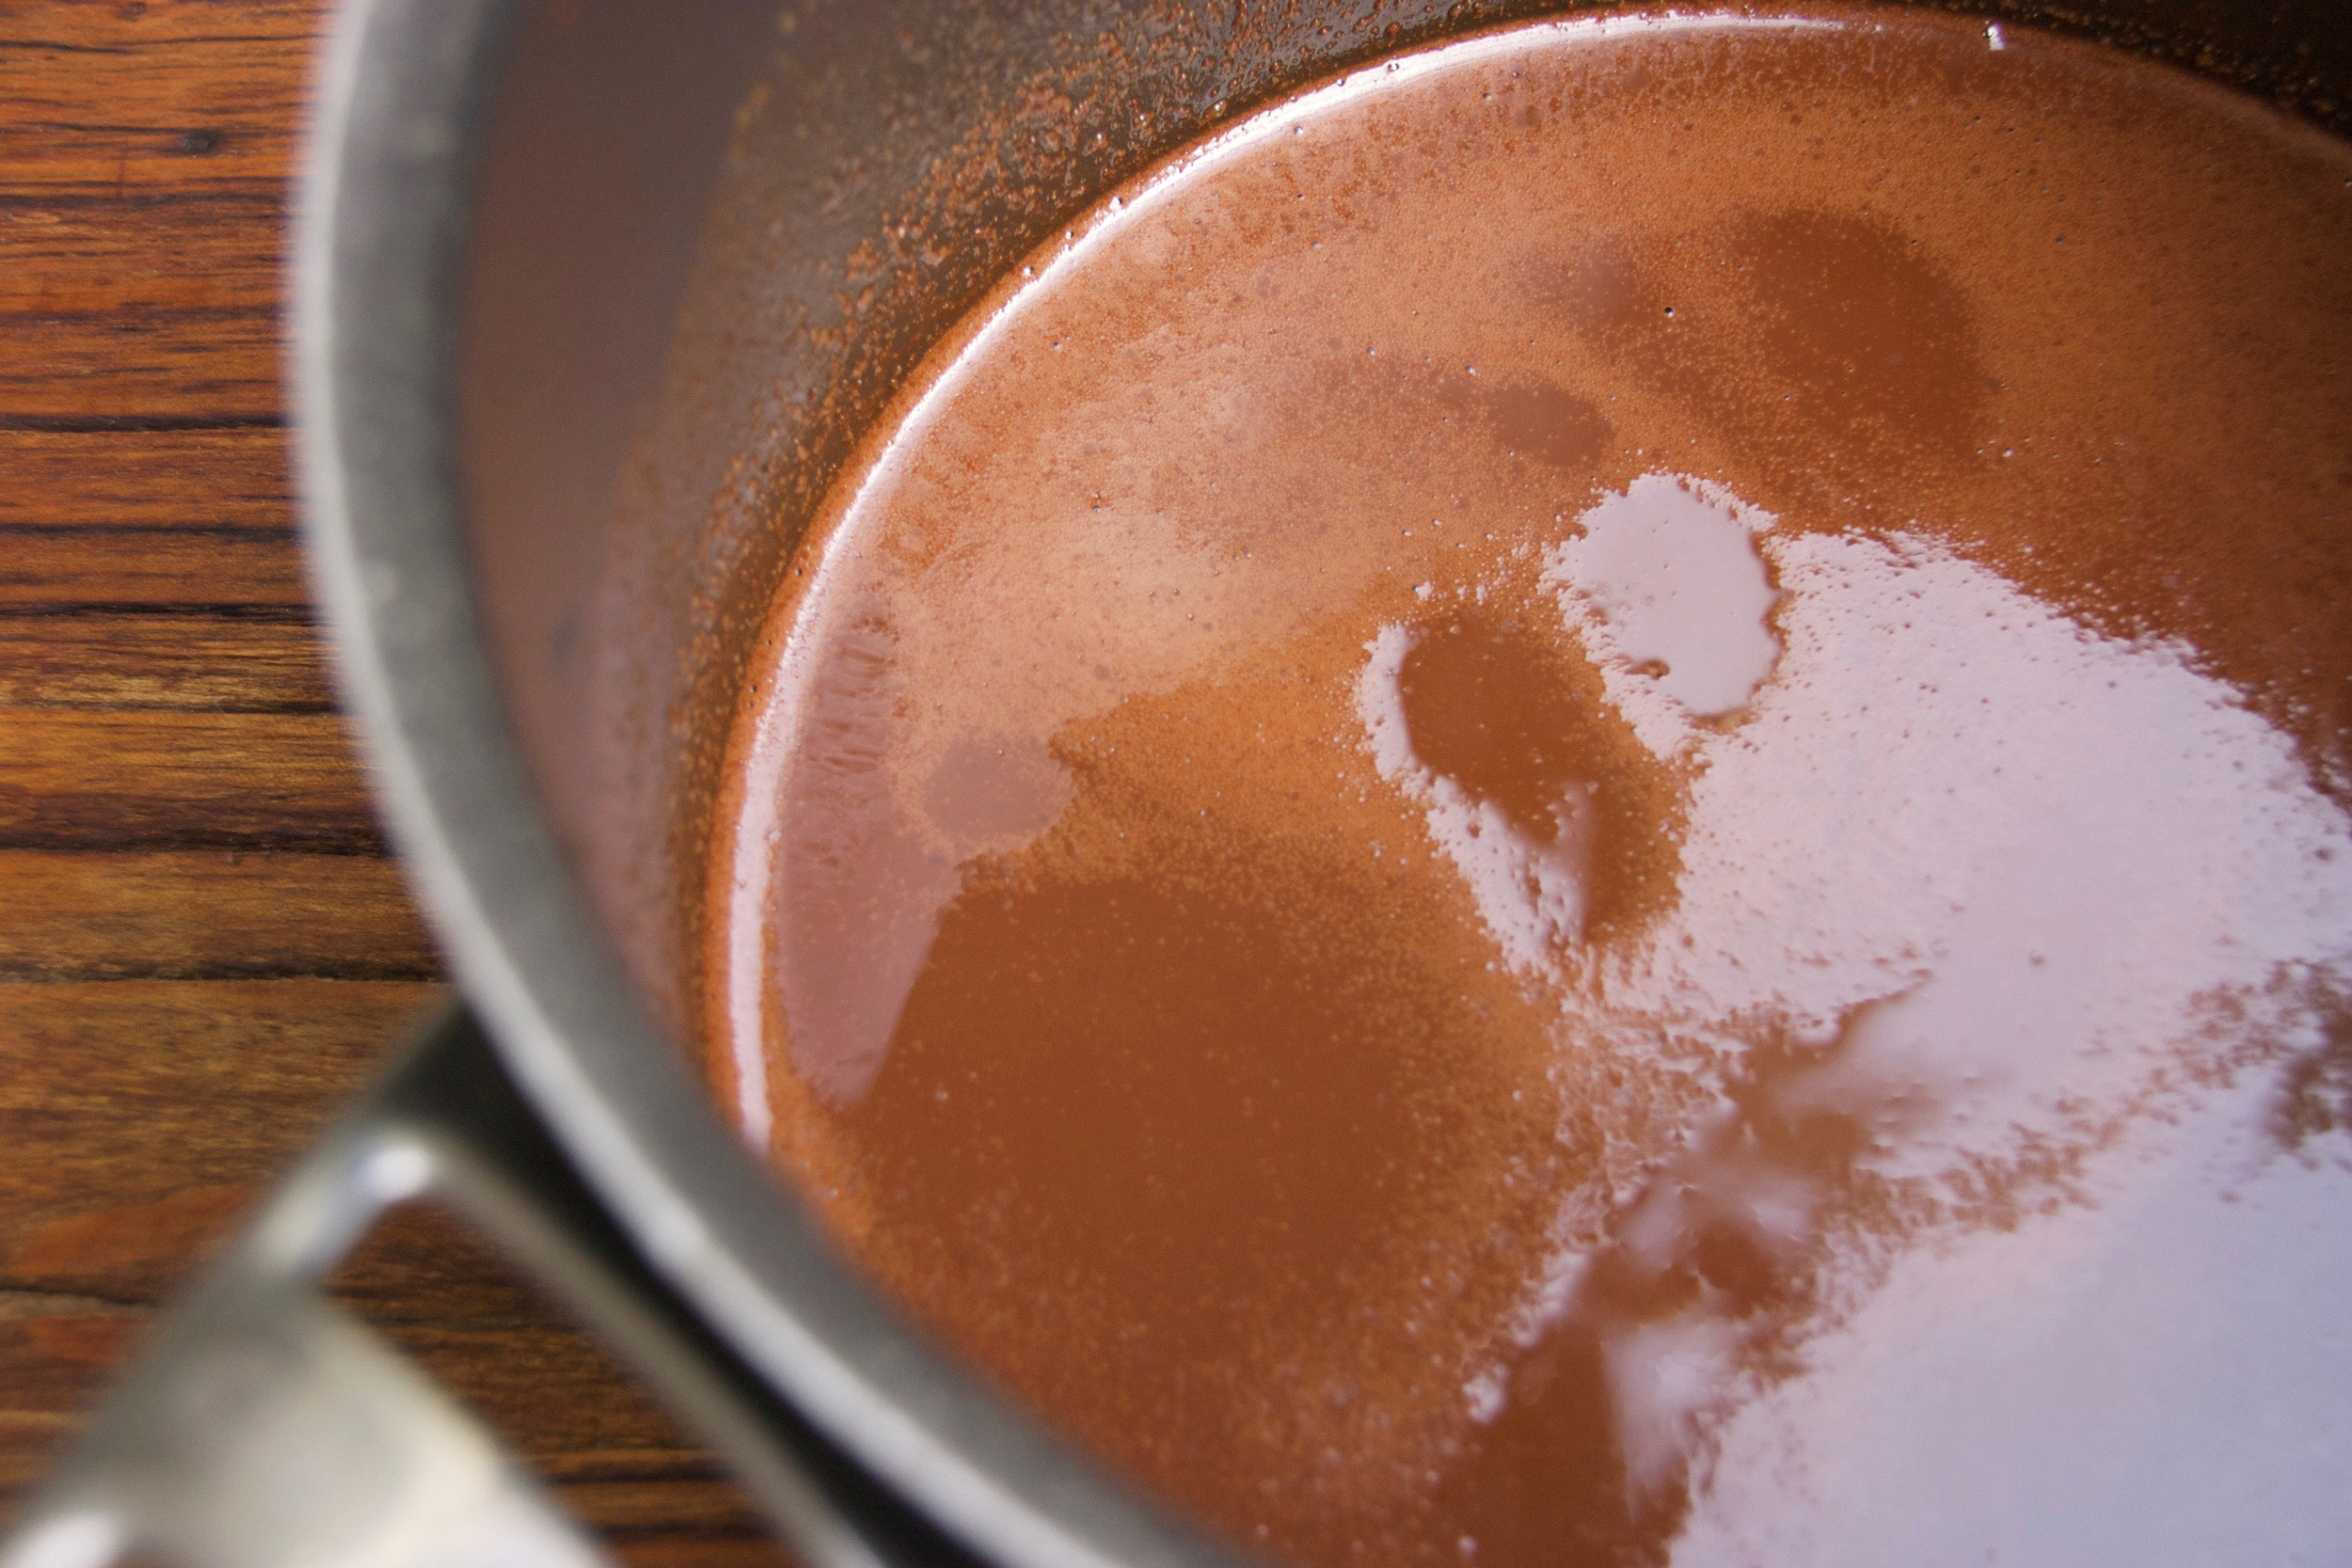
So the first thing we do is preheat the oven and grease the cavities of your chosen tin well. Then melt the butter and vanilla in a saucepan over a medium heat until melted. Keep the butter over a medium heat until it turns brown (around 5 minutes), being careful not to let it burn. This makes a buerre noisette and when making blonde financiers (ie not chocolate ones) this gives them their golden colour. Once brown, the chocolate is added and stirred together until melted. Then set aside to cool a little.
The next stage is to whisk the egg whites and icing sugar together until soft peaks form. This takes around 5 minutes. Sift the flour and ground almonds over the top of the egg and sugar mixture and then fold them in with a metal spoon. When they're fully mixed, pour the chocolate into the bowl down one of inside edges (this is so that you don't drop the chocolate straight on top of your mixture when you've taken time to fold it and keep lots of air in). Fold the chocolate into the mixture, making sure that you scrape the bottom and sides of the bowl well as the chocolate will all sink to the bottom and you want it folded throughout. The worst thing is when you come to put your mixture into the tin and find a layer of chocolate at the bottom that hasn't been mixed through properly.
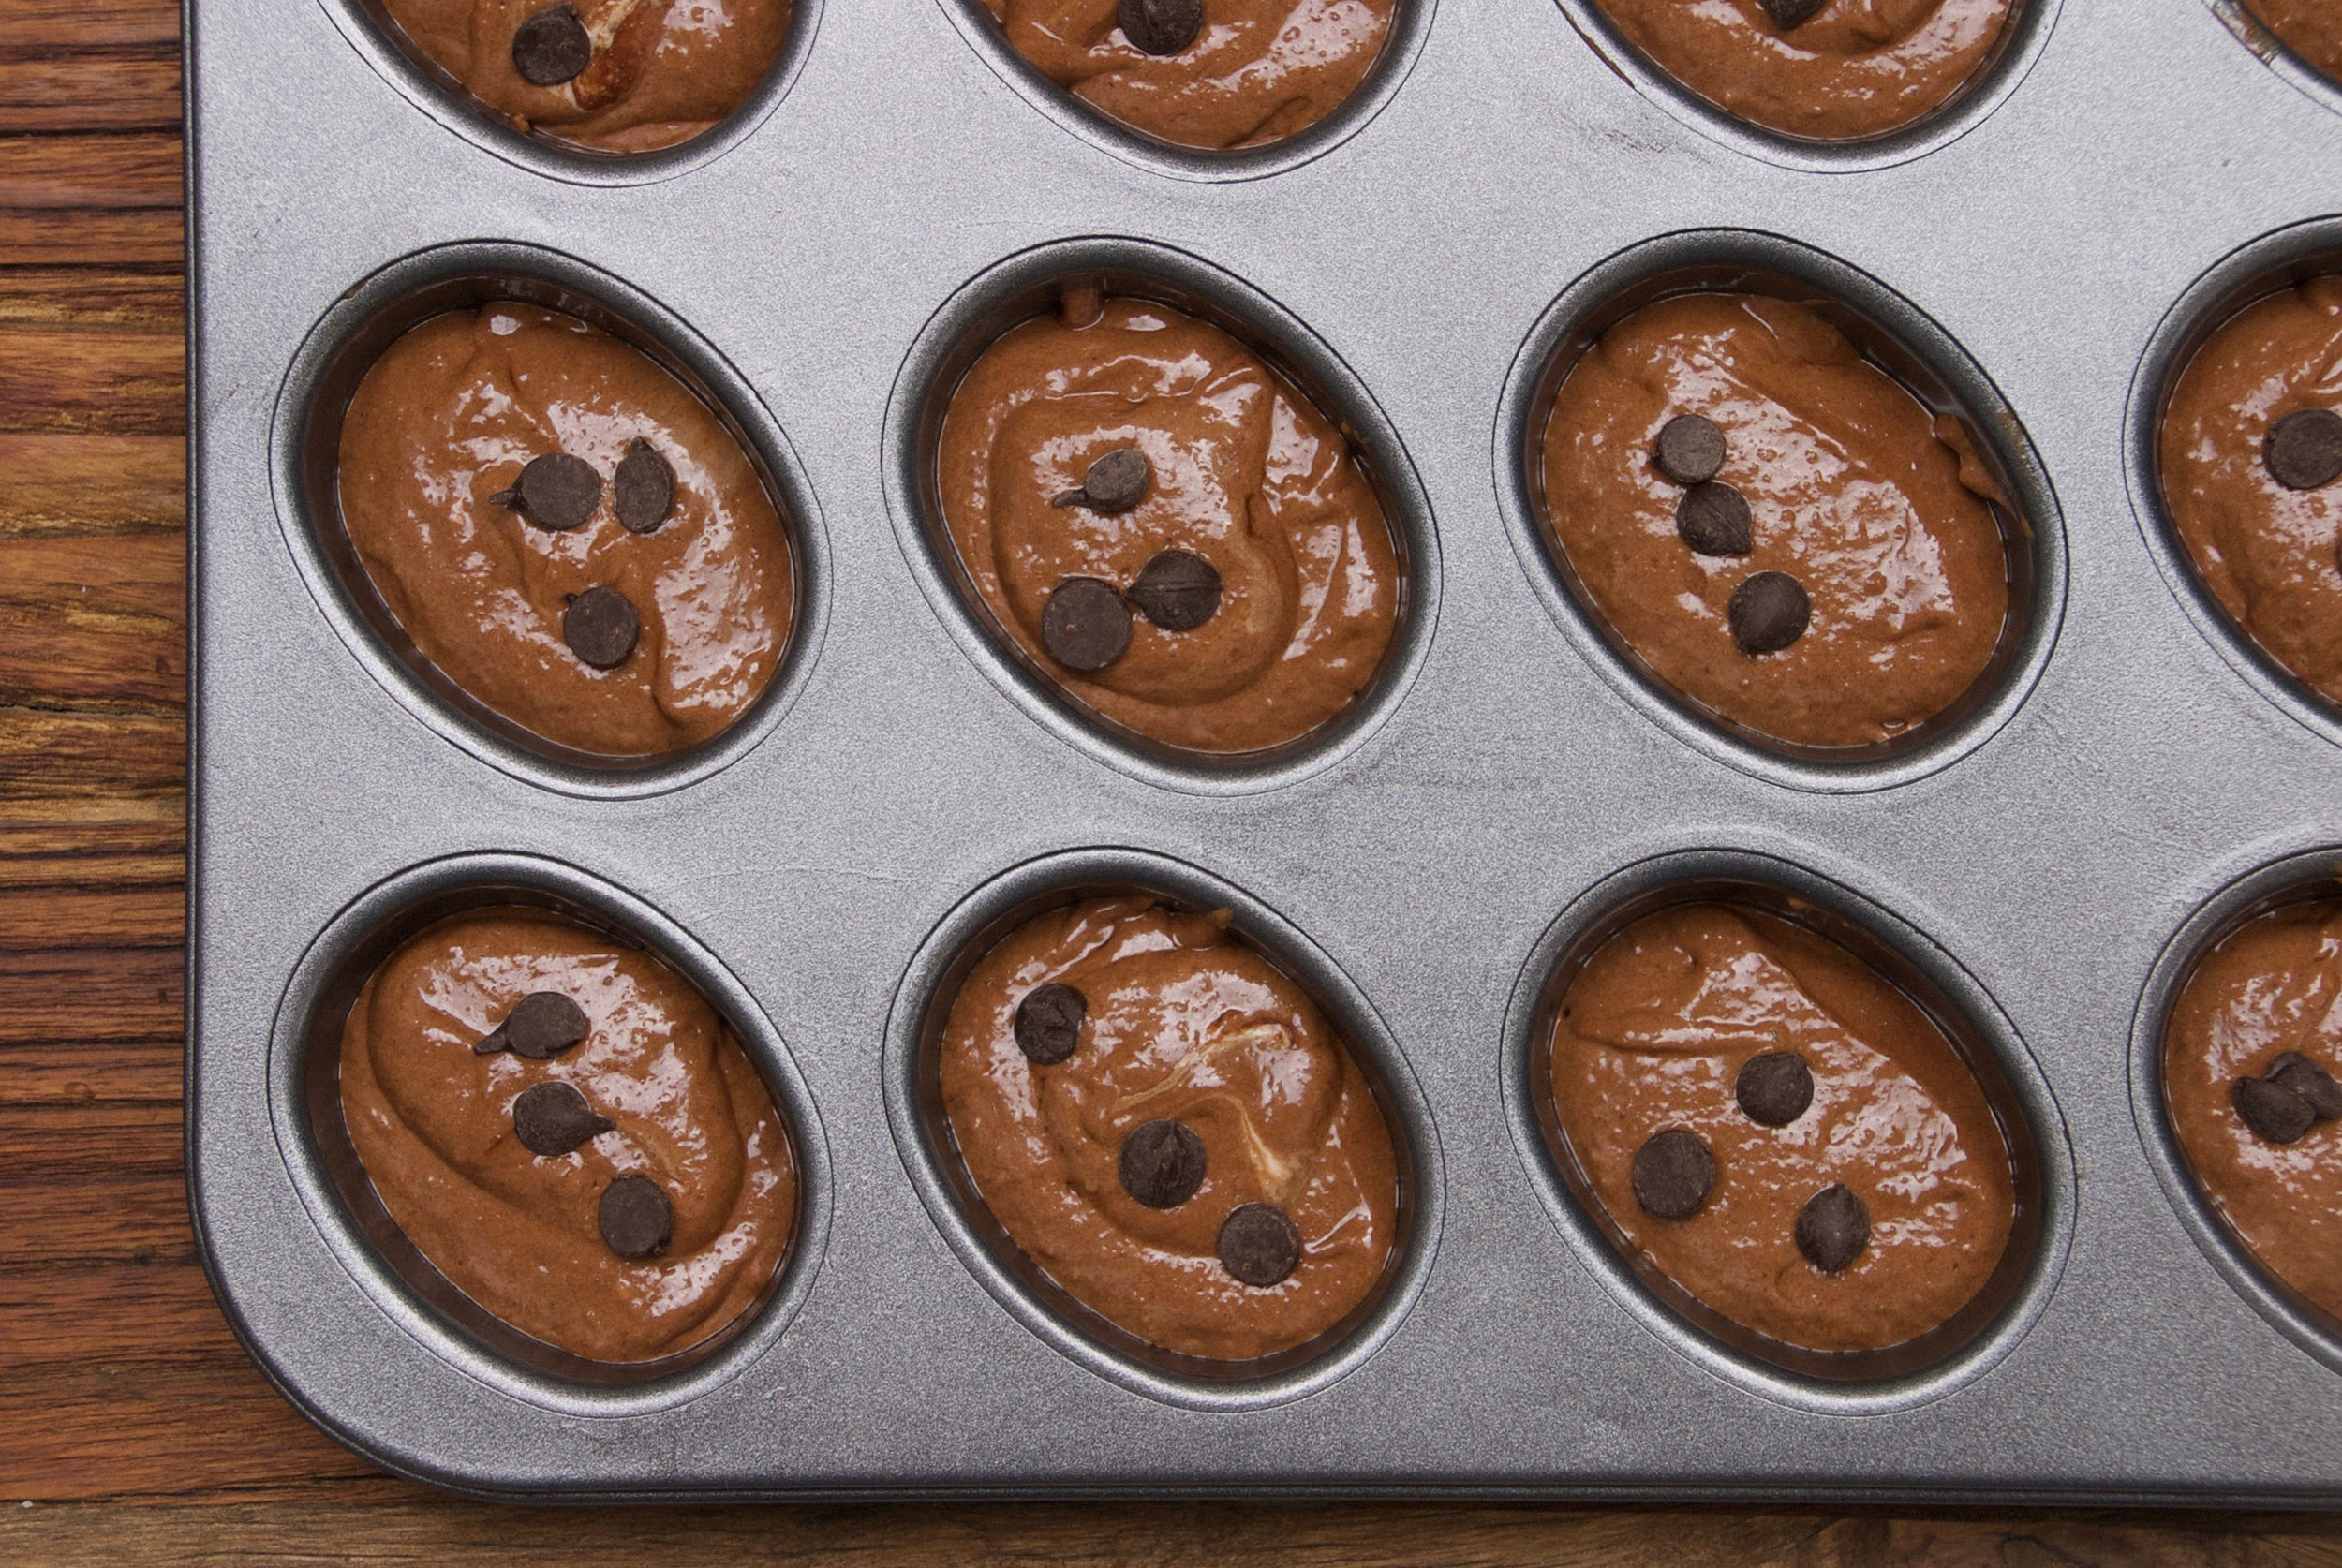
When the mixture is fully incorporated, take a small spoon or ice cream scoop and put one spoonful into each cavity of your baking tin. Each one should be around half-full. Then pop them in the oven for 15-20 minutes. Mine took 18 minutes but you can check that they're ready by inserting a wooden skewer into the middle of each one and it should come out clean. When they're baked, leave them in their tins for around 10 mins. Then check that they are loosened from the tin with a flat knife and use this to help lever them out, but they should come out very easily.

These would be stunning served with raspberries, pistachios, extra chocolate sauce :) As I mentioned earlier, I sprinkled chopped pistachios over the top to give a little extra crunch and then dusted them with icing sugar.
Chocolate Financiers are seriously delicious. Lovely and light, they would be perfect for afternoon tea or a coffee morning. Even a little after dinner treat if you're hosting a dinner party.
I can't wait to share them with my boys when they get home from school today :)
Chocolate Financiers
Makes 12 financiers
Ingredients
- 150G UNSALTED BUTTER
- 1 TSP VANILLA EXTRACT
- 100G CHOCOLATE, CHOPPED INTO PIECES
- 200G EGG WHITES (5 eggs)
- 175G ICING SUGAR
- 50G PLAIN FLOUR
- 85G GROUND ALMONDS
- OPTIONAL: CHOPPED PISTACHIOS AND/OR CHOCOLATE CHIPS
Method
- Preheat the oven to 160 degrees (fan)
- Grease the cavities of your chosen tin well
- In a medium saucepan and over a medium heat, melt the butter and vanilla extract together until fully melted
- Continue to heat the butter until it turns a golden brown colour (around 5 minutes)
- Add the chocolate and stir until melted
- Set aside to cool a little
- In a freestanding mixer, whisk the egg whites and icing sugar together until soft peaks form (around 5 minutes on a medium speed)
- Sift the flour and icing sugar over the top of the mixture and then fold in using a metal spoon
- Add your chocolate butter mixture by pouring it down the inside side of the bowl rather than straight on top of your mixture
- Fold the chocolate in, ensuring that you scrape down the sides and bottoms and thoroughly mix the chocolate in
- Using a spoon or small ice cream scoop, fill each cavity of your baking tin around half full
- Bake for 15 - 20 minutes or until a wooden skewer inserted in the middle of the financiers comes out clean
- Remove from the oven and leave them in their tin for around 10 mins to cool a little
- Gently using a flat knife, loosen them from the sides of the tin and remove each one
- If you would like to add the pistachios, chop a handful of them and sprinkle them on the top
- Finally, dust them with a light sprinkling of icing sugar
- And enjoy :)
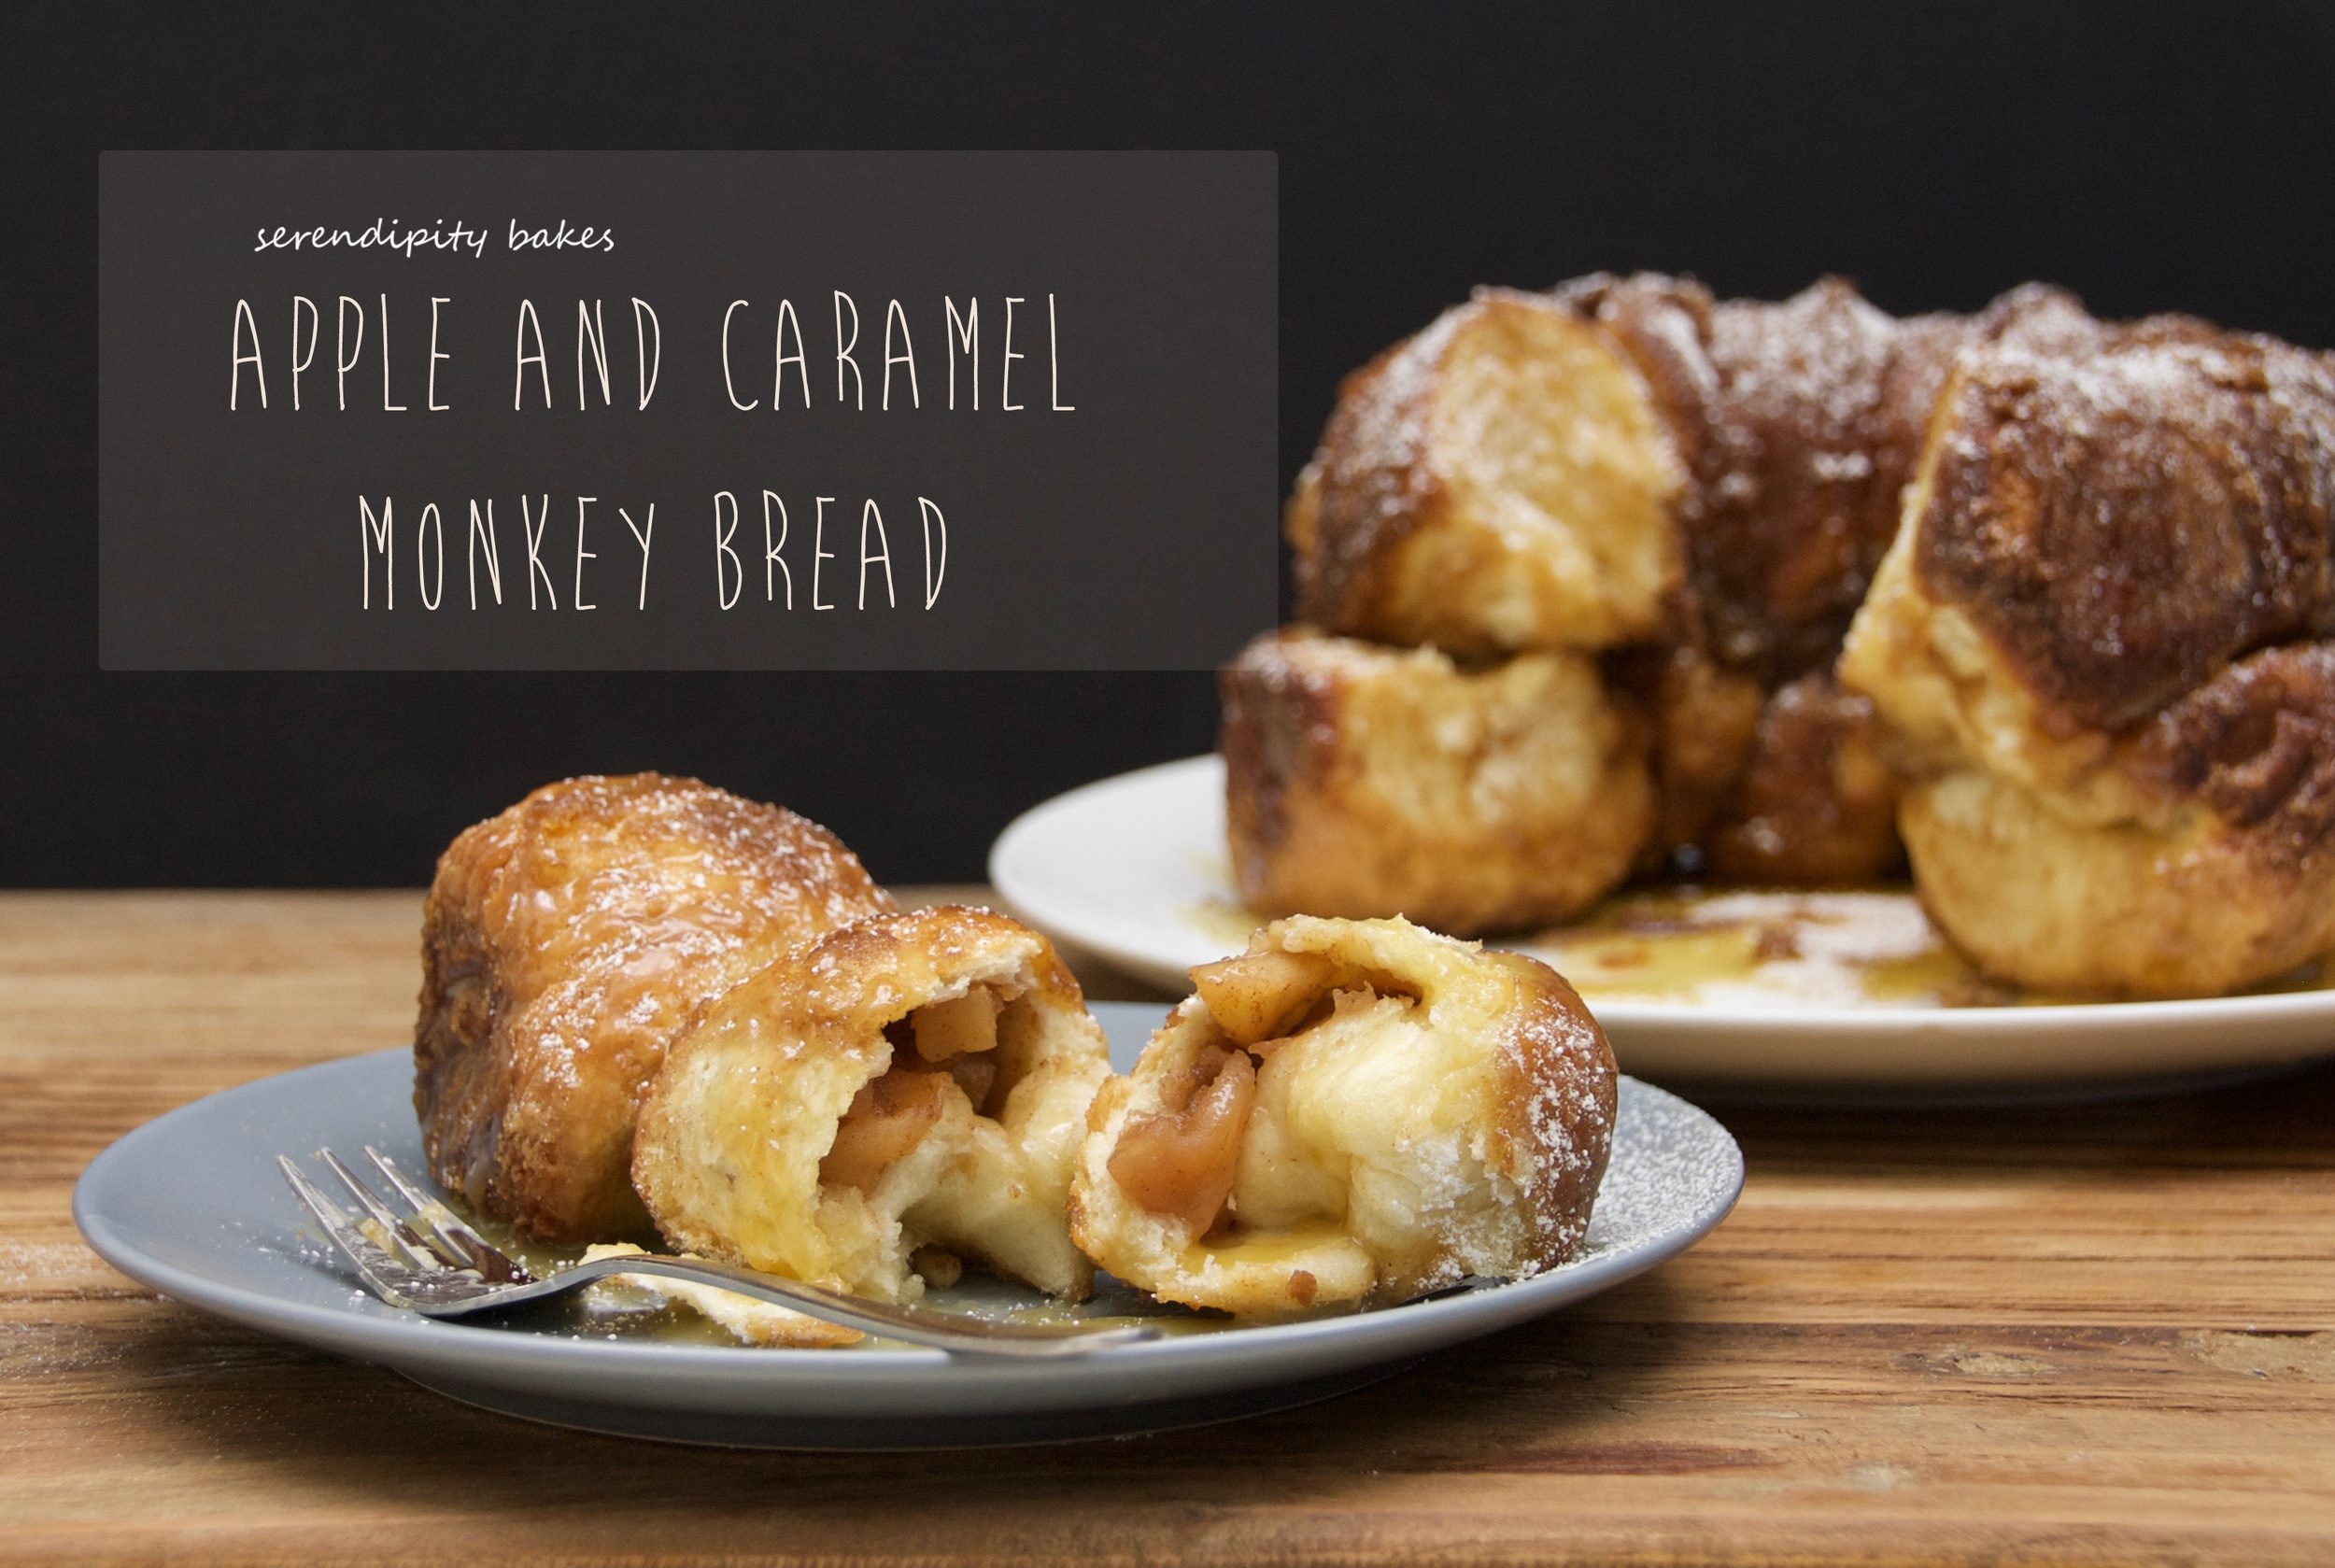
Apple and Caramel Monkey Bread
The weekend was so lovely. Mostly sunny, a little rainy and packed full of family fun. And an extra (bank holiday) day is always an added bonus :) And then today one of my boys felt too poorly for school so we decided to make something yummy to cheer him up!
The first time I made Monkey Bread it was a complete success in our house. All of the boys asked when I was going to make it again so I knew it was definitely a winner! Today we made a slightly different version and played around with one from the Australian Women's Weekly. It made me giggle that's it's in the category for "The Lazy Baker"! I'm not sure I agree it's for the lazy baker but it's a version of monkey bread that doesn't contain any yeast and you don't have a wait for a rise so I guess that could be considered a kind of lazy :) What I love about this is that the balls are filled with spiced apple making them soft and yummy on the inside whilst they have a crunchy sugary outside. Then once it's baked you top it with a delicious caramel sauce. Doesn't that all sound like absolute heaven?

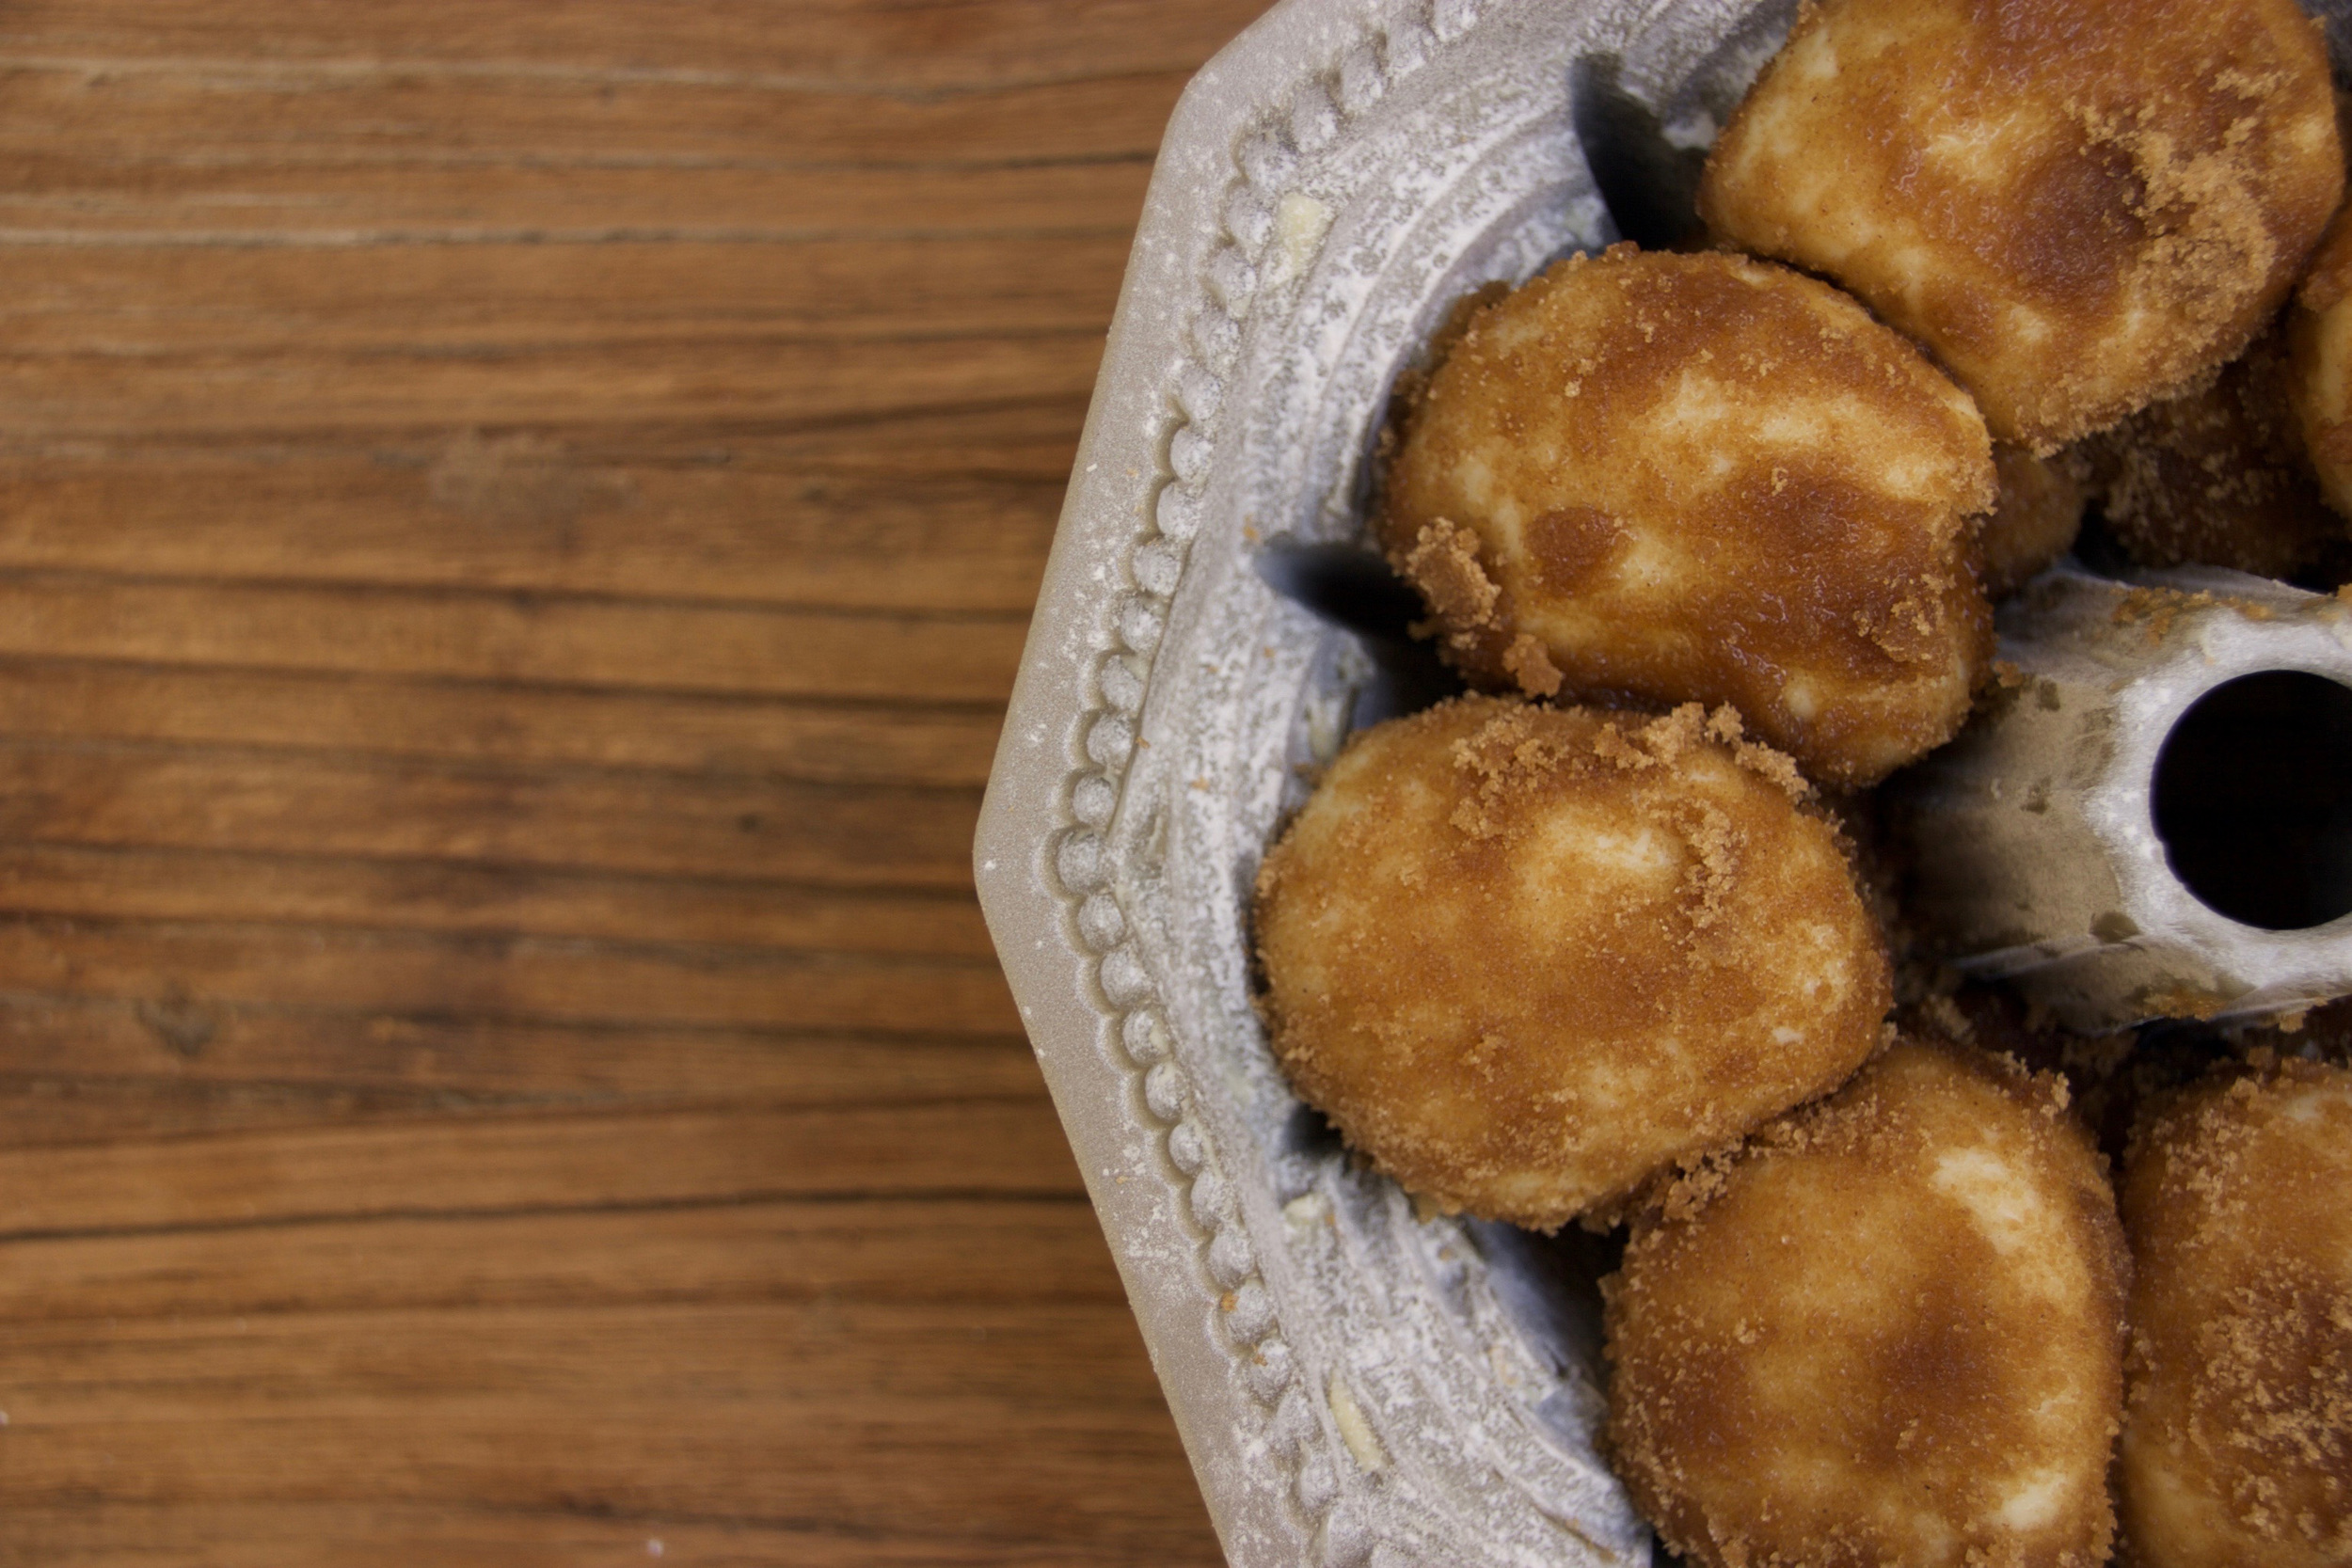
I used a bundt tin to bake my bread. To ensure that it's baked all the way through, we need a pan with a tubular centre so a kugelhopf or bundt tin is ideal for this. The tin needs to be greased and then floured VERY well. As with all bundt tin bakes, I find the success is all about the greasing of the tin otherwise it's almost impossible to get it out of the tin in one piece. Once the tin is prepared, we make the apple. After peeling, coring and cutting up the apple into small pieces, it's brought to a simmer with water, cinnamon and allspice and then heated for ten minutes to become soft. Then set aside to cool down.


The dough is simple to prepare. We mix the flour and sugar and then rub in cold butter with your fingertips to get the consistency of breadcrumbs. Then add the buttermilk and cut it through the mixture until a dough is formed. We gently knead it for five minutes until it's a soft dough. Then weigh the dough and divide it into 14 equal pieces. Roll each piece into a ball and then flatten it until it's an 8-10cm circle. Then we place a teaspoon of cooled (if it's too hot it melts the dough) apple sauce into the centre and pull the sides up around it, pinching them closed at the top. Each ball needs to be rolled in melted butter, then a mixture of brown sugar and cinnamon and finally arranged in the tin in 2 rows - depending on your tin, around 6 balls at the base and then 7 on top.
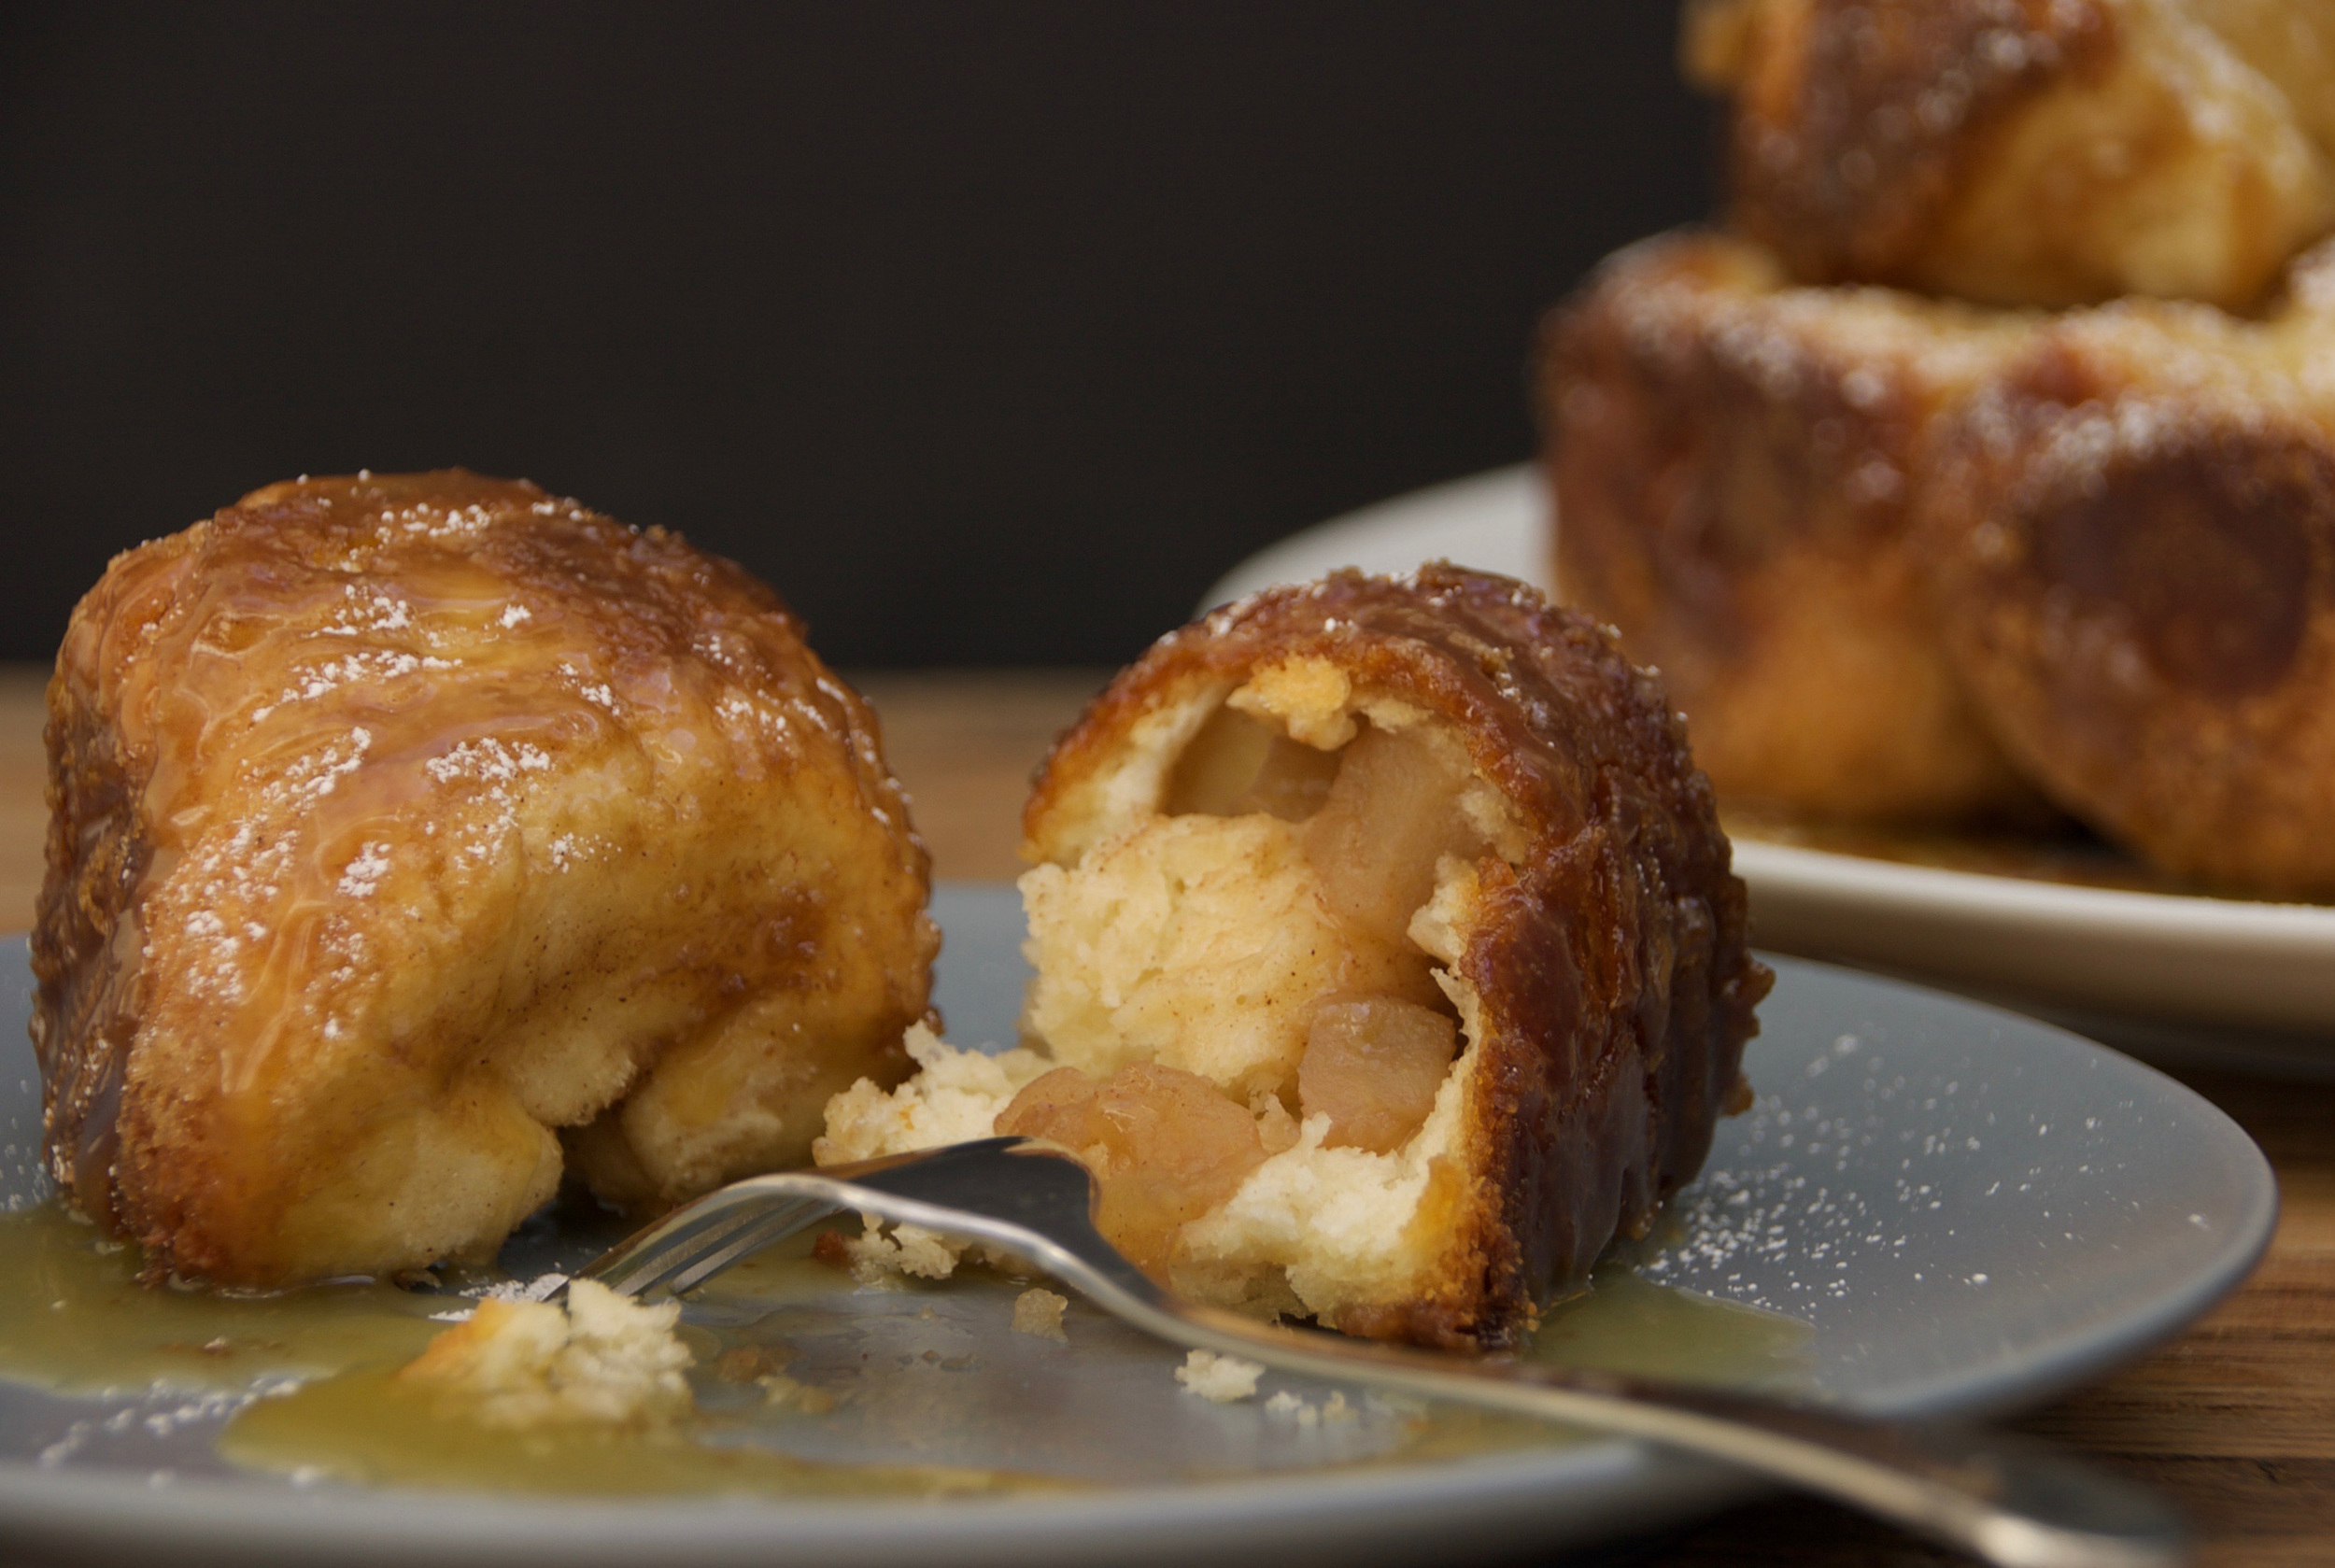
No proving is required for this bread, so we pop it straight into the oven for 20 mins and then after covering it with foil, bake it for a further 15 minutes. When it's finished baking, it needs to be left in its tin for 30 minutes and then gently removed. You will need to loosen it from the sides with a palette knife and then gently turn it out onto a plate.
For the caramel sauce, I used the same recipe as for my Anzac Biscuits with Salted Caramel. We melt the golden syrup and sugar in a saucepan and then stir in the butter, cream and salt. This is then drizzled over the top of the bread.

This is a lovely bake that is especially yummy straight from the oven. The little balls taste like delicious doughnuts (with a gorgeous cinnamon sugar exterior) and are light inside with an extra special surprise of spiced apple. They are perfect for breakfast and brunch but would also be a great pudding for supper with friends.
I suspect that Monkey Bread will be staying a firm favourite in this house for years to come - and am looking forward to trying new flavour combos :)
Apple and Caramel Monkey Bread
adapted from Australian Women's Weekly Pecan & Apple Monkey Bread
Spiced Apple Ingredients
- 3 GRANNY SMITH APPLES
- 55G CASTER SUGAR
- 1 TBSP LIGHT BROWN DEMERARA SUGAR
- 1 TSP GROUND CINNAMON
- 1/4 TSP GROUND CLOVES
- 1 TBSP WATER
Monkey Bread Ingredients
- 450G SELF-RAISING FLOUR
- 2 TBSP CASTER SUGAR
- 40G COLD BUTTER (cut into little bits)
- 310ML BUTTERMILK
Cinnamon Sugar Coating Ingredients
- 90G BUTTER, MELTED
- 165G LIGHT BROWN DEMERARA SUGAR
- 1/2 TSP GROUND CINNAMON
Caramel Sauce Ingredients
- 100G LIGHT SOFT BROWN SUGAR
- 50G GOLDEN SYRUP
- 75G UNSALTED BUTTER
- 75ML DOUBLE CREAM
- 1 TSP SEA SALT
Method
- First of all, grease your Bundt tin with butter and then a coating of flour over the top of the butter - it's very important to grease all the nooks and crannies of the bundt tin otherwise there's a good chance your final bread will stick to the tin and not come out in one piece!
- To make the Spiced Apple, peel, core and chop your apples into small pieces
- Place them in a saucepan with the sugars, spices and waters and bring to a simmer
- Cover, reduce the heat and cook for around 10 mins until soft
- Drain the liquid away and leave to cool
- Preheat the oven to 200 degrees (fan)
- To make the Monkey Bread, put the flour and sugar into a bowl and stir to combine
- Add the cold, cubed butter and rub the butter into the flour until you have a breadcrumb texture
- Add the buttermilk and stir it through the flour with a knife until it comes together in a dough
- On a lightly floured surface, knead the dough the 5 minutes
- Weigh the dough and divide it equally into 14 pieces
- Take each piece, roll it into a ball and then flatten it into a disc around 8-10cm in diameter
- Place a teaspoon of cooled apple into the centre of each disc, pull the sides up around the apple sauce and then pinch the dough together at the top to seal the ball
- Do this for the rest of the balls
- To make the Cinnamon Sugar, mix the sugar and cinnamon in a small ball and also have your melted butter in another bowl next to it
- First dip each ball completely in the melted butter and then roll it in the cinnamon sugar so it's fully coated
- Arrange the coated balls in the tin in 2 rows - probably around 6 in the bottom and 7 on top
- Bake in the oven for 20 minutes
- Place tin foil over the top of the tin and then bake a further 15 minutes
- Remove from the oven and leave to rest for 30 minutes
- Using a palette knife, gently loosen the sides of the bread from the tin and gently turn out onto a plate
- To make the Caramel Sauce, place the sugar and golden syrup in a small saucepan with a tablespoon of water
- Bring it just to the boil and then simmer for 3 minutes
- Add the butter, cream and sea salt in one go and stir for another minute until everything is melted and fully incorporated
- Transfer to a bowl and allow to cool at room temperature
- When you're ready to serve your Monkey Bread, drizzle it with the caramel sauce and then dust with icing sugar
- And enjoy :)
Milk Chocolate Cheesecake

The most delicious baked chocolate cheesecake! With a base made from Bourbon Biscuits and a velvety topping whipped together with mascarpone, cream cheese, eggs and milk chocolate. Extremely indulgent and perfect for a dinner party 💕
Read moreAnzac Cookies with Salted Caramel Sauce
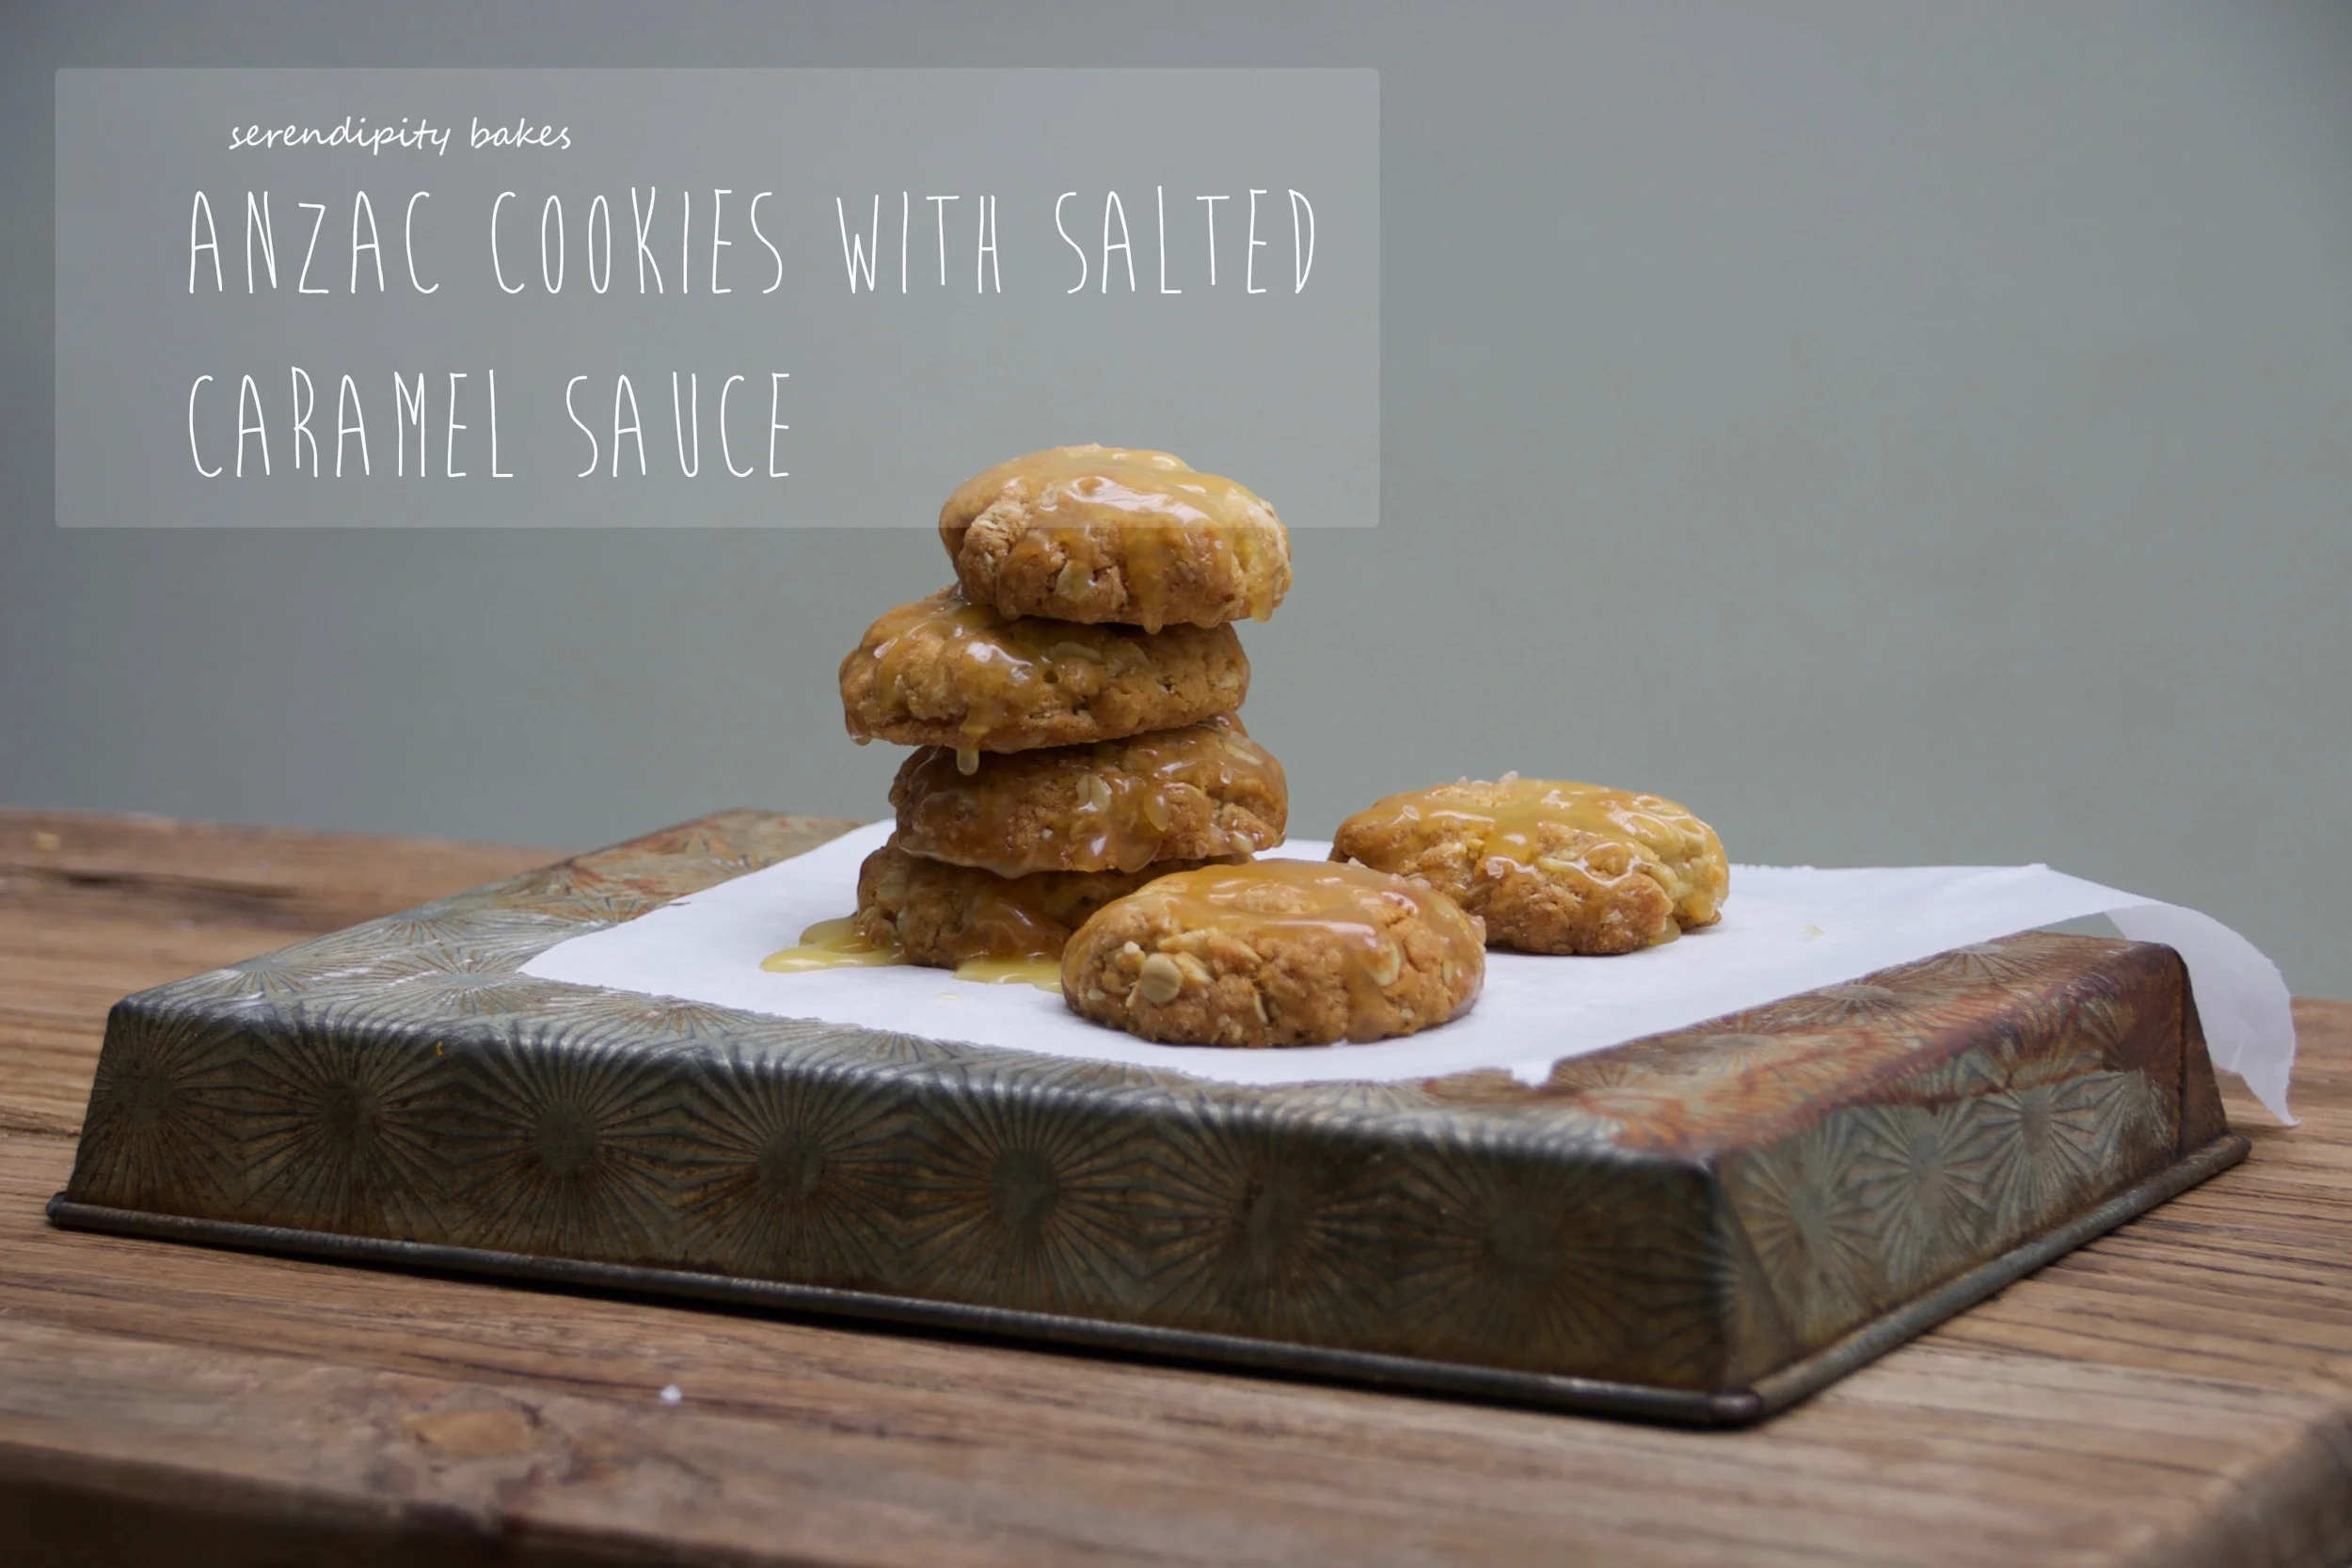
Every year, we celebrate today with a batch of Anzac cookies. Although living in the UK, we want our boys to remember their New Zealand heritage and every year Anzac Day honours the armies of New Zealand and Australia who fought at Gallipoli. Sweet Anzac cookies have become associated with the war because their ingredients don't spoil easily and so the wives of the army men could send these little biscuits to their loved ones and they wouldn't spoil on the long journey.

These cookies are simple to make and are full of ingredients that could easily be found in your kitchen at home. I wanted to shake them up a little so thought it would be fun to add a drizzle of salted caramel to make them even more delicious :)

We start by popping the oats, sugar and coconut into a bowl and sifting the flour in there too, whilst the golden syrup and butter are melted together over a low heat. When the butter and syrup are smooth and well mixed, we take the bicarb and mix it a tablespoon and a half of water, pop it in the saucepan with your sugary mixture and stir. Remove it from the heat and then pour this into the dry ingredients. The mixture needs to be combined well and then you're ready to shape your little cookies.

To make my cookies evenly sized, I always take a little time to weigh each cookie (these ones were around 30G each) but you can eyeball each scoop if you prefer. We roll the cookies into little balls and pop them onto a lined baking tray. When they're all ready, flatten each one a little and they're ready to go in the oven. Super easy.
They're quick to bake but it gives you just enough time to make the salted caramel sauce. We melt the golden syrup and sugar in a saucepan and then stir in the butter, cream and salt. Super yummy! Let it cool down to room temperature and when the cookies are baked and cooled, you can have lots of fun drizzling them with the sweet, sticky sauce :) I topped them with another sprinkling of sea salt. And they're done!

It's great to honour traditions and with something so simple to bake you can get the kids involved in the kitchen. Last year, my little boy made Anzac cookies for his house cookery competition and loved every minute!
But don't think that their simplicity means that they're not absolutely delicious and I think the salted caramel gives them an extra special twist.
They're just perfect for sharing with loved ones and friends 💕
Anzac Cookies with Salted Caramel Sauce
Makes around 20 cookies
Cookie Ingredients

- 200G PLAIN FLOUR
- 100G ROLLED OATS
- 110G CASTER SUGAR
- 65G DESICCATED COCONUT
- 45G GOLDEN SYRUP
- 150G UNSALTED BUTTER
- 1/2 TSP BICARBONATE OF SODA
Caramel Sauce Ingredients
- 100G LIGHT SOFT BROWN SUGAR
- 50G GOLDEN SYRUP
- 75G UNSALTED BUTTER
- 75ML DOUBLE CREAM
- 1 TSP SEA SALT
Method
- Preheat the oven to 170 degrees (fan)
- Line two baking trays
- Put the oats, sugar and coconut in a bowl and sift the flour over the top
- Stir to combine
- Melt the butter and golden syrup in a small saucepan over a medium heat until melted and smooth
- Mix the bicarb with with a 1.5 tablespoons of water
- Add this to the sugar mixture and remove from the heat
- Mix this with the dry ingredients until fully combined
- Form little balls of mixture (weigh them if you want identical cookies) and place them on the baking trays
- Flatten each ball slightly and then pop them in the oven for around 10-12 minutes or until they are golden in colour
- Whilst they're in the oven, make your salted caramel sauce
- To make this, place the sugar and golden syrup in a small saucepan with a tablespoon of water
- Bring it just to the boil and then simmer for 3 minutes
- Add the butter, cream and sea salt in one go and stir for another minute until everything is melted and fully incorporated
- Transfer to a bowl and allow to cool at room temperature
- When they cookies and the salted caramel are cooled, drizzle the cookies with the caramel
- Add a final flourish of sea salt to the cookies and enjoy :)
Pistachio and Orange Blossom Cake

I have a lot of cookery books. And when I say a lot, I mean a lot. They are currently all balanced in precarious piles over our guest room floor. I'm in the planning stages of a little office space (and am unbelievably excited about it) but that's a small while away so for the moment we're sticking with the tottering book piles! But not long ago I was dismantling one of these piles to get to a book (always at the bottom, right?) and started reading an old Fiona Cairn's book, Bake & Decorate.

I love her preface where she talks about empowering all sorts of different people to try their hand at baking and creating lots of memories and aromas of cake making throughout our homes. It's so true (at least for me). My boys are finally taking an interest in cooking and baking and I'd love for them to start building a love for this in their childhoods.
So when thumbing through this wonderful baking book, I found a recipe for Pistachio and Orange Blossom Cake. I absolutely LOVE pistachio and the idea of pairing this with lovely fresh springtime orange blossom was too tempting.
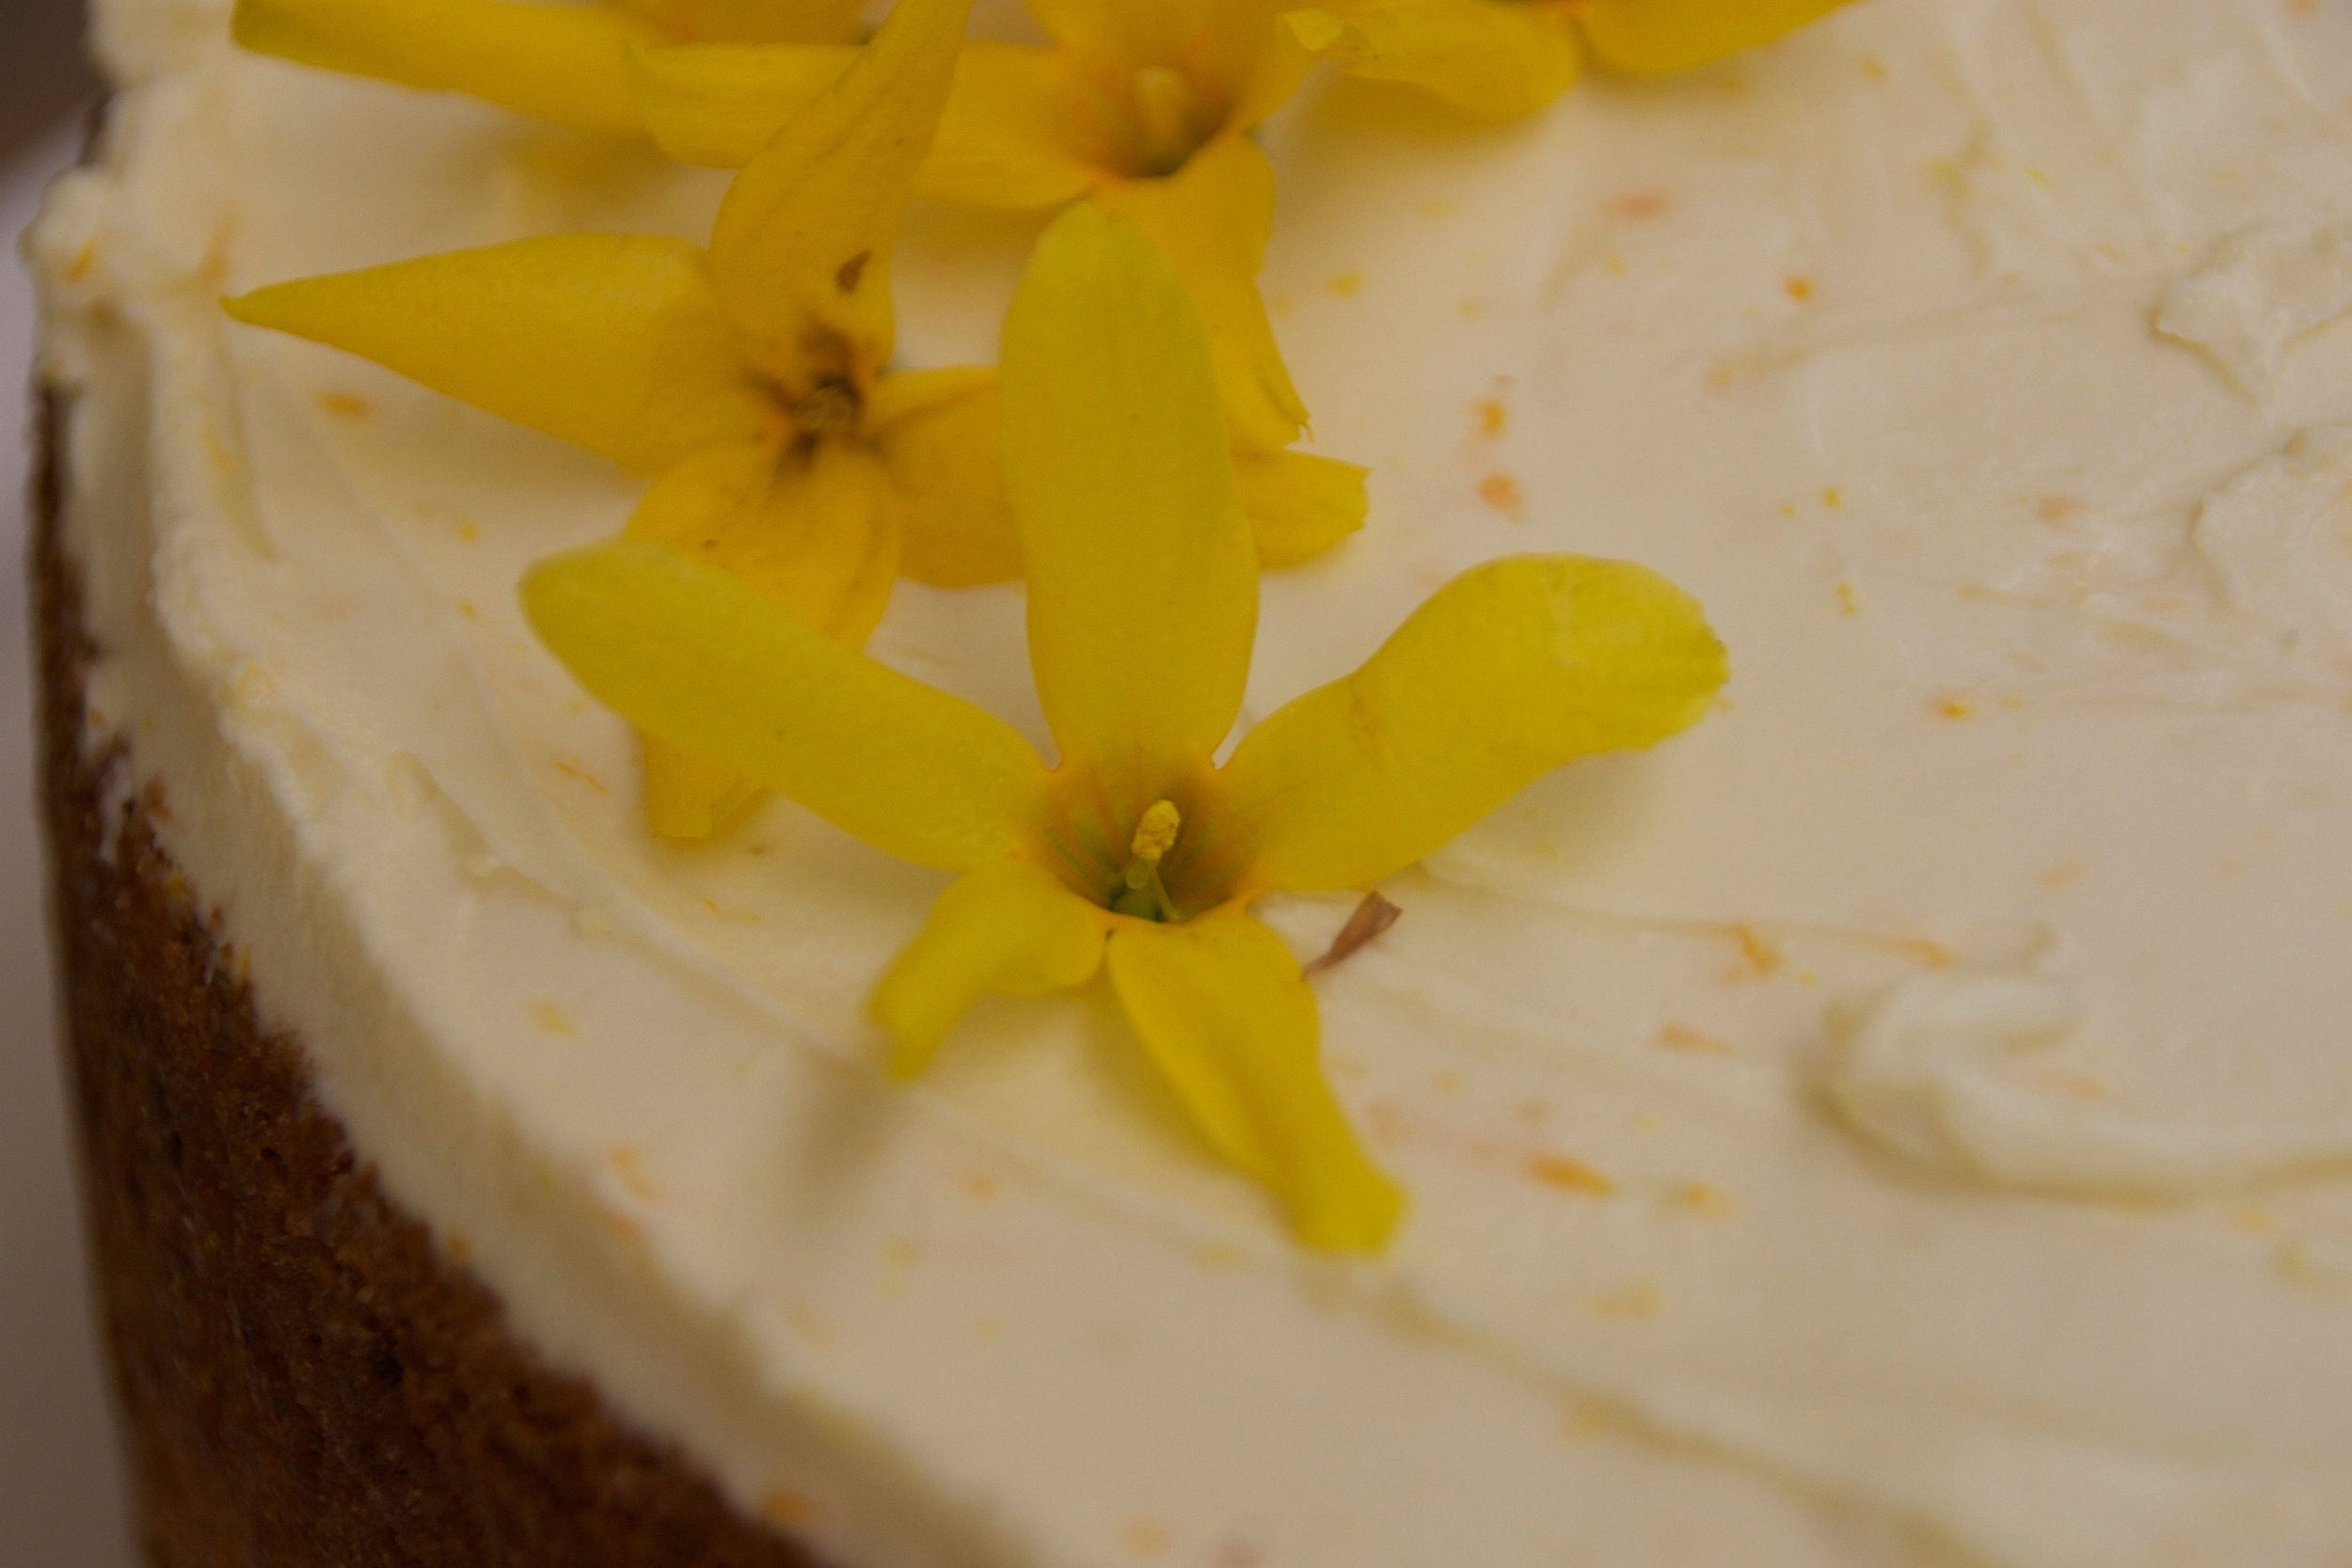
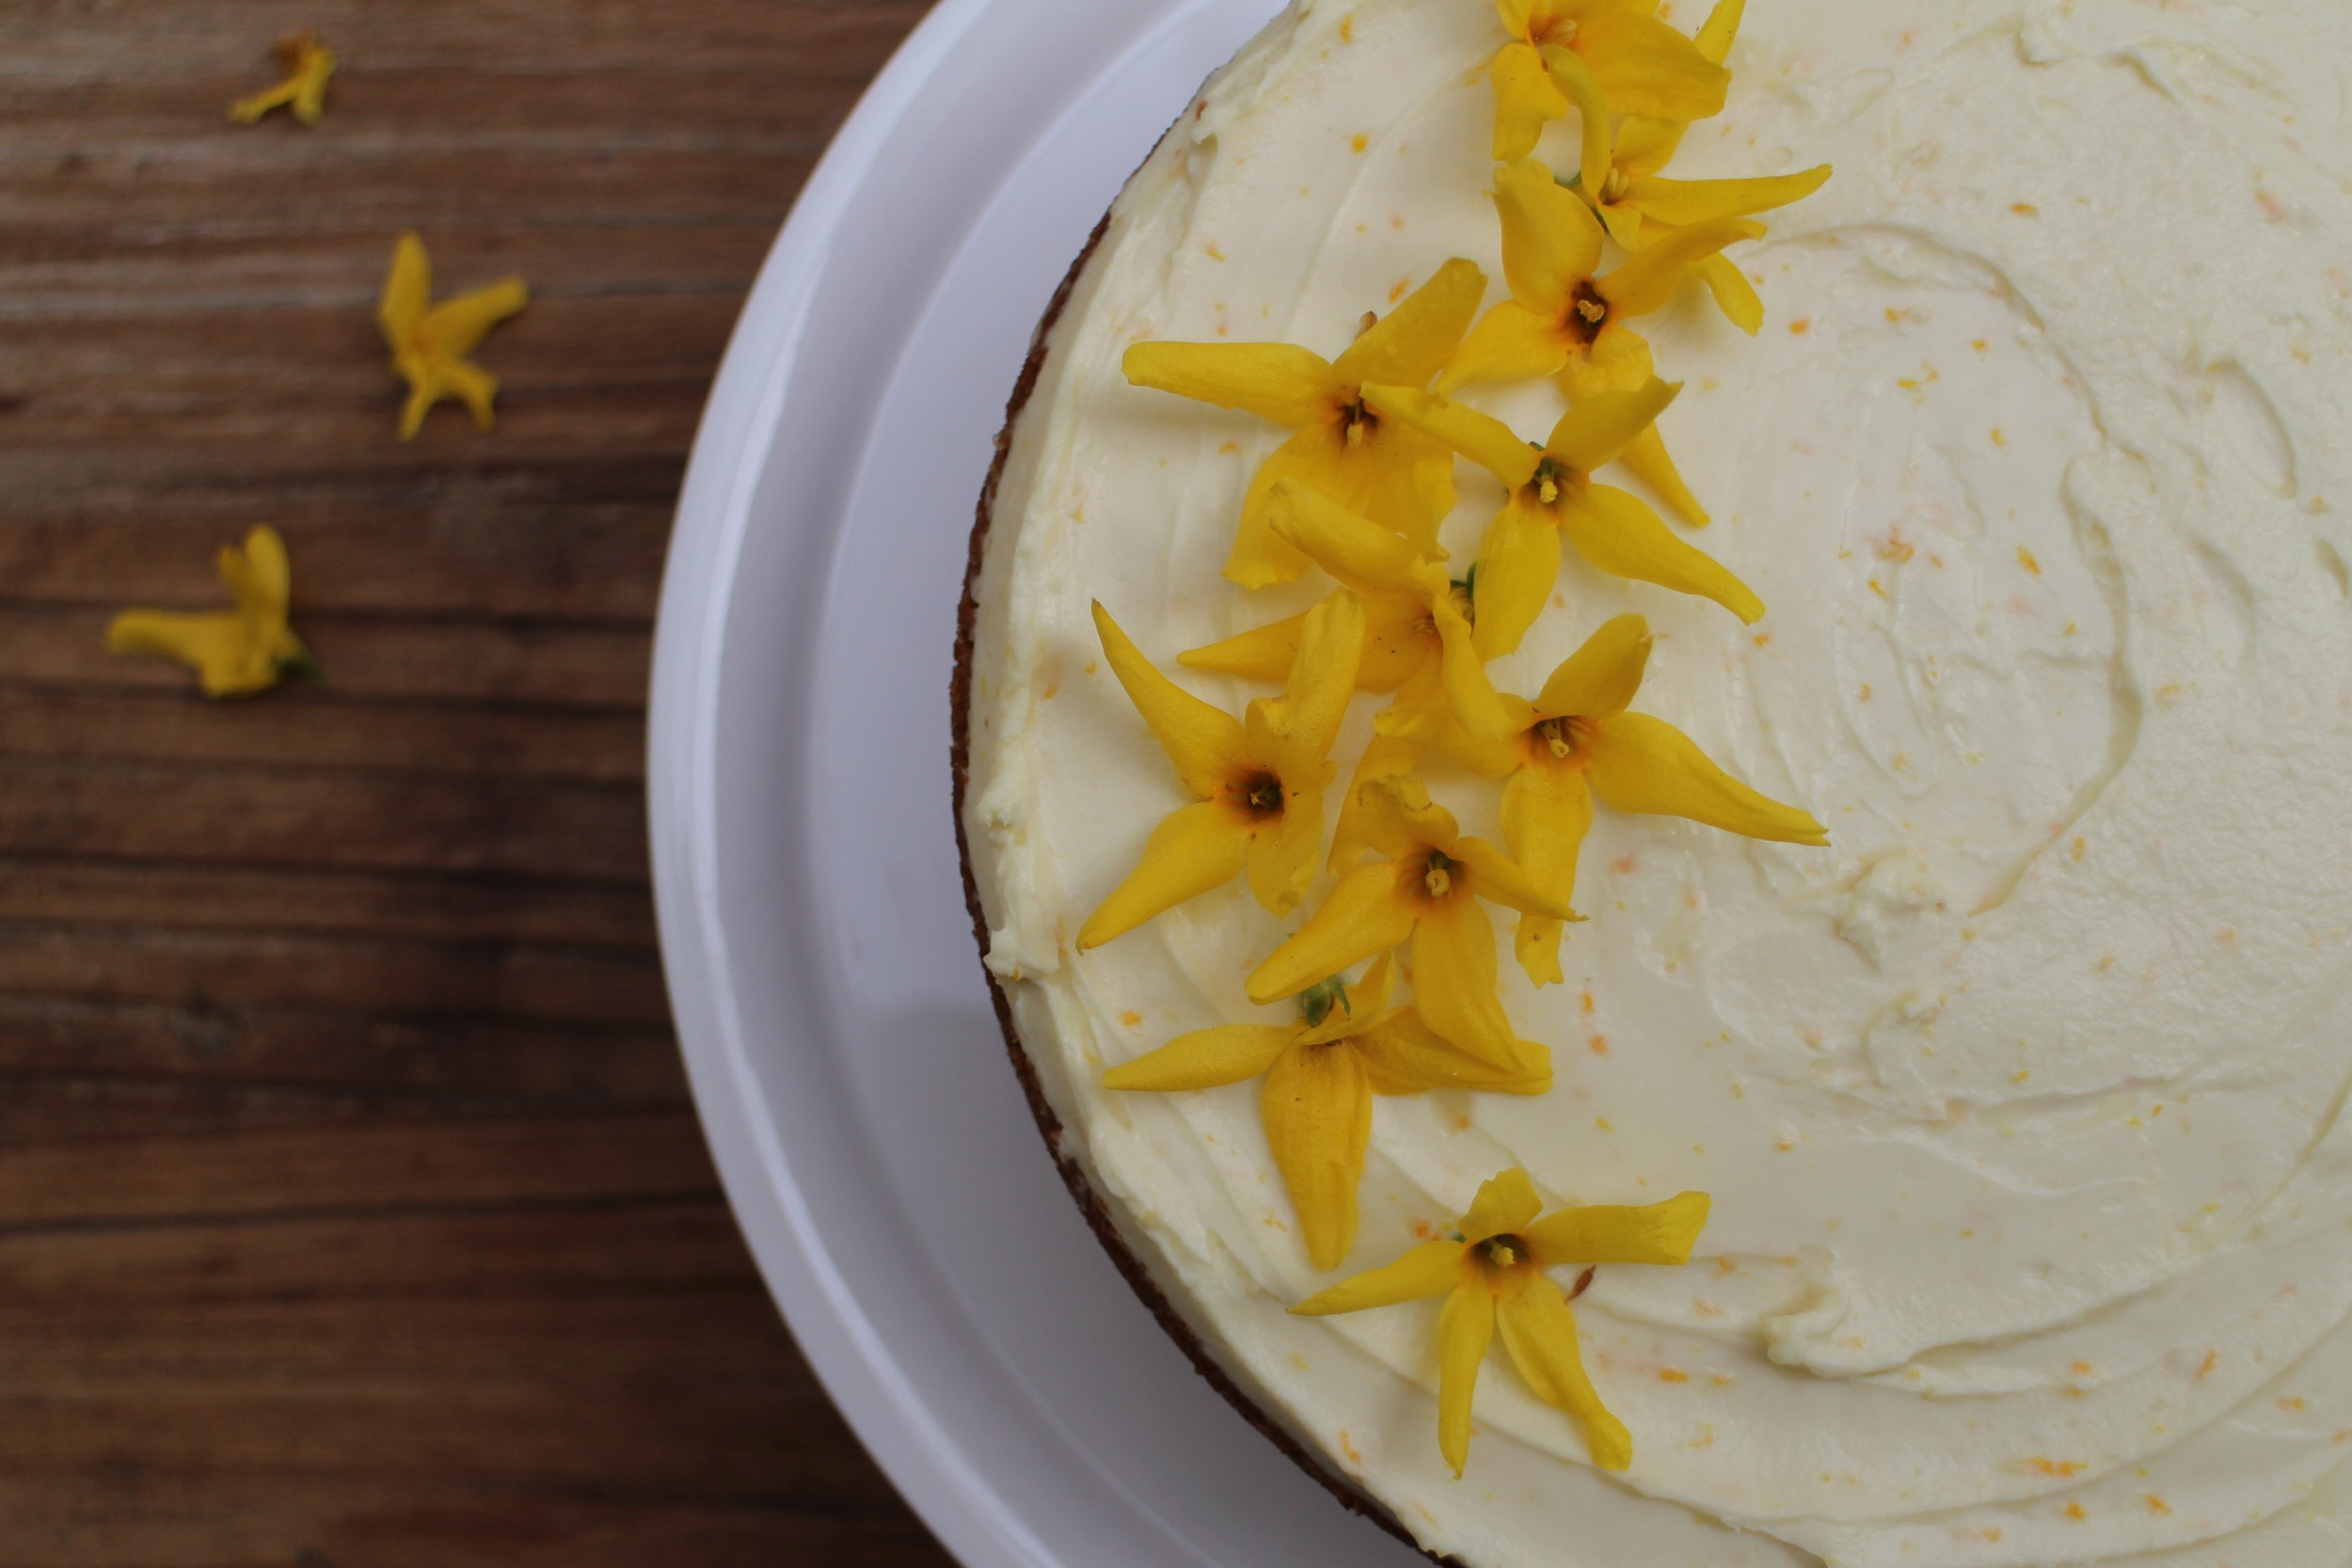
This is a simple looking cake. It doesn't have layers so is presented as an un-split cake with a layer of mascarpone cream on the top. It doesn't pretend to be something it's not and would look perfectly in place on a tea table or with a cup of coffee one morning. However what it does do is pack a punch with its flavours. In the cake we have pistachio, almond, orange zest and orange blossom; whilst in the topping we have mascarpone, orange zest, vanilla and orange blossom. And if that's not enough, there is a delicious syrup made from orange juice, sugar and orange blossom that soaks the cake. So you can see - it's definitely not lacking in taste!

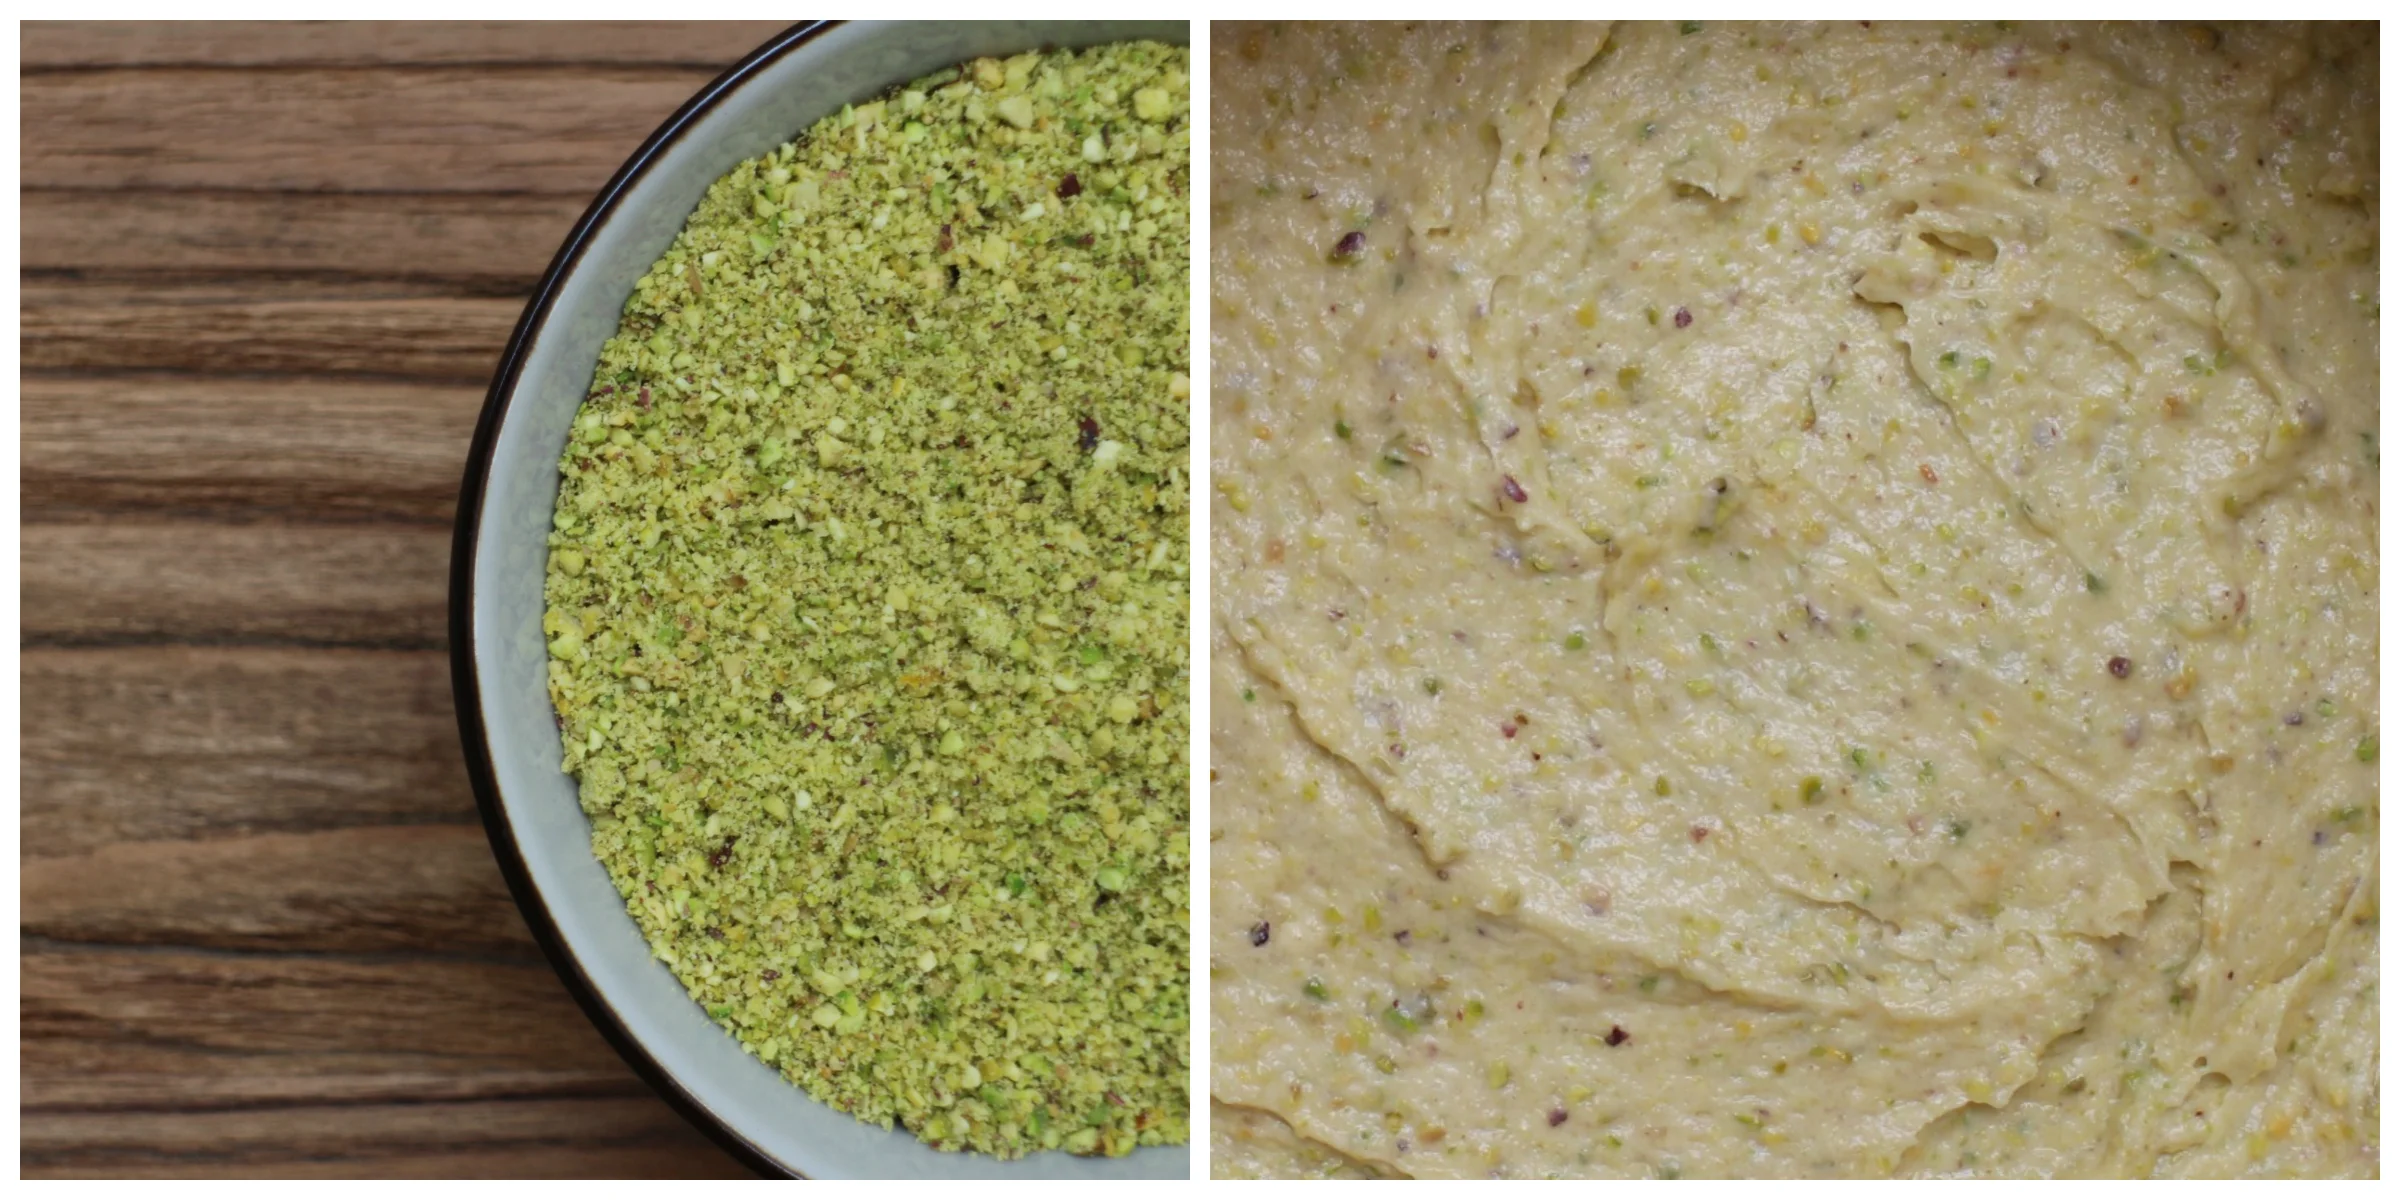
The first part of making this cake is roasting the pistachios - and then blitzing them to a powder. The butter, sugar and orange zest are creamed in a standing mixer whilst the dry ingredients are sieved into a separate bowl. When the butter and sugar are fully creamed, the eggs are added one at a time - if it starts to curdle, then a tablespoon of the flour mixture should be added. Then the pistachios and almonds are folded in with the dry ingredients and finally the orange blossom water. Simple.
Whilst the cake is baking in the oven, the syrup is made. This is a simple combination of freshly squeezed orange juice, sugar and orange blossom water in a saucepan, brought to a rolling boil. It needs to simmer until you have around 60ml of liquid (this is 4 tablespoons to give you an idea of how much you need). It takes around 10-15 minutes but you need to keep an eye on it as there's a tipping point when it becomes a sticky marmalade!
Once the cake's out of the oven, then the cake should be pricked all over and soaked with the orange syrup - and allowed to cool in its tin. When it's ready to come out and completely cooled down, then it can be frosted. The topping is made from the mascarpone, orange zest, vanilla, orange flower water and sugar and can be hand-whipped in a bowl. Then spread on top of the cake with a palette knife.
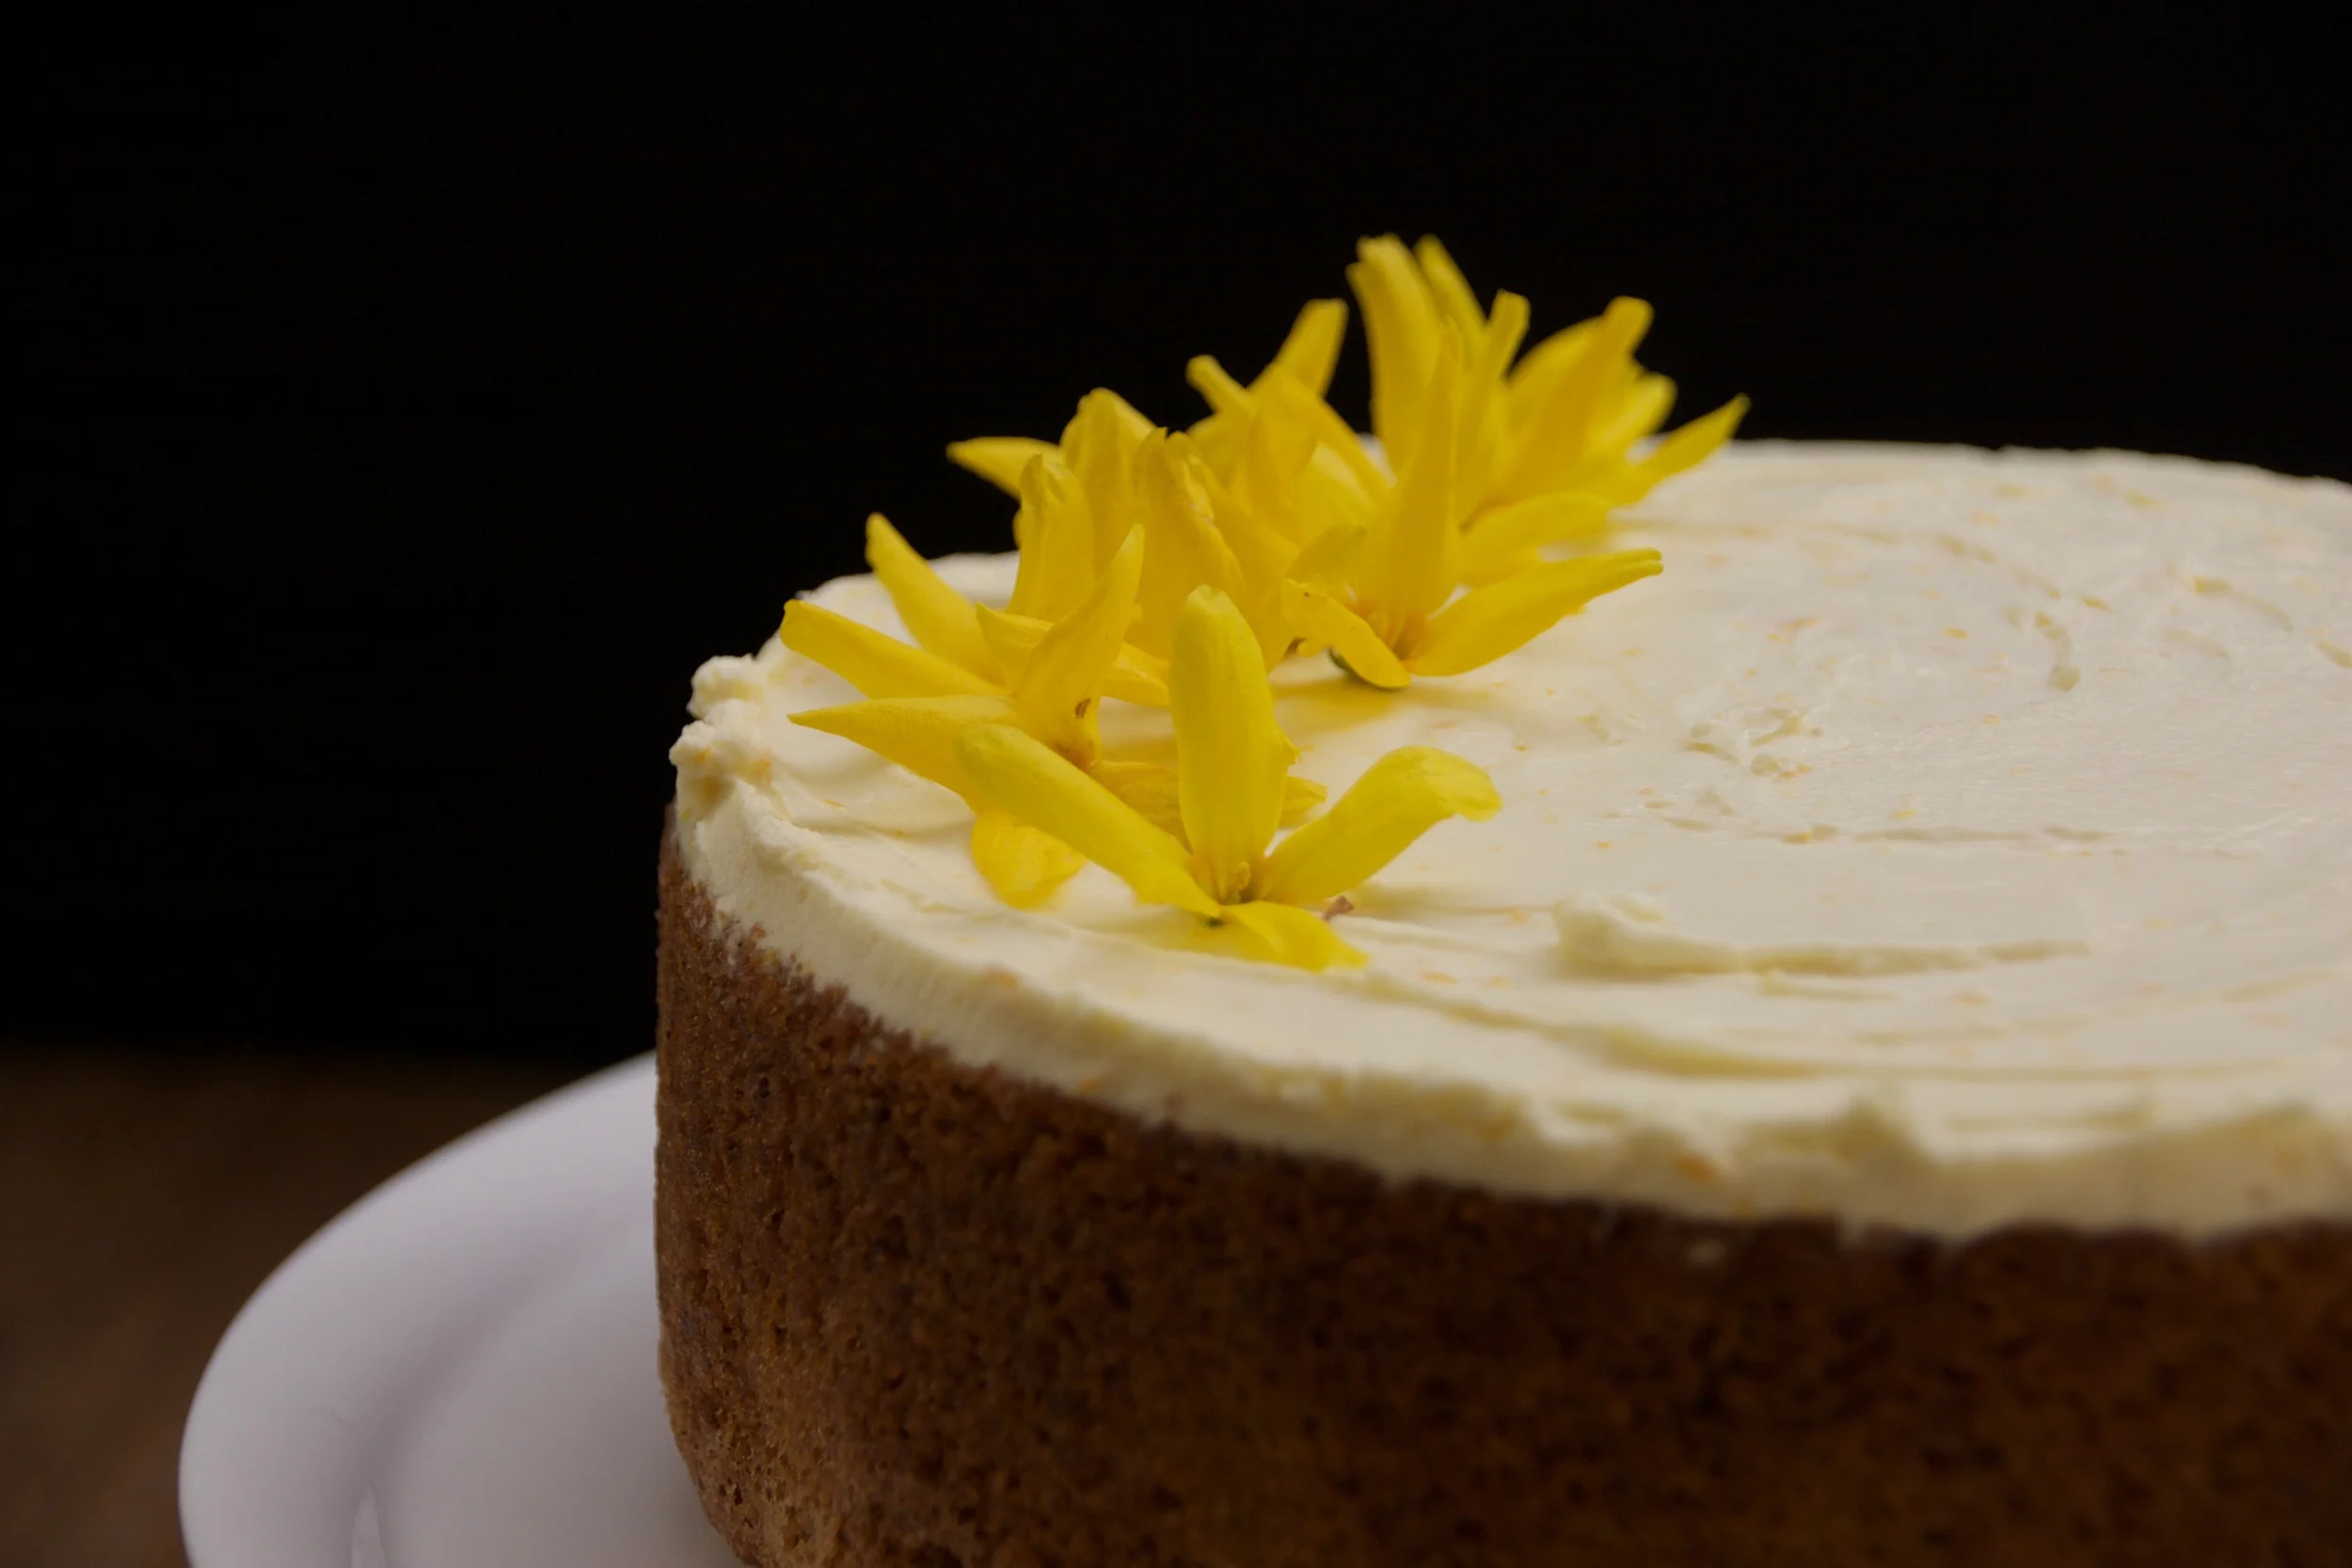
So I love the texture of the cake. The nuts are delicious and the mix of pistachios and almonds are really stunning in this cake whilst at the same time being very moist. With the topping being made of mascarpone, it feels a lot lighter than traditional buttercream - more like the texture of whipped cream which is so yummy. There is a light green hue to the inside of the cake itself (from the pistachio) which I love contrasted with the flecks of orange in the frosting. I thought the flavours might be a little grown-up for my boys, but after three helpings, I think I can be assured it's a popular choice :)
This is a lovely light cake and would be perfect for afternoon tea or a coffee morning. It definitely heralds in the start of springtime and sunnier days 🌞
Pistachio and Orange Blossom Cake
from Fiona Cairn's Bake & Decorate
Cake Ingredients

- 175G UNSALTED BUTTER, SOFTENED
- 100G SHELLED UNSALTED PISTACHIOS
- 70G SELF-RAISING FLOUR
- 1 TSP BICARBONATE OF SODA
- PINCH OF SALT
- 200G GOLDEN CASTER SUGAR
- ZEST OF 1 ORANGE
- 4 EGGS, LIGHTLY BEATEN
- 70G GROUND ALMONDS
- 2 TSP ORANGE BLOSSOM WATER
Syrup Ingredients
- JUICE OF 1 ORANGE
- 45G GOLDEN CASTER SUGAR
- 1 TBSP ORANGE BLOSSOM WATER
Frosting Ingredients
- 250G MASCARPONE
- ZEST OF 1 ORANGE
- 1/2 TSP VANILLA EXTRACT
- 1 TBSP ORANGE BLOSSOM WATER
- 30G GOLDEN CASTER SUGAR
Method
- Preheat the oven to 170 degrees (fan)
- To make the Cake, grease and line a 7 inch cake tin (if you don't have this size, you can use a different sized tin by adjusting the cooking time)
- Spread the pistachios in an even layer on a baking tray and place in the oven for around 5 minutes - they can burn quite easily so give the tray a little shake half-way through cooking and keep watching them
- Let them cool down and then blitz in a food processor until finely ground
- Sieve the flour, baking powder and salt into a bowl
- Place the butter, sugar and orange zest in the bowl of a standing mixer and beat for 5 minutes until smooth and creamy
- Add the eggs little by little, beating after each addition - if the mixture starts to curdle, add a tablespoon of the flour mixture
- Then fold in the pistachios and almonds, flour mixture and finally the orange blossom water
- Place in the baking tin and smooth over the surface
- Bake for around 40 minutes or until a tooth pick inserted in the middle comes out clean
- Whilst the cake is baking, make the Orange Syrup
- Place the orange juice, sugar and orange blossom water in a saucepan and bring to a rolling boil
- Simmer for around 10-15 minutes until there is 60ml liquid remaining in the pan
- When the cake is out of the oven, immediately prick it all over with a toothpick and then pour the syrup evenly across the surface
- Allow the cake to cool completely in its tin
- When it's cool, turn it out onto a plate and make the Frosting
- Place the mascarpone, orange zest, vanilla, orange blossom water and sugar in a bowl and beat until smooth
- Spread this on the top of the cake with a palette knife
- Adorn with flowers or serve just as it is :)
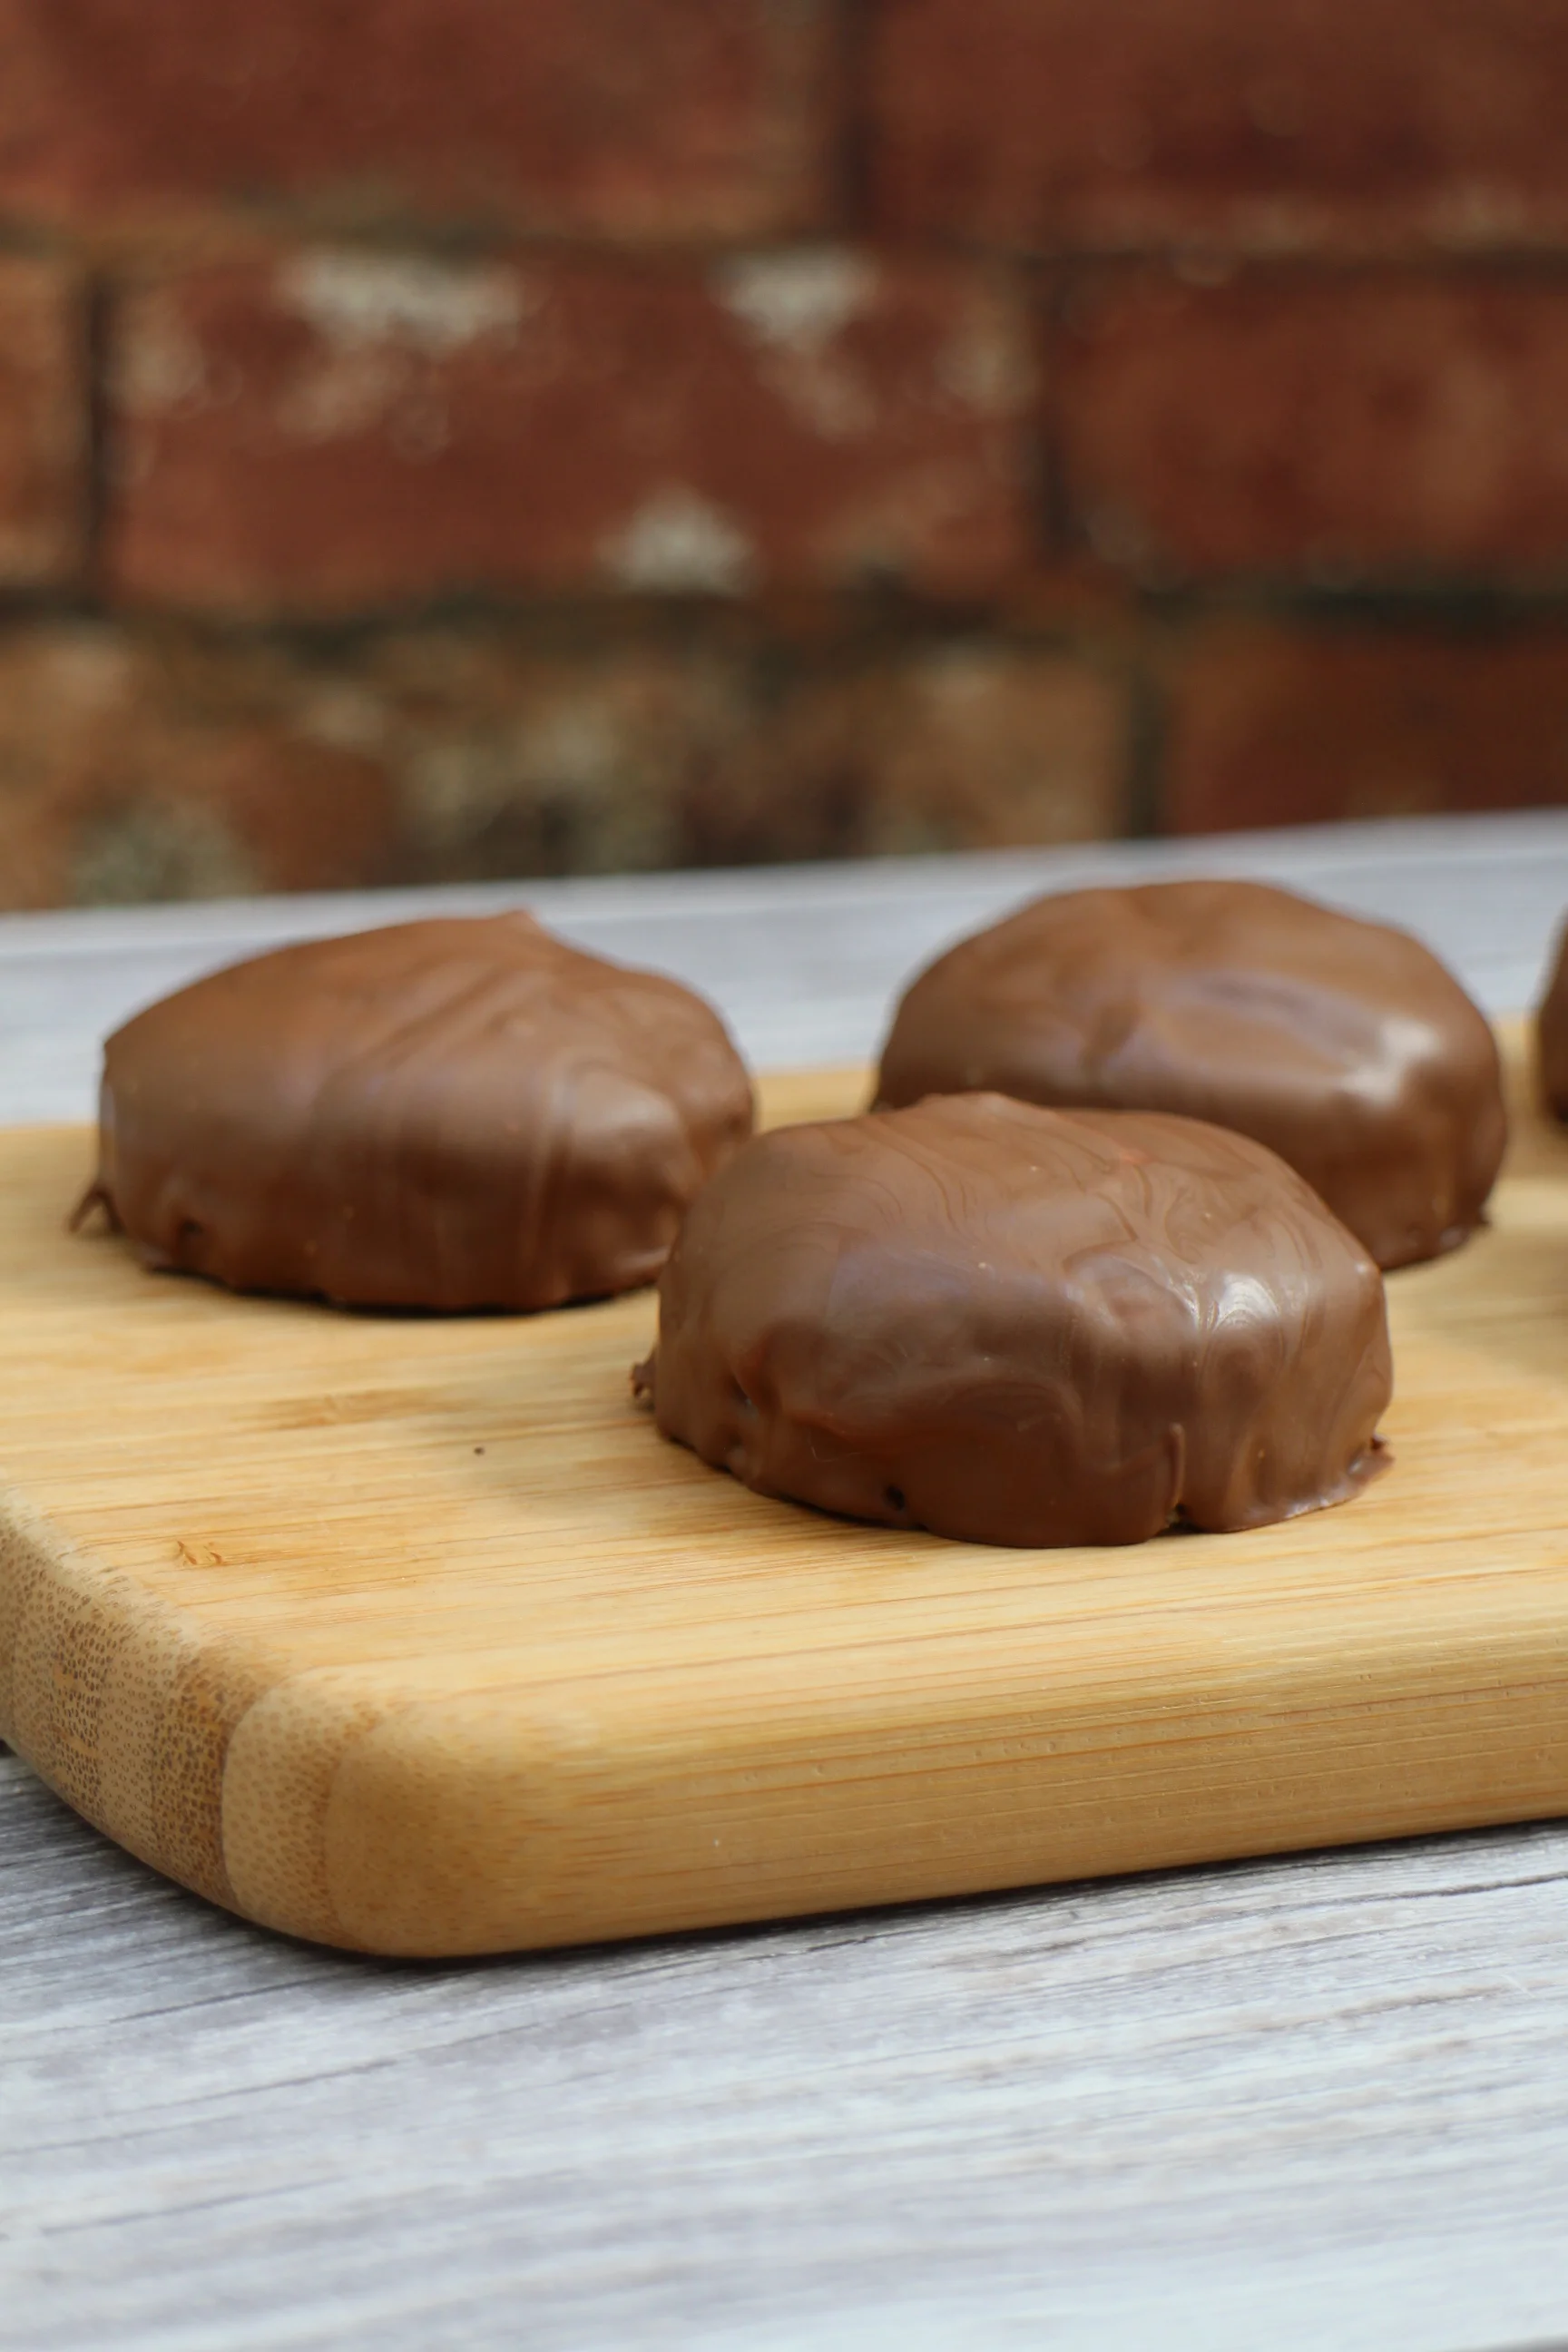
Chocolate Coconut Truffles
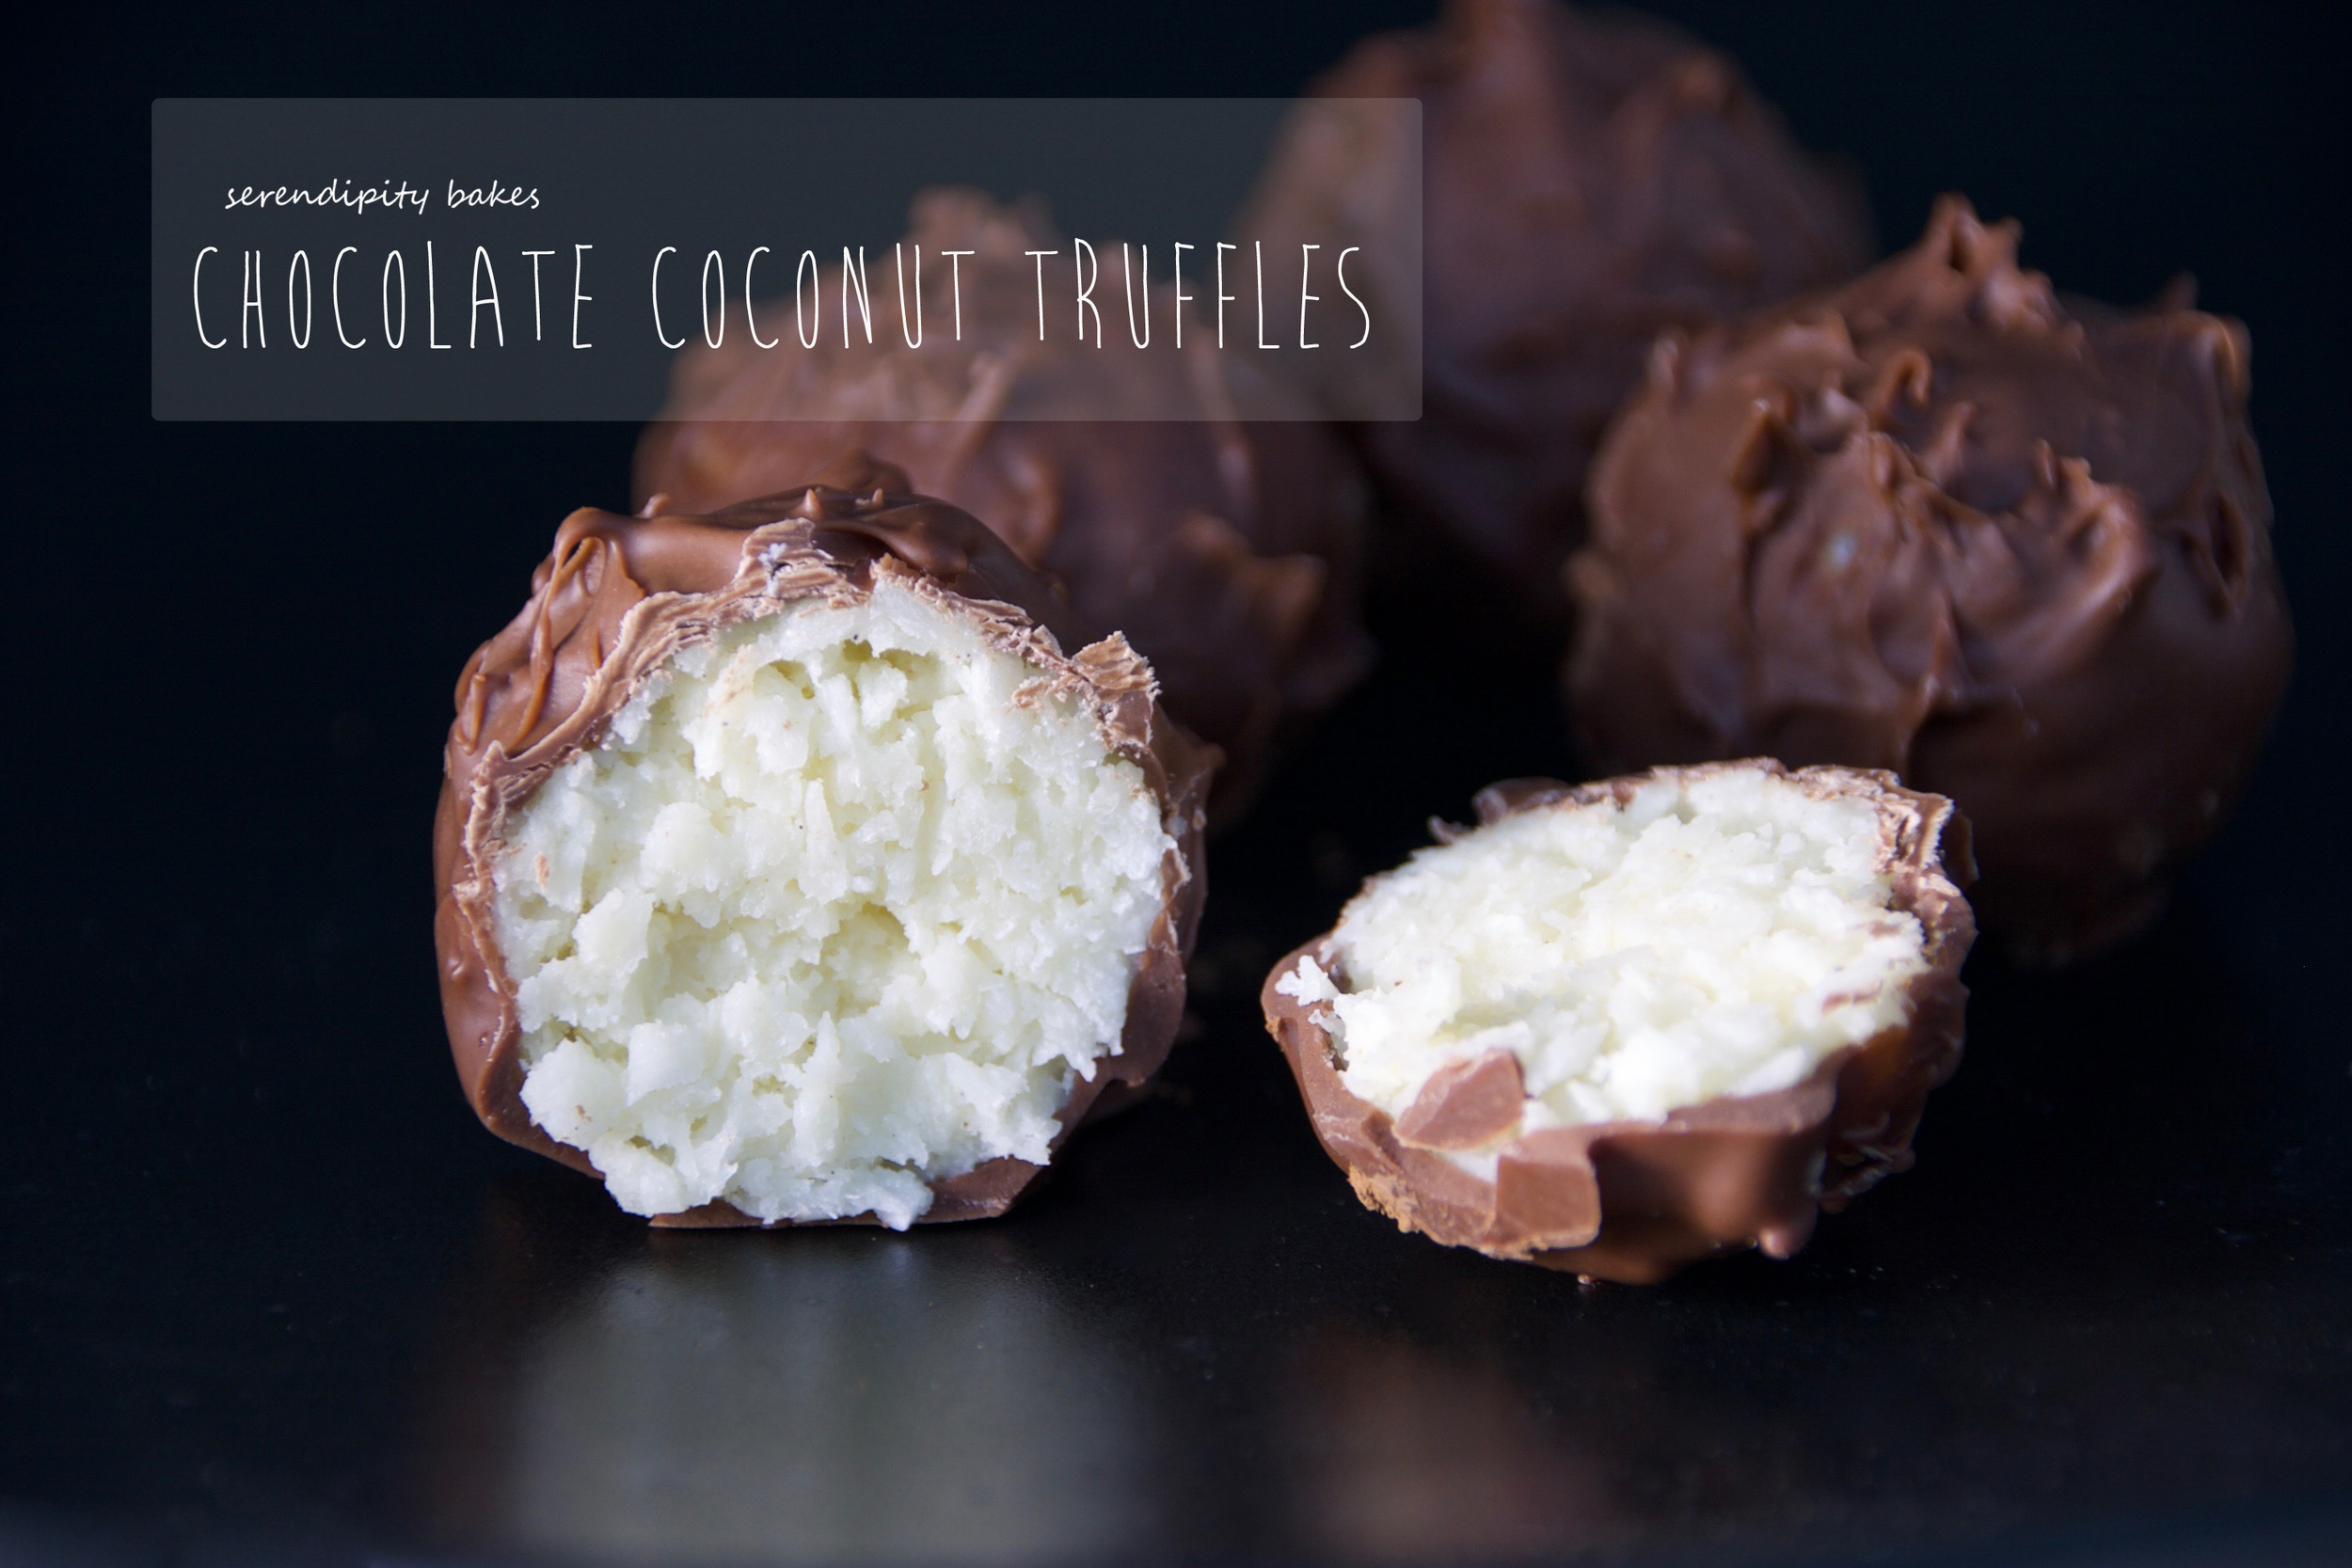
These delicious Chocolate Coconut Truffles are a fantastic homemade version of my very favourite Chocolate Bounty Bars. Small, bitesize truffles filled with white chocolate coconut ganache and covered with salted milk chocolate. And only 4 simple ingredients! Perfect for gifts, perfect to treat yourself :)
Read moreOrange Blossom & Almond Cookies

Delicious almondy goodness shines through in these tasty little Almond Cookies with just a hint of Orange Blossom. A twist on the traditional Greek Almond Cookie!
Read moreLemon & Mascarpone Pancakes
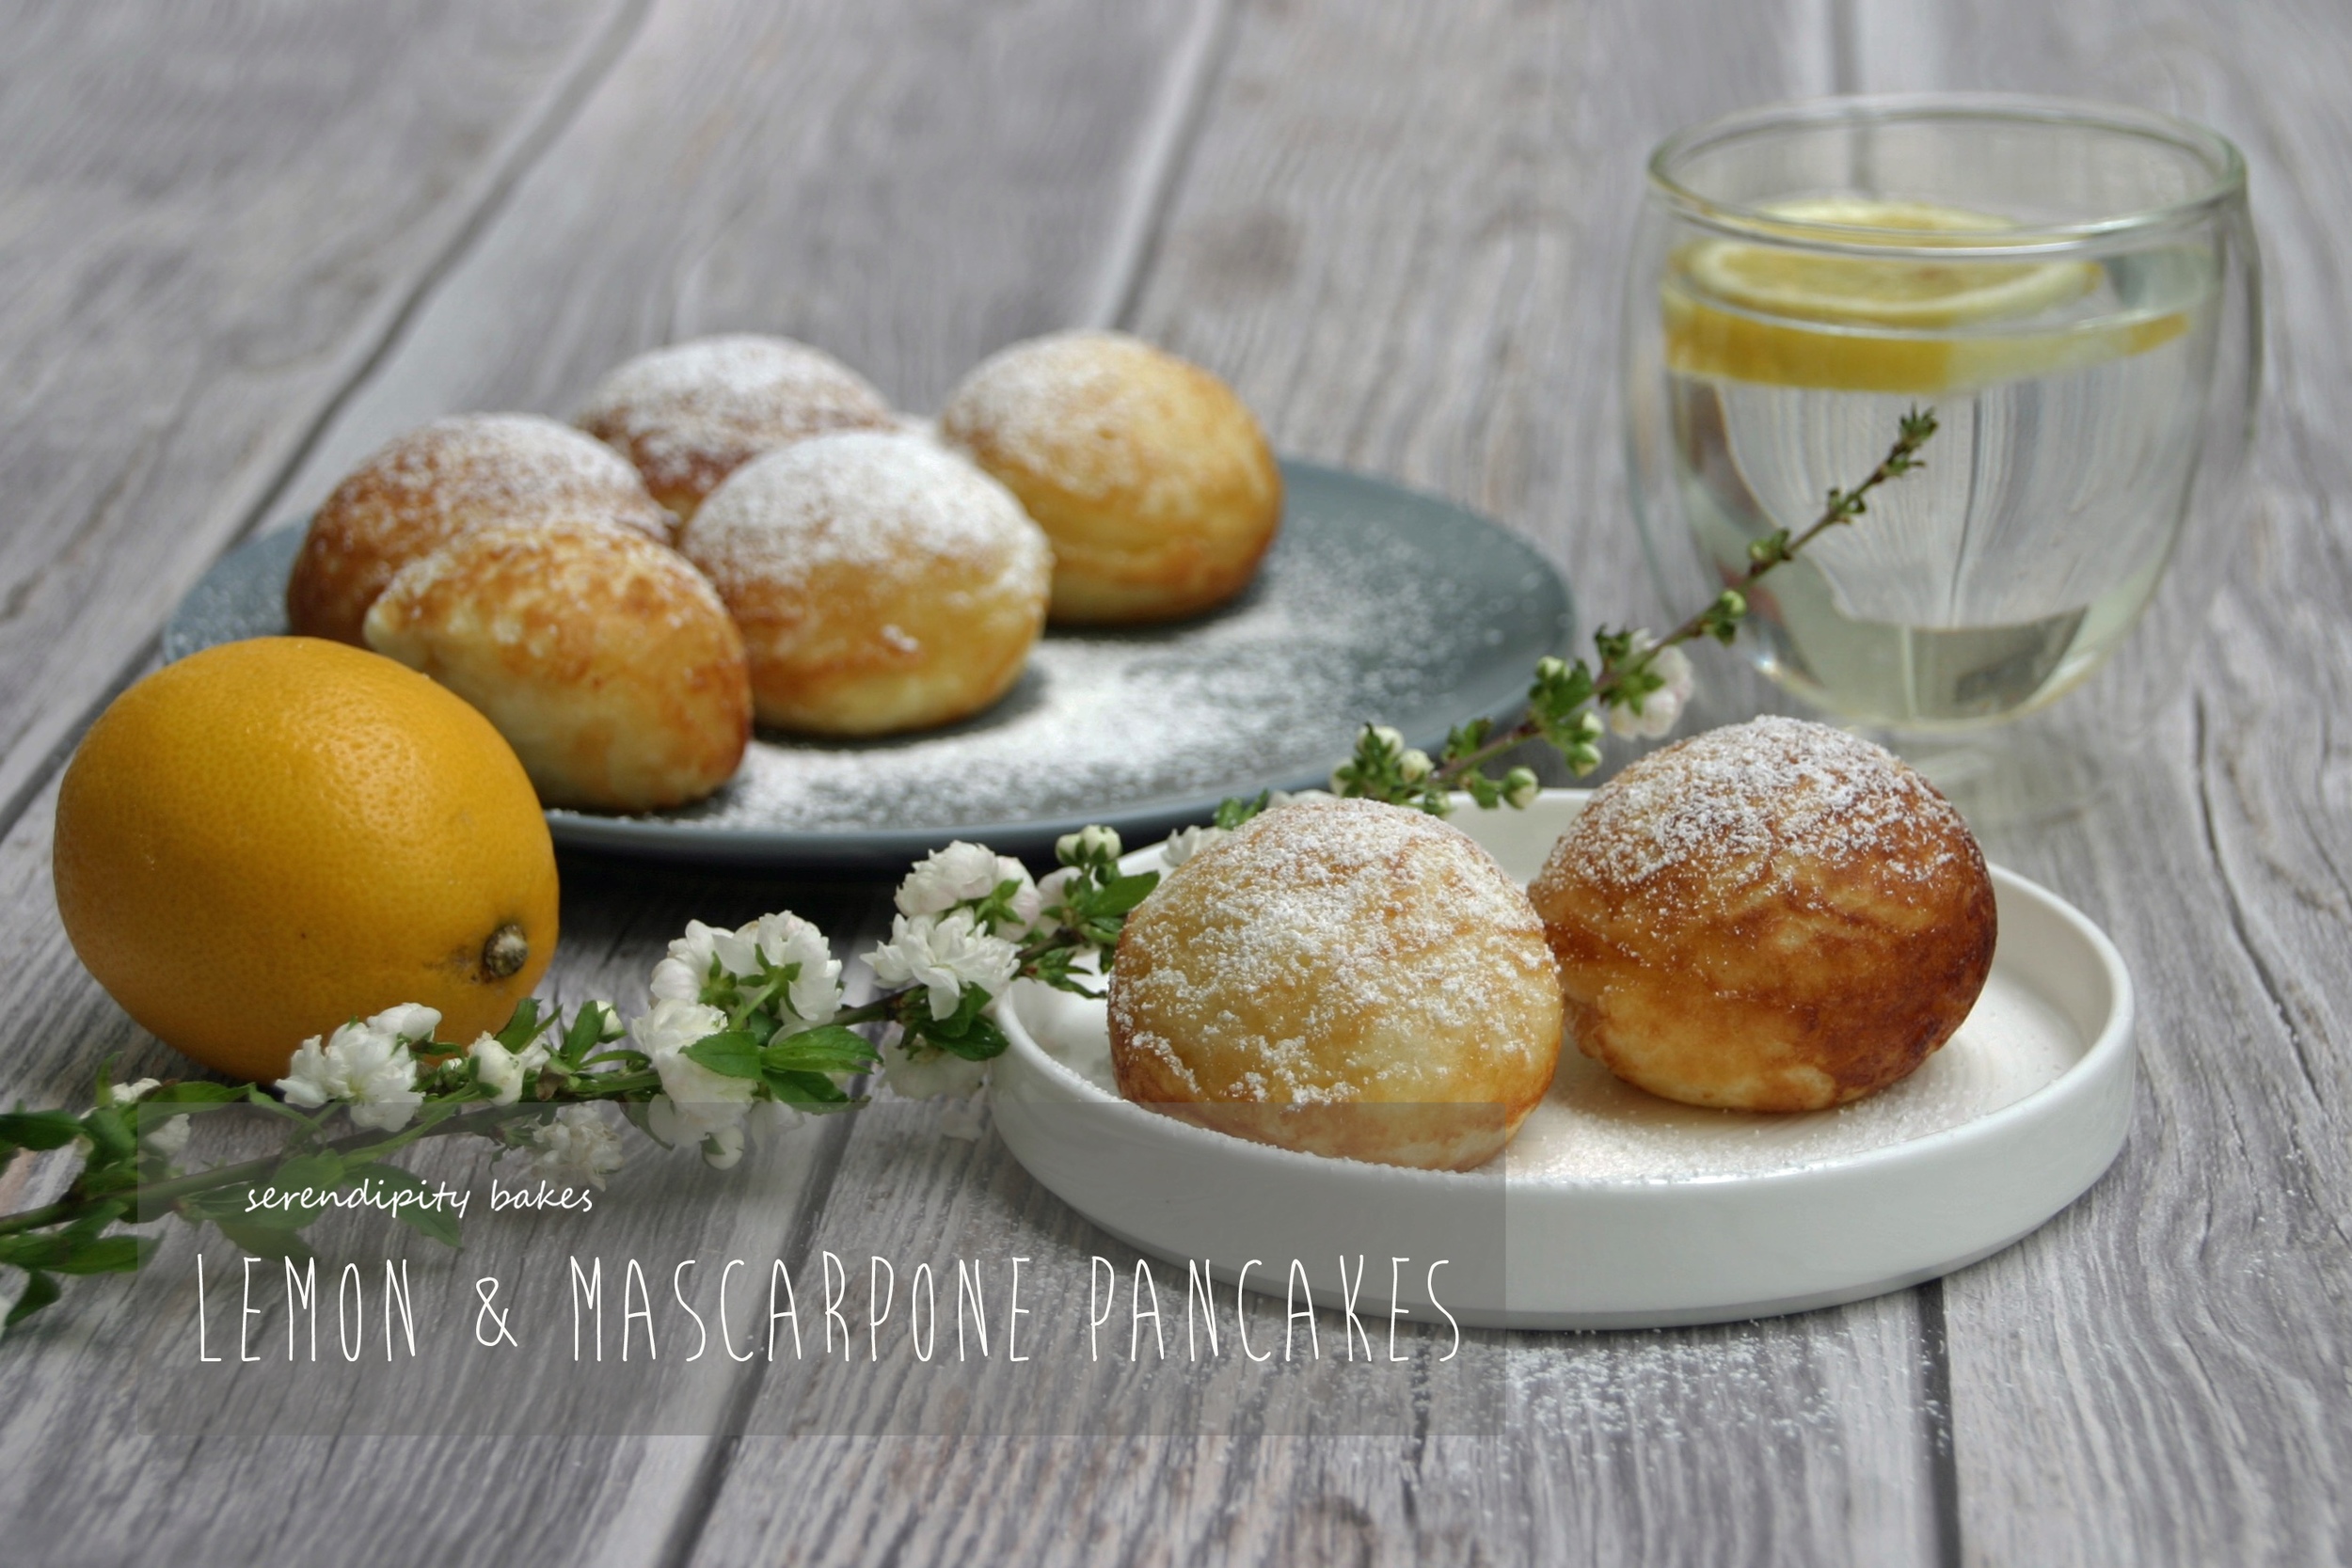
So there's this pan. We've had it for, oh, maybe ten years. It's been sat in a drawer at my parents' house, unloved, and I rediscovered it over easter. It makes Æbleskiver, Danish Pancake Puffs, which I have discovered today are, quite frankly, delicious! They are little light balls which can be filled with all sorts of flavours. The possibilities for flavour combinations are endless but the ones I'm making are filled with mascarpone and lemon cream which is tangy, fresh and decidedly yummy.
If there's one person that's possibly even more addicted to baking and cooking ware and gadgets than me, it's my mum! When they spent a decade out in Toronto, we discovered our love for Williams-Sonoma and my mum used to get drawn into all the in-store demos and come home laden with all the necessary kitchenware and ingredients required to make them at home. Cue, the Æbleskiver pan. I secretly love the hordes of different cooking bits and bobs she's gathered over the years!


Making these pancakes was a voyage into the unknown as I haven't made or tasted them before. The batter and filling are simple to make; the cooking of them takes a little more technique! We start by making the Lemon and Mascarpone Cream which is as simple as it sounds -- equal amounts of mascarpone and lemon curd beaten together for a few minutes until smooth and creamy, then refrigerated until you're ready to cook the pancakes. I would make this to taste and would have an even tangier lemon cream next time as it's one of my favourite flavours.
The pancake batter is again an easy recipe using buttermilk. First of all, the dry ingredients are mixed together in a bowl. Then the egg yolks are lightly beaten in a separate bowl and the buttermilk whisked into the egg mixture. This is added to the dry ingredients and mixed until combined. You get a rather lumpy mixture so don't fear if you don't have something beautifully smooth at this stage!

As I whisked the egg white to stiff peaks, my batter puffed up in its bowl and then I added the egg whites in 2 stages, stirring through with a metal spoon. We're almost ready to make the pancakes but first need to melt some butter for your pan.

The process moves pretty quickly now, especially if you have different measuring spoons trying to get everything into the pan in order. First of all, you pop 1/2 tsp melted butter into each pan cavity and wait for it to bubble. Then add 1 tbsp batter, top it with 1/2 tsp lemon cream and then finally cover it with another 1 tbsp batter. This is all quite fiddly and I had the heat up too high for the first batch so trying to get all of these different elements into the pan before I needed to flip each ball was all very hectic.
I abandoned the spoons for the second batch and popped the batter and lemon cream into two separate piping bags. Much simpler! I also turned the heat down to low so the whole process felt much calmer :) After you've added your two lots of batter and cream to each cavity, after 3-4 minutes the balls should be ready to flip. When we make regular pancakes, we always wait for the first few bubbles to appear on the surface so we know we're ready to flip them and these little balls were the same. They're also pretty easy to slide around and check how well cooked they are underneath. I spun them round with the aid of two teaspoons but you can use cocktail sticks if you prefer.
They come out of the pan very easily and after you transfer them to a plate, liberally sprinkle them with icing sugar to make them look really pretty.
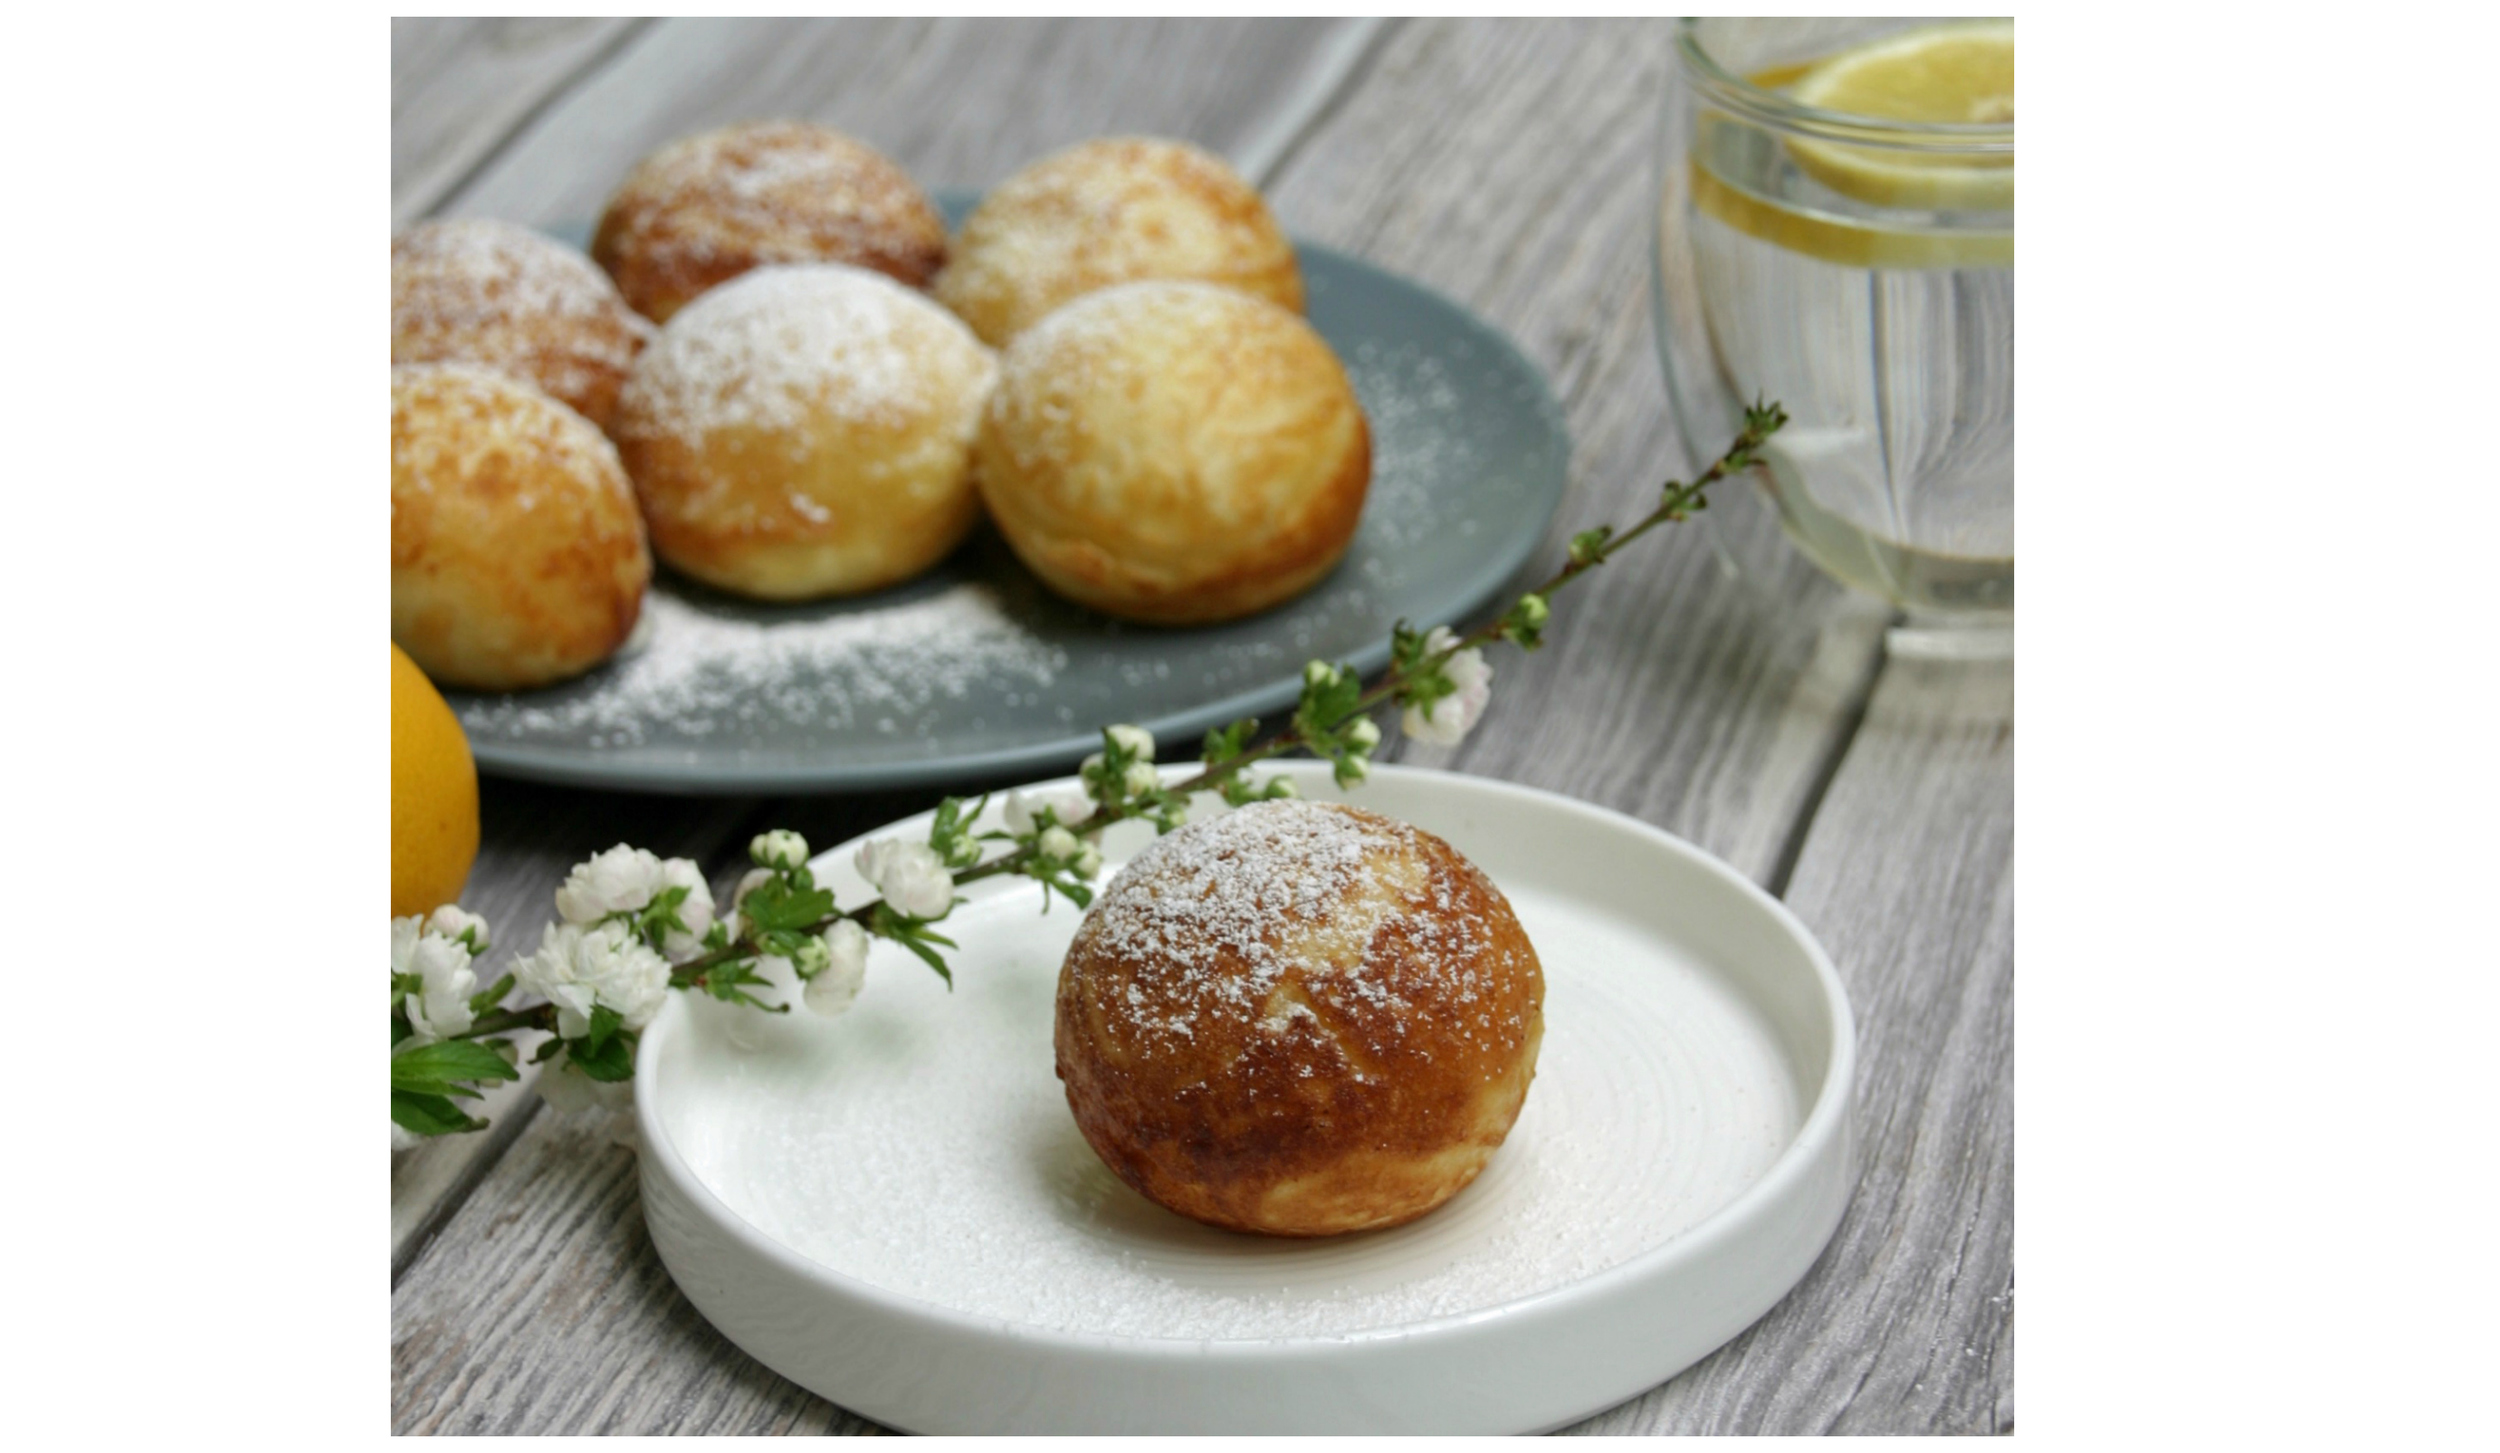
I read up on whether you need to invest in one of these pans to make the pancake balls and the unfortunate answer is that you do if you want the ball shape which after all, makes them pretty cute. Although you probably won't be making lots of different creations with this pan, the flavour combos are endless and I'm already dreaming up both sweet and savoury ideas for them :)

I squirrelled away a few of them for hubby tonight and just thought I'd check out whether they're still good cold and I am very pleased to confirm that they absolutely are -- think doughnut texture and super yummy!
My boys and I have already come up with our next few flavour combos - stay tuned ;-)
Lemon & Mascarpone Pancakes
adapted from Williams Sonoma's Lemon-Mascarpone Filled Pancakes
Makes around 20 pancake balls
Ingredients

- 80G MASCARPONE
- 80G LEMON CURD
- 250G PLAIN FLOUR
- 3/4 TSP BICARBONATE OF SODA
- 1 TSP BAKING POWDER
- 1.5 TBSP CASTER SUGAR
- 1/2 TSP SALT
- 1/2 LEMON, ZEST ONLY
- 3 EGGS, SEPARATED
- 420ML BUTTERMILK
- 100G MELTED BUTTER
- ICING SUGAR, TO DECORATE
Method
- To make the Lemon & Mascarpone Cream, put the mascarpone and lemon curd into the bowl of a freestanding mixer and beat for around 3 minutes until smooth
- Cover and refrigerate until you're ready to make the pancakes
- Place all the dry ingredients (flour, bicarb, baking powder, caster sugar, salt and lemon zest) into a bowl and stir to combine
- Put the egg yolks in a separate bowl and whisk lightly
- Add the buttermilk and again whisk lightly until combined
- Whisk the egg and buttermilk mixture into the dry ingredients until combined - you will have a thick and lumpy mixture at this stage
- Whisk the egg whites to stiff peak
- Gently fold the egg whites into the batter in two additions and ensure that the mixture is all combined
- Place the batter and the lemon cream into two separate piping bags
- Melt the butter
- Place the pan on a low heat and add a teaspoon of butter to each cavity
- When the butter is bubbling gently, add around 1 tbsp batter into each cavity
- Then insert the tip of the lemon cream bag gently into the top of the batter and add 1/2 teaspoon cream
- Cover this with another tablespoon of batter
- When little bubbles start to appear on the surface of the batter, it's time to flip them gently using 2 teaspoons to help rotate them
- Cook the other side for around another 3 minutes
- It's easy to rotate the pancake balls in their cavity so you can check that you're happy they're cooked all around
- When cooked, gently remove them from the pan and transfer to a plate
- Sprinkle them with icing sugar
- They are best eaten warm but are also yummy cold so be sure to make up a whole batch and you can eat them later for a sweet snack :)
Mini Carrot Cakes

So I guess everyone has a recipe they think is the best. I LOVE my carrot cake. This is hands down my favourite recipe (and I've eaten some pretty good carrot cakes in my time) but the reason I love this one is that it's lovely and moist and very light. This recipe works great as muffins or as a big carrot cake but today they are Mini Carrot Cakes. Perfect for the weekend, perfect for sharing with friends.
I always start by grating the carrot. I used to grate the carrot by hand, but these days I cheat and use a handheld blender - it's much quicker! You need around 4 very large carrots to get the amount you need. Then after setting these aside, start by making the batter - place the oil, brown sugar and eggs in a freestanding mixer and beat for around 3 - 5 minutes until thick and creamy. Add the carrots and zest and mix gently to combine. You don't want to overbeat this and the next stage as it will toughen your cakes. Finally sift the flour, bicarb and cinnamon into the mix and then gently combine.

Today I wanted to make mini carrot sandwich cakes but if you prefer, or don't have this tin, they can easily be made in cupcake or muffin wrappers instead. Using the mini sandwich tin, scoop around an ice cream scoop of batter into each cavity until almost full and then bake for around 18 - 20 minutes. The cakes should cool for around 10 minutes in the tin and then be gently removed and placed on a cooling rack. You will get a muffin top dome on each cake that needs to be sliced off to make flat-topped cakes. These muffin tops are excellent perks for any little helpers you might have in the kitchen - or chef's perks if you can keep it quiet!
Whilst the cakes are cooling you, can have fun making your little carrots for the top of each cake. I used around 10g sugarpaste for each carrot and coloured it with orange food dye. Each one should be shaped like a carrot and small scores made along each one to look like the indentations found on a carrot. Then a herb placed in the top of each one. I used coriander but it does tend to wilt rather quickly so place them in just before serving.


The final job is to make the cream cheese frosting. Super simple to make, first beat the butter for a couple of minutes in a freestanding mixer. Then add the cream cheese, vanilla extract and half of the sifted icing sugar and beat for around 3 - 5 minutes until smooth and creamy. The final icing sugar needs to go in now and again mixed for another 3 minutes until lovely and smooth. Place this in a piping bag.

To assemble them, pipe a little buttercream onto half of the cakes. I piped mine in little blobs and then gently placed the other half on top. Pipe the final buttercream on top in a dome shape (try to get this around 2/3 the height of your carrots so you can hide your carrots in the middle). Sprinkle some or the crushed Oreo cookies on top as the soil and then pop a carrot into each one.

I think these look so cute and fun and are perfect for kids and adults alike. The cake itself is light and airy and then paired with rich cream cheese, they are a dream.

Easter came with a multitude of chocolate and although it may be over, our holidays continue and this is a great to get a break from all the chocolate!
And a cake containing carrots must be healthy - or at least that's what the kids are telling me ;-)
Mini Carrot Cakes
makes 9 mini cakes
Cake Ingredients

- 350G GRATED CARROT (around 4 large carrots)
- 170ML VEGETABLE OIL
- 210G LIGHT BROWN SUGAR
- 3 EGGS
- 1 ORANGE, ZEST ONLY
- 1 LEMON, ZEST ONLY
- 275G SELF-RAISING FLOUR
- 1 TSP BICARBONATE OF SODA
- 1.5 TSP CINNAMON
Frosting Ingredients
- 65G UNSALTED BUTTER, SOFTENED
- 200G CREAM CHEESE, FULL FAT
- 1 TSP VANILLA EXTRACT
- 500G ICING SUGAR, SIFTED
- 90G WHITE FONDANT
- ORANGE FOOD COLOURING
- HERBS FOR CARROT STALKS (I used coriander)
- 4 OREO COOKIES, CRUSHED
Method
- Preheat the oven to 170 degrees (fan)
- Grate the carrot and set aside
- Place the vegetable oil, brown sugar and eggs in the bowl of a freestanding mixer
- Mix them for 5 minutes on medium speed until you have a thick, creamy texture
- Add the carrots, zest of lemon and zest of orange and stir through until just combined
- Sift the flour, bicarb and cinnamon on the top of the batter and stir gently until just combined
- Pour batter into a mini sandwich tin and fill each cavity until almost to the top - you should have 18 cavities filled
- Bake for 18 - 20 minutes until a skewer inserted in the centre comes out clean
- Leave to cool for 10 minutes and then gently remove each cake and set it on a cooling rack to cool
- Your mini cakes will have a dome so you want to carefully slice off each one and put aside so you have flat-topped cakes
- To make the mini carrots, colour the fondant using the orange food colouring
- Divide into 9 pieces, around 10g per piece and shape each one into a cylinder shape like a carrot
- Make indentations down each one like a real carrot and make a small hole in the top of each carrot
- Top with a little piece of herb and set aside
- To make the Cream Cheese Frosting, beat the butter in a freestanding mixer for 2 minutes
- Then add the cream cheese, half of the icing sugar and the vanilla extract
- Beat for around 3 - 5 minutes until a smooth and creamy consistency
- Add the remaining icing sugar and beat again for 3 minutes until smooth
- When the carrot cakes have cooled for around 30 minutes you can then frost them
- Pipe buttercream onto 9 of the mini cakes
- Then take the remaining 9 mini cakes and place one gently on top of the buttercream so you have 9 mini sandwich cakes
- Pipe the remaining buttercream on the top of each cake
- Sprinkle some of crushed Oreo Cookies on top of each cake and then place a carrot in the centre
- After all this hard work, make yourself a cup of tea and then enjoy a well-deserved carrot cake for your efforts :)
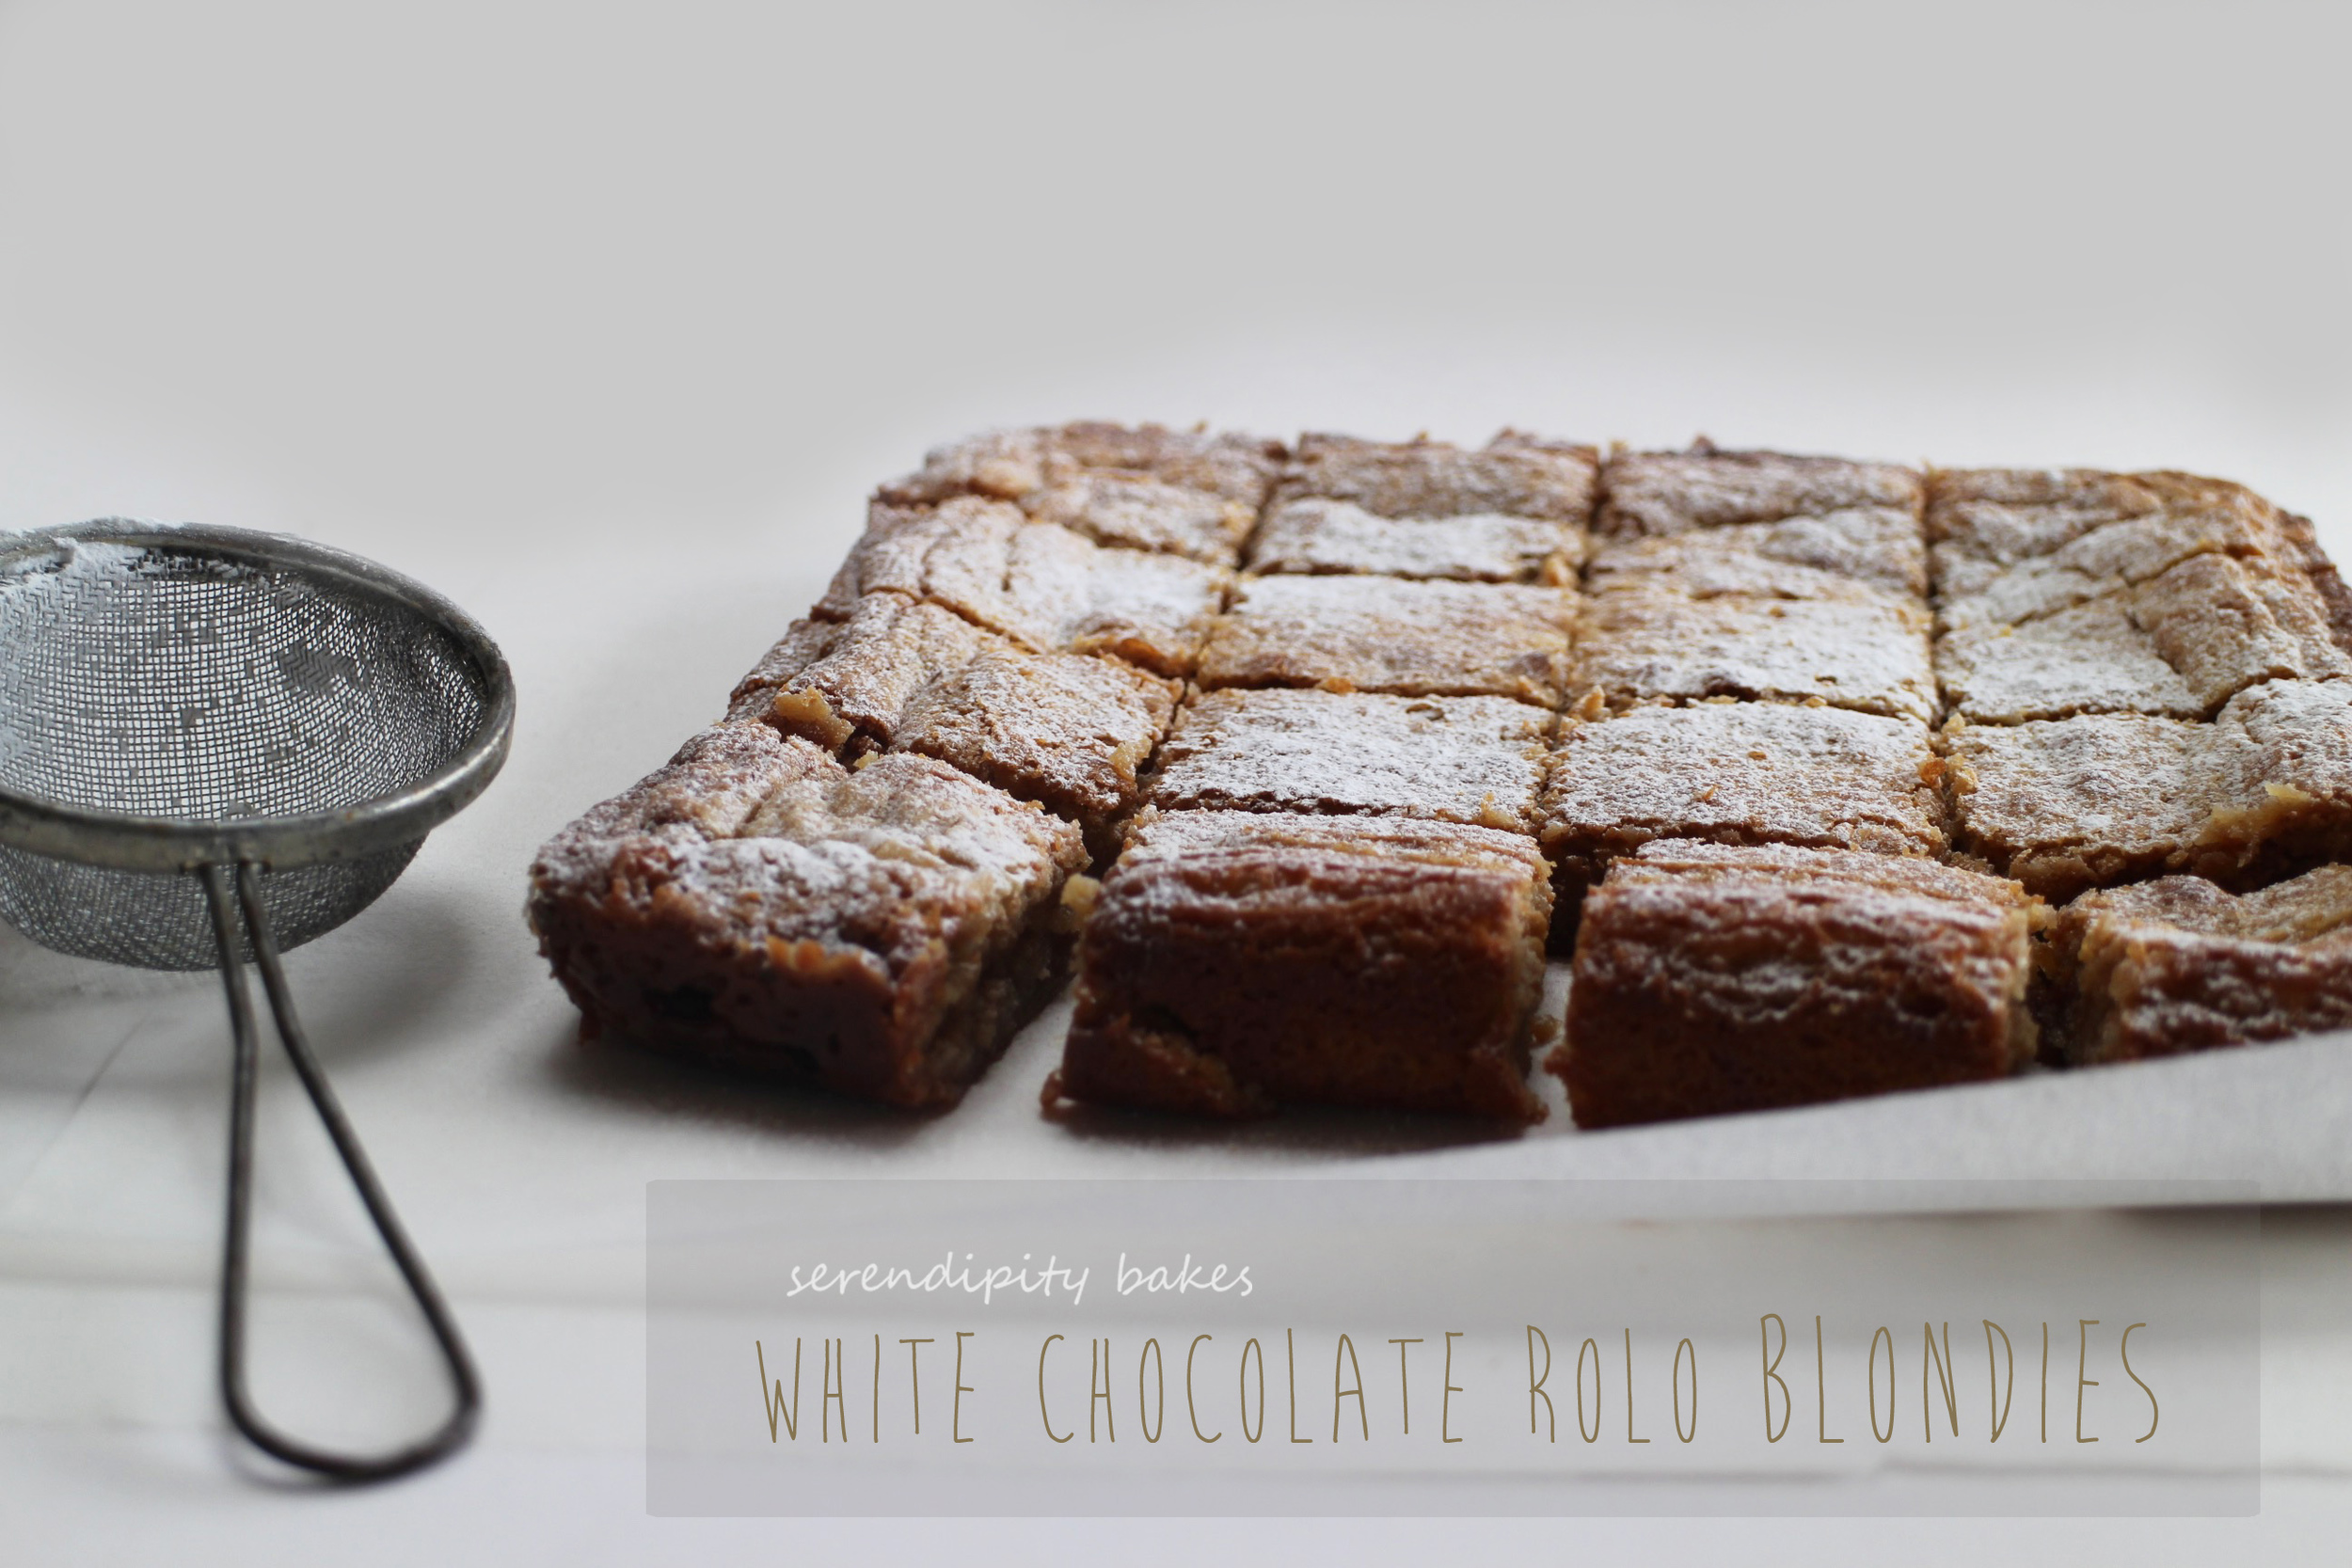
White Chocolate Rolo Blondies
I hope you've all had wonderful chocolate-filled easters wherever you've been celebrating. We're away for a few days, spending time with family and although the weather has been pretty horrible, we've spent a wonderful few days enjoying new board games, making treasure maps for our (many) easter egg hunts and running outside to make the most of the occasional rays of sunshine.
As if we haven't had enough chocolatey loveliness over the long weekend, today I decided to make us a sweet treat -- and when I say sweet, we all declared this was truly one of the sweetest sweet treats I've made -- before going on to devour whole squares of it. White Chocolate Rolo Blondies. A white chocolate version of a brownie stuffed with the yummiest Rolo sweets. Although if you've been overwhelmed by easter eggs filled with lots of yummy sweeties, you can exchange the Rolos for your own favourite sweet. Mmmm...I'm now dreaming of Maltesers 💕

This is an easy one-bowl batter but for something so simple to make, it rewards big time in flavour. White chocolate is my favourite chocolate and the Rolos turn really squidgy and chewy in the final bake. After the chocolate and butter are melted together, we just add the ingredients one by one, stirring after each addition until they're all combined. After this is spread evenly in a baking tin, then the Rolos are squished (yes, this is technical term!) into the batter and then it's popped into the oven to bake.

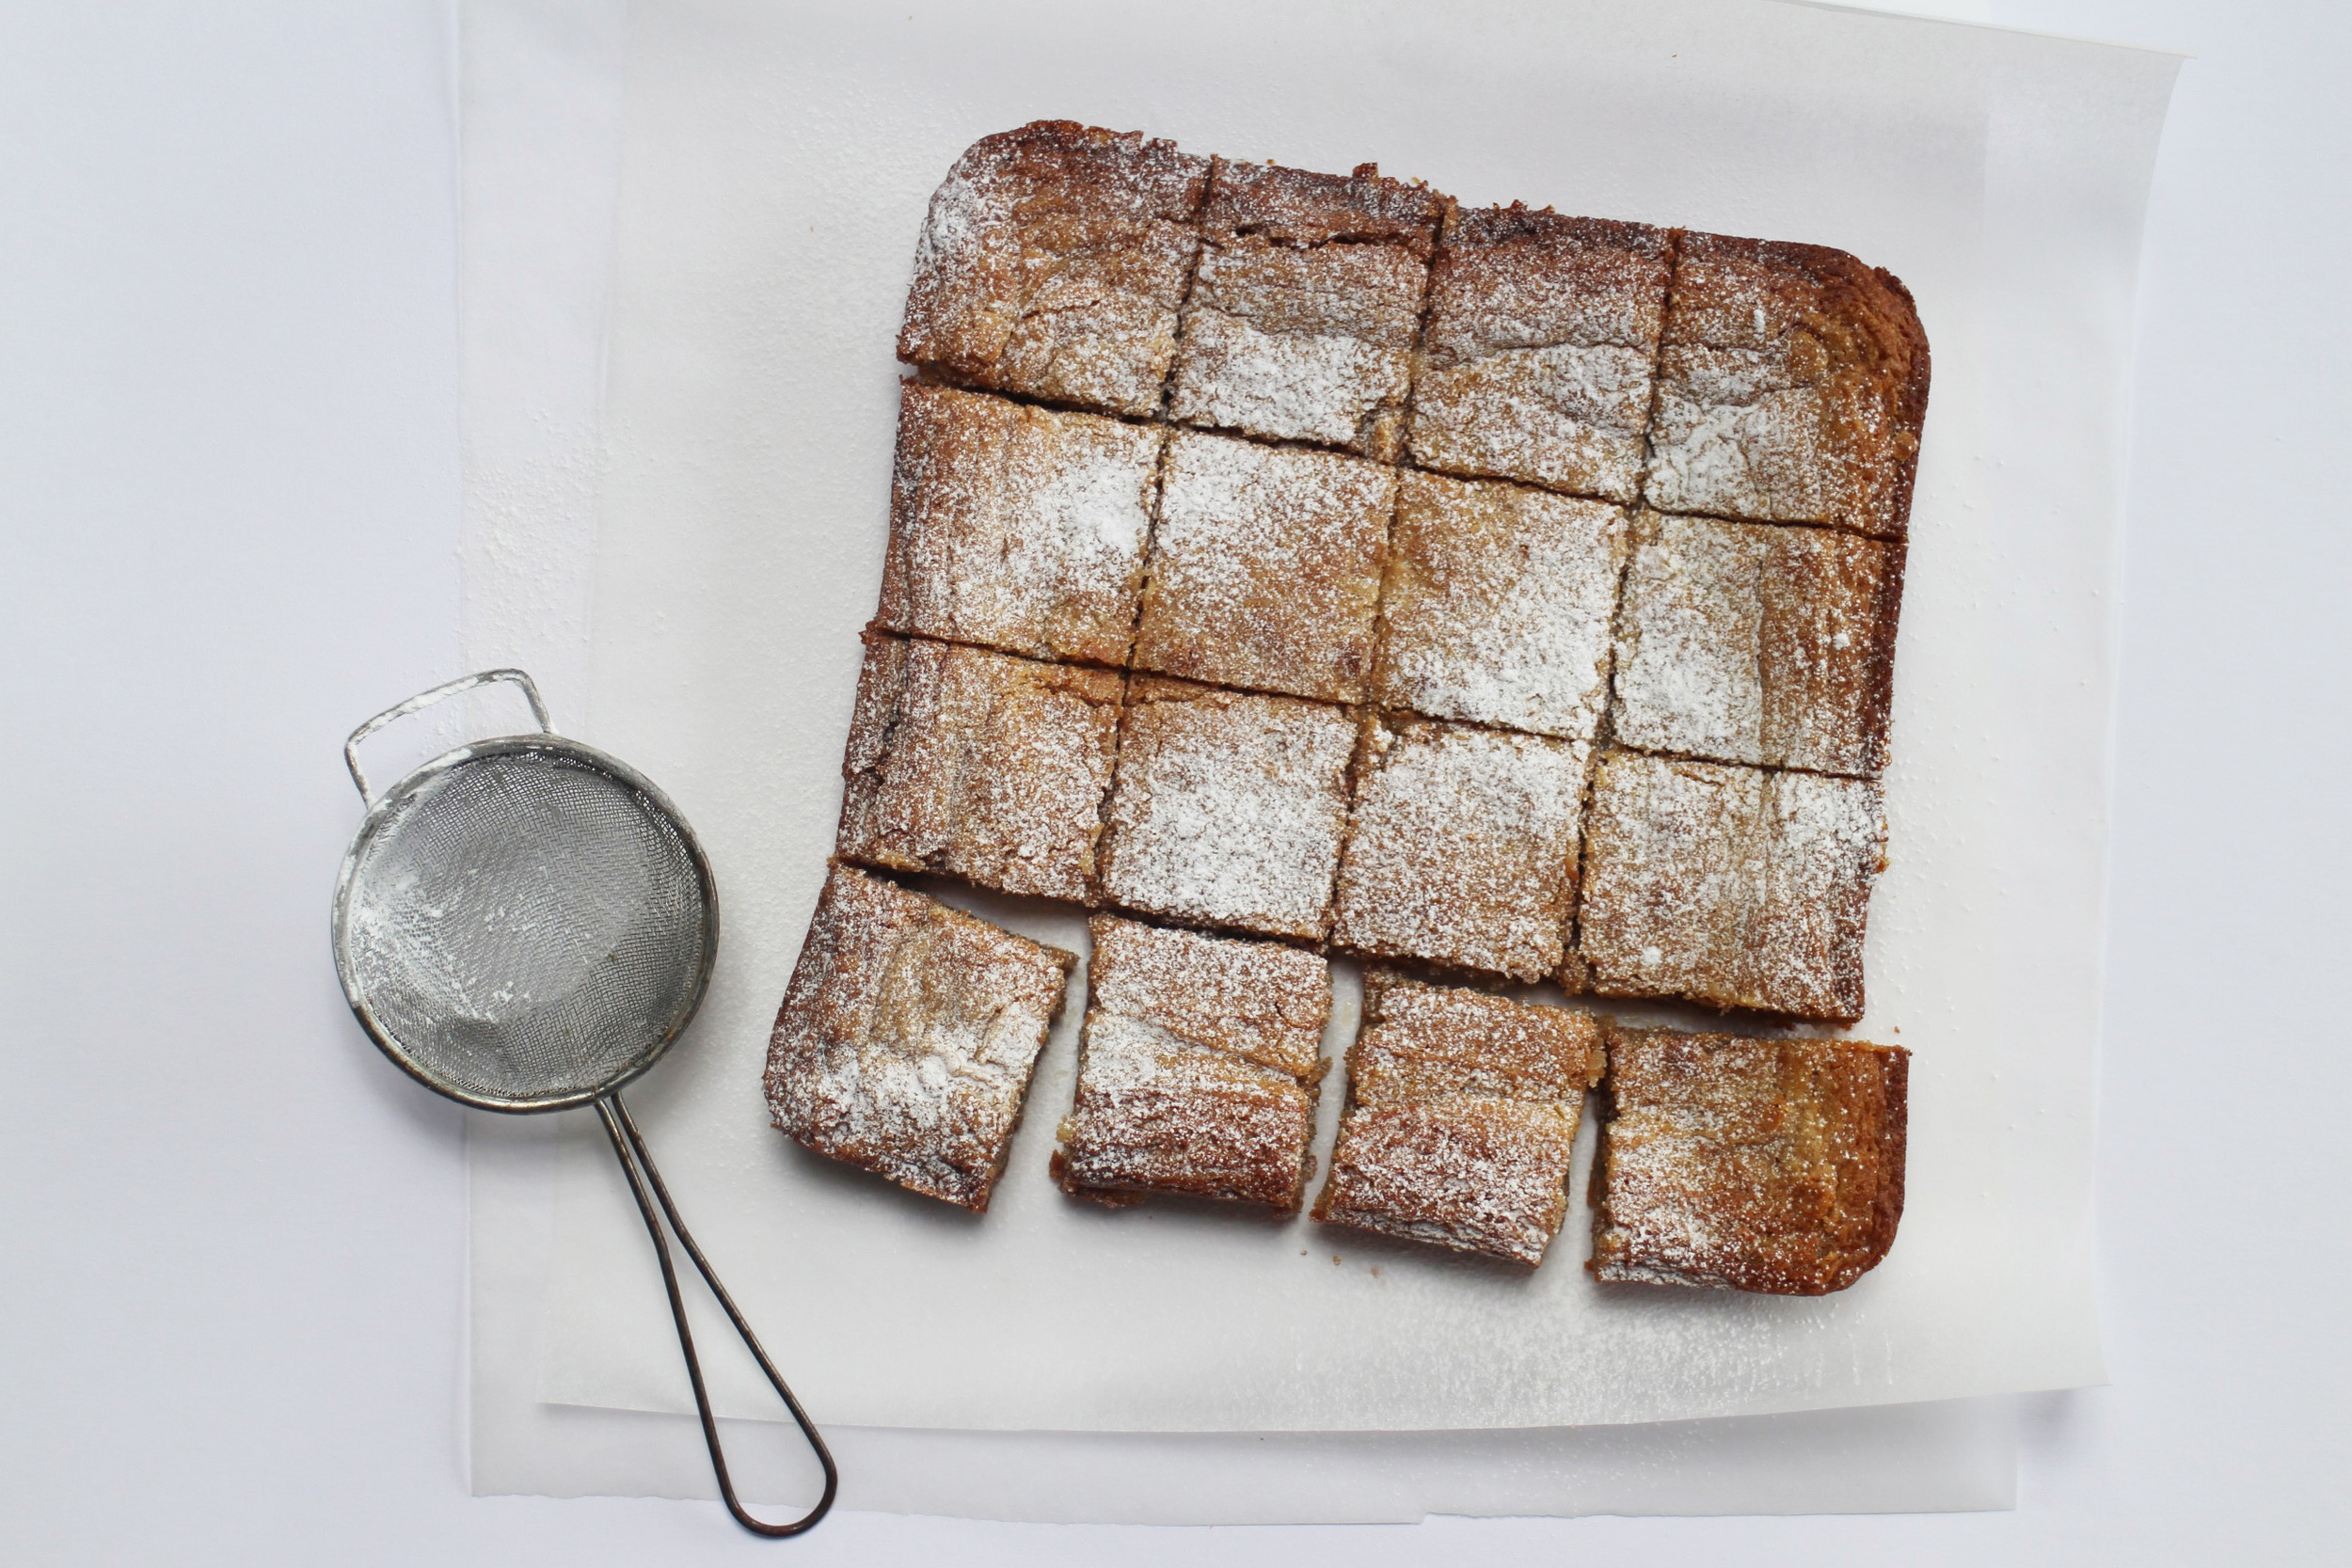
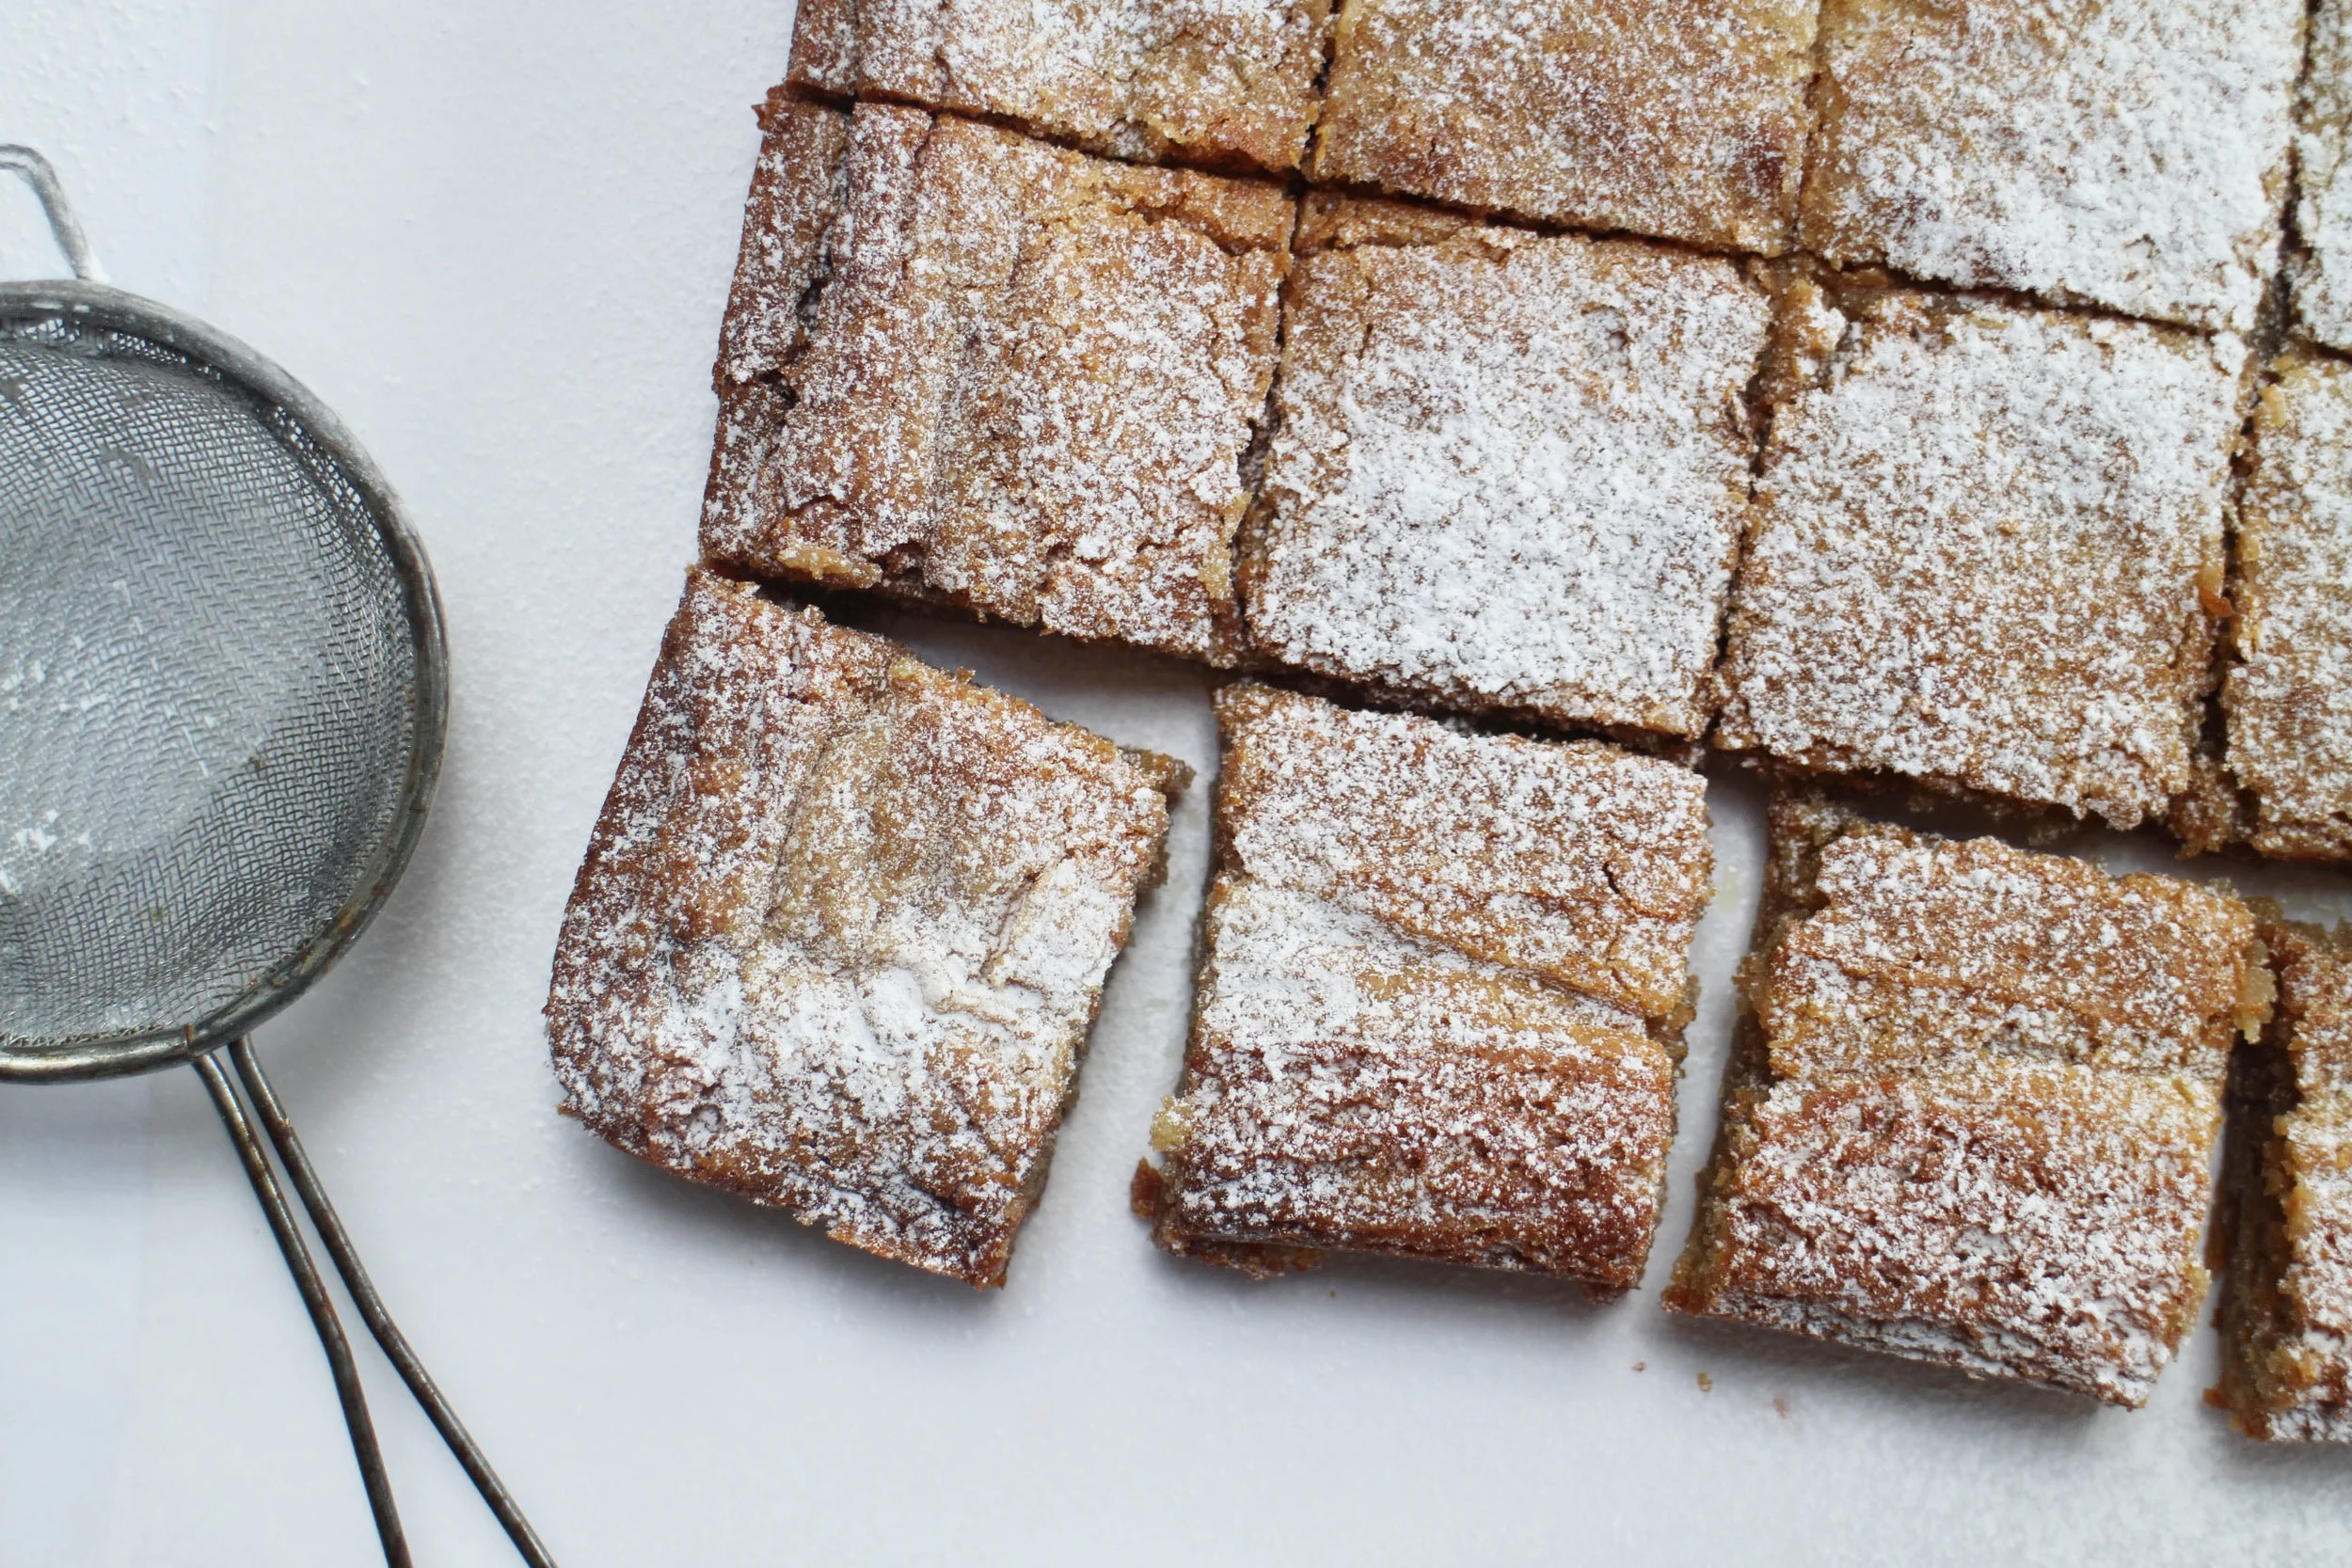
Once it's out of the oven, it's left to cool in the tin until just warm and then divided into squares with a sharp knife. How many squares, you decide. I cut ours into 16 but we thought we could actually cut them up smaller into one bite blondies. To drizzle or not to drizzle is entirely up to you, but a dusting of icing sugar and some melted white chocolate makes them a little more special.

So, after all your easter eggs, if you are still hankering after something a touch sweet, insanely chewy and just that little bit decadent, this is the treat for you.
They don't hang around for long :)
White Chocolate Rolo Blondies
Makes 16 squares
Ingredients

- 250G WHITE CHOCOLATE, CHOPPED
- 115G UNSALTED BUTTER, CUBED
- 100G CASTER SUGAR
- 2 LARGE EGGS, LIGHTLY BEATEN
- 1/2 TSP VANILLA EXTRACT
- 130G PLAIN FLOUR
- 1/2 TSP BAKING
- 100G WHITE CHOCOLATE CHIPS
- 16 ROLOS
Method
- Preheat the oven to 170 degrees (fan)
- Grease and line an 8 inch square baking tin
- Put 175g white chocolate and the cubed butter in a heatproof bowl over a pan of gently simmering water (making sure that the water doesn't touch the base or sides of the bowl)
- Stir the chocolate and butter gently over the heat until they're melted together
- Remove the bowl from the heat and stir in the sugar until smooth
- Slowly add the beaten eggs and then the vanilla extract and stir until the mixture is smooth and glossy (this takes around one minute)
- Sift the flour and baking powder over the top of the bowl and then stir to combine
- Finally add the white chocolate chips and mix through gently
- Pour the batter into the prepared baking tin, ensuring that it reaches all the edges and is evenly spread
- Then place 16 rolos across the batter and press them down into the mixture (you will still be able to see them)
- Bake in the oven for 20 - 25 minutes until a skewer in the centre comes out clean
- Leave to cool in the tin
- Once just warm, remove from the tin and divide it into squares with a sharp knife
- Dust with icing sugar
- Finally melt the remaining 75G white chocolate in the microwave on short bursts (remove from the microwave when 2/3 of the chocolate is melted and then stir gently until all the chocolate is melted)
- Drizzle the melted chocolate across the top of the blondies
- Enjoy :)
Cherry Pie and Damn Fine Coffee

So yesterday it was Pi Day. There was I, making my very first cherry pie, and I didn't even realise it was International Pi(e) Day. The rest of the blogging world had gone crazy with their amazing array of sweet or savoury pies and mine was dutifully sat in the fridge ready for its moment of baking. So here am I, a day late, sharing my Cherry Pie with you all. If you want to know the real inspiration for trying my hand at this ruby red creation, it was all down to the excitement about the new series of Twin Peaks. I mean - yay! Ever since that final scene where Agent Dale Cooper smacked his head against the mirror, uttering, "Where's Annie?" in a maniacal voice, I've been longing to know what comes next. And I've ALWAYS wanted to try the miraculous cherry pie from the Double R Diner with their damn fine coffee.
So just a few *ahem* years since I watched it, I have finally got around to making my very own cherry pie. I think I might just have become a pie addict! The cherry filling was a bit of a mistake - as in, I wanted to buy tinned cherries but when I got to the supermarket, my only option was tinned cherry fruit filling. I expected this to be cherries in liquid but it was more like cherries in a glutinous gel. It actually tastes pretty good.

The pastry is wonderfully straightforward which I love and you roll it out straightaway rather than waiting for it to chill. You can make it by hand, but I made mine in the mixer. It's simply flour, sugar and salt mixed with small cubes of cold butter; then this is mixed with water to make your pastry. To make the lattice stripes, I have a cutter (I got this from Tala but there are lots of different ones available) but you can easily use a knife and ruler and make straight lines if you don't have the cutter. I also decided to give my pie an air of romance so used a heart cutter with the leftover pastry to make my border.

So you divide your pastry in half and the first half lines your dish. The filling it added and the the top lattice is woven on to the top. The pie needs to chill for at least half an hour (mine went in the fridge overnight) and then it's ready to bake.
I really love the bubbling cherry sauce which peaks up through the golden lattice when your pie has finished baking. And it's absolutely delicious served warm fresh from the oven.
Whether or not you're a Twin Peaks fan, whether or not you ever hankered after a slice of the Double R Diner's most famous cherry pie, or whether or not you actually had a clue what was going on in the show for the whole two seasons, this pie is super yummy. It may be spring here, but that doesn't stop the bitter wind blowing and the -2 degree temperatures so there's nothing better than curling up in front of the fire with a slice of it.

To quote Agent Dale Copper, "This must be where pies go when they die" 💕💕
Cherry Pie
adapted from Williams-Sonoma recipe for Cherry Pie
Makes one 25cm pie
Ingredients

- 400G PLAIN FLOUR
- 2 TBSP CASTER SUGAR
- 1/2 TSP SALT
- 250G UNSALTED BUTTER (straight from the fridge and cut into little cubes)
- 6 TBSP COLD WATER
- 2 TINS OF CHERRY FRUIT FILLING
Method
- Preheat your oven to 200 degrees celsius (fan)
- To make your pastry, first mix the flour, sugar and salt in the bowl of a freestanding mixer
- Cut your butter into small cubes, add this to the bowl and make sure that each piece is coated with flour
- Then mix together with the paddle attachment until the texture looks like cornmeal - I usually finish it off with my fingertips to make sure that each piece of butter is no larger than a pea
- Add the water and mix again slowly until the dough comes together and forms a ball
- Divide your dough in half and put half onto a lightly floured surface
- Flatten the disc with your hand and then roll it out until it's around 30cm in diameter adding a little extra flour if needed
- Immediately place this into your pie dish leaving around 2cm of pastry overhang
- Then take the other half of the dough and roll it out into a rectangular shape around 30cm by 20cm
- Cut the dough into strips (using a ribbon cutter if you want scalloped edges)
- Put your cherry filling into your pie and make sure it's spread evenly
- Then build your lattice onto the top of your pie with your strips overhanging the edge of the pie dish
- You can either fold the edges of the pastry back over the edge and crimp the to seal the pie, but I chose to cut the pastry flush with the edge of the dish
- Cut out small heart shapes (any shape would do here -- leaves, fish, flowers, etc) and after placing a tiny amount of water on the back of each heart, place them around the edge of the pie dish
- Chill your pie in the fridge for at least half an hour
- Bake your pie for 15 minutes
- Decrease your oven temperature to 160 degrees celsius (fan) and bake for a further 45 minutes
- Your pie's ready when the crust is golden brown and the cherry filling is bubbling up through the lattice
- Enjoy warm from the oven with a cup of freshly brewed, (damn) fine coffee :)
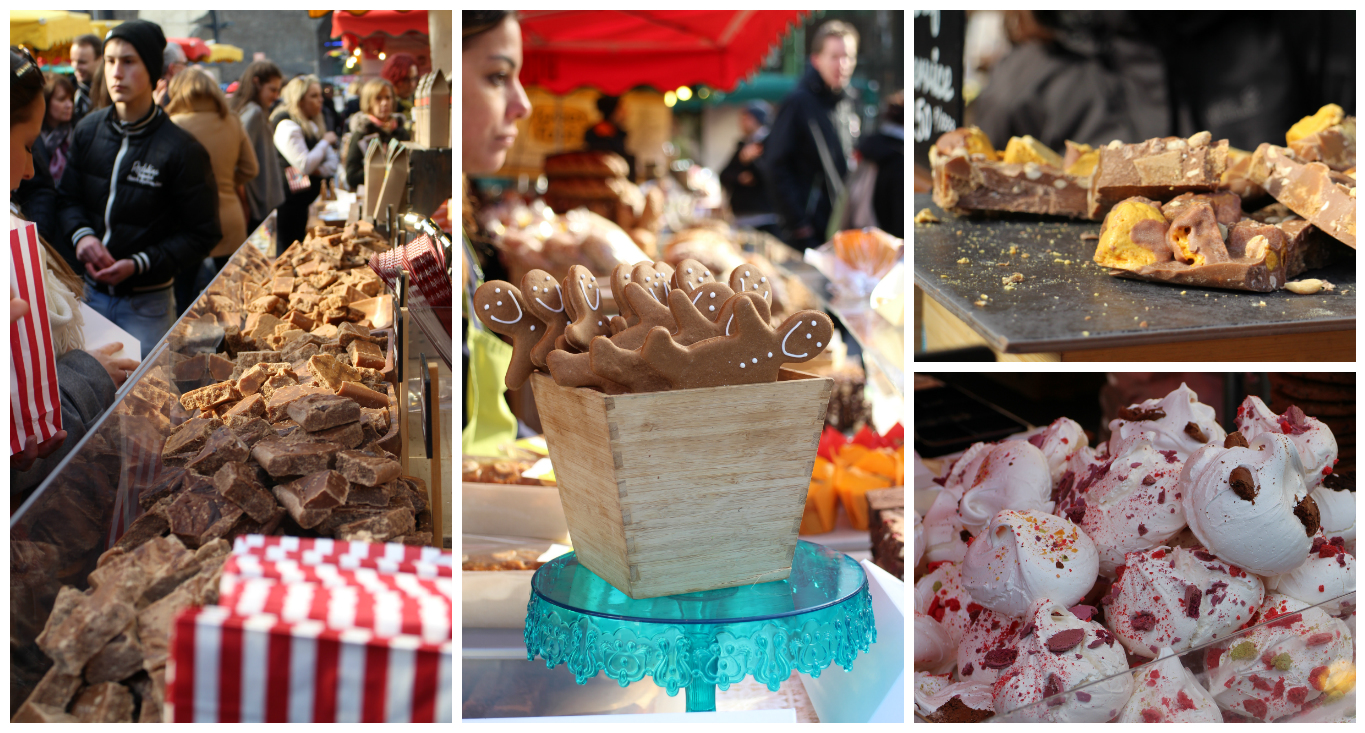
Through The Lens: Borough Market

Hi there! This is a different kind of a post (as in it's not about baking and recipes) but one I wanted to capture for you as it's most definitely about food and the best quality of it. For many years, I've loved photography. There are 3 main photographers that have totally inspired me over the last 15 years or so -- my fabulous sister-in-law, Luci Harrison, our amazing wedding photographer, Johannes Van Kan, and an awesome children's photographer that captured our children in their early years, Maria Murray.
Since starting this blog, I've had the opportunity to take a LOT of photos of food. Many that I'm proud of, many that I know I could do better -- but I'm always looking for inspiration. Last week, one of my oldest and dearest school friends and I set off armed with cameras and headed for Borough Market to capture the bustling market, stall holders and amazing and unique food. And taste testing was an absolute must! I wanted to share some of the photos of our adventures - and give you a few recommendations for our favourite stalls along the way. And I hope through these photos you can enjoy this amazing place and perhaps plan in a visit of your very own :)

So I'm not even going to save the best to last -- this was hands down our best find of the day. Khanom Krok served us the most delicious Mini Sweet Coconut Pancakes. Crispy on the outside and gooey on the inside, we got ours fresh from the pan and they were amazing. Well worth a visit just for these!

We had elevenses perched on the bar stools of Rabot 1745, one of Hotel Chocolat's restaurants. Amazing Caramel Hot Chocolate and fresh from the oven Chocolate Orange Scones with Salted Butter and Chocolate Ganache. I think my friend's face says it all! Even on a Friday morning, it was bustling with people so if you fancy indulging in a fresh bake and array of unusually favoured drinks, I'd get there early to beat the rush.

The stalls there are beautifully merchandised. The stall holders definitely take a huge amount of pride in their food and displaying it to the world. Une Normande à Londres was definitely my favourite shop for the way they showed off their beautiful array of les fromages and les saucissons.

There's plenty to taste test as you're wandering around as each stall is keen to show off their delicious food and draw you into buying some to take home. Tartufaia Truffles had the most fabulous scented truffles to invest in -- I couldn't be persuaded into the Truffle Honey but the Black Truffle Oil was certainly delicious!


Thanks for reading and I hope you found some inspiration in these photos. I can't wait to try to recreate some of the recipes at home and plan in a return visit -- we certainly left there with full bellies and met some of the loveliest people there along the way. Definitely worth a trip - and if you visit it yourself, I'd love to hear which was your favourite food discovery 💕
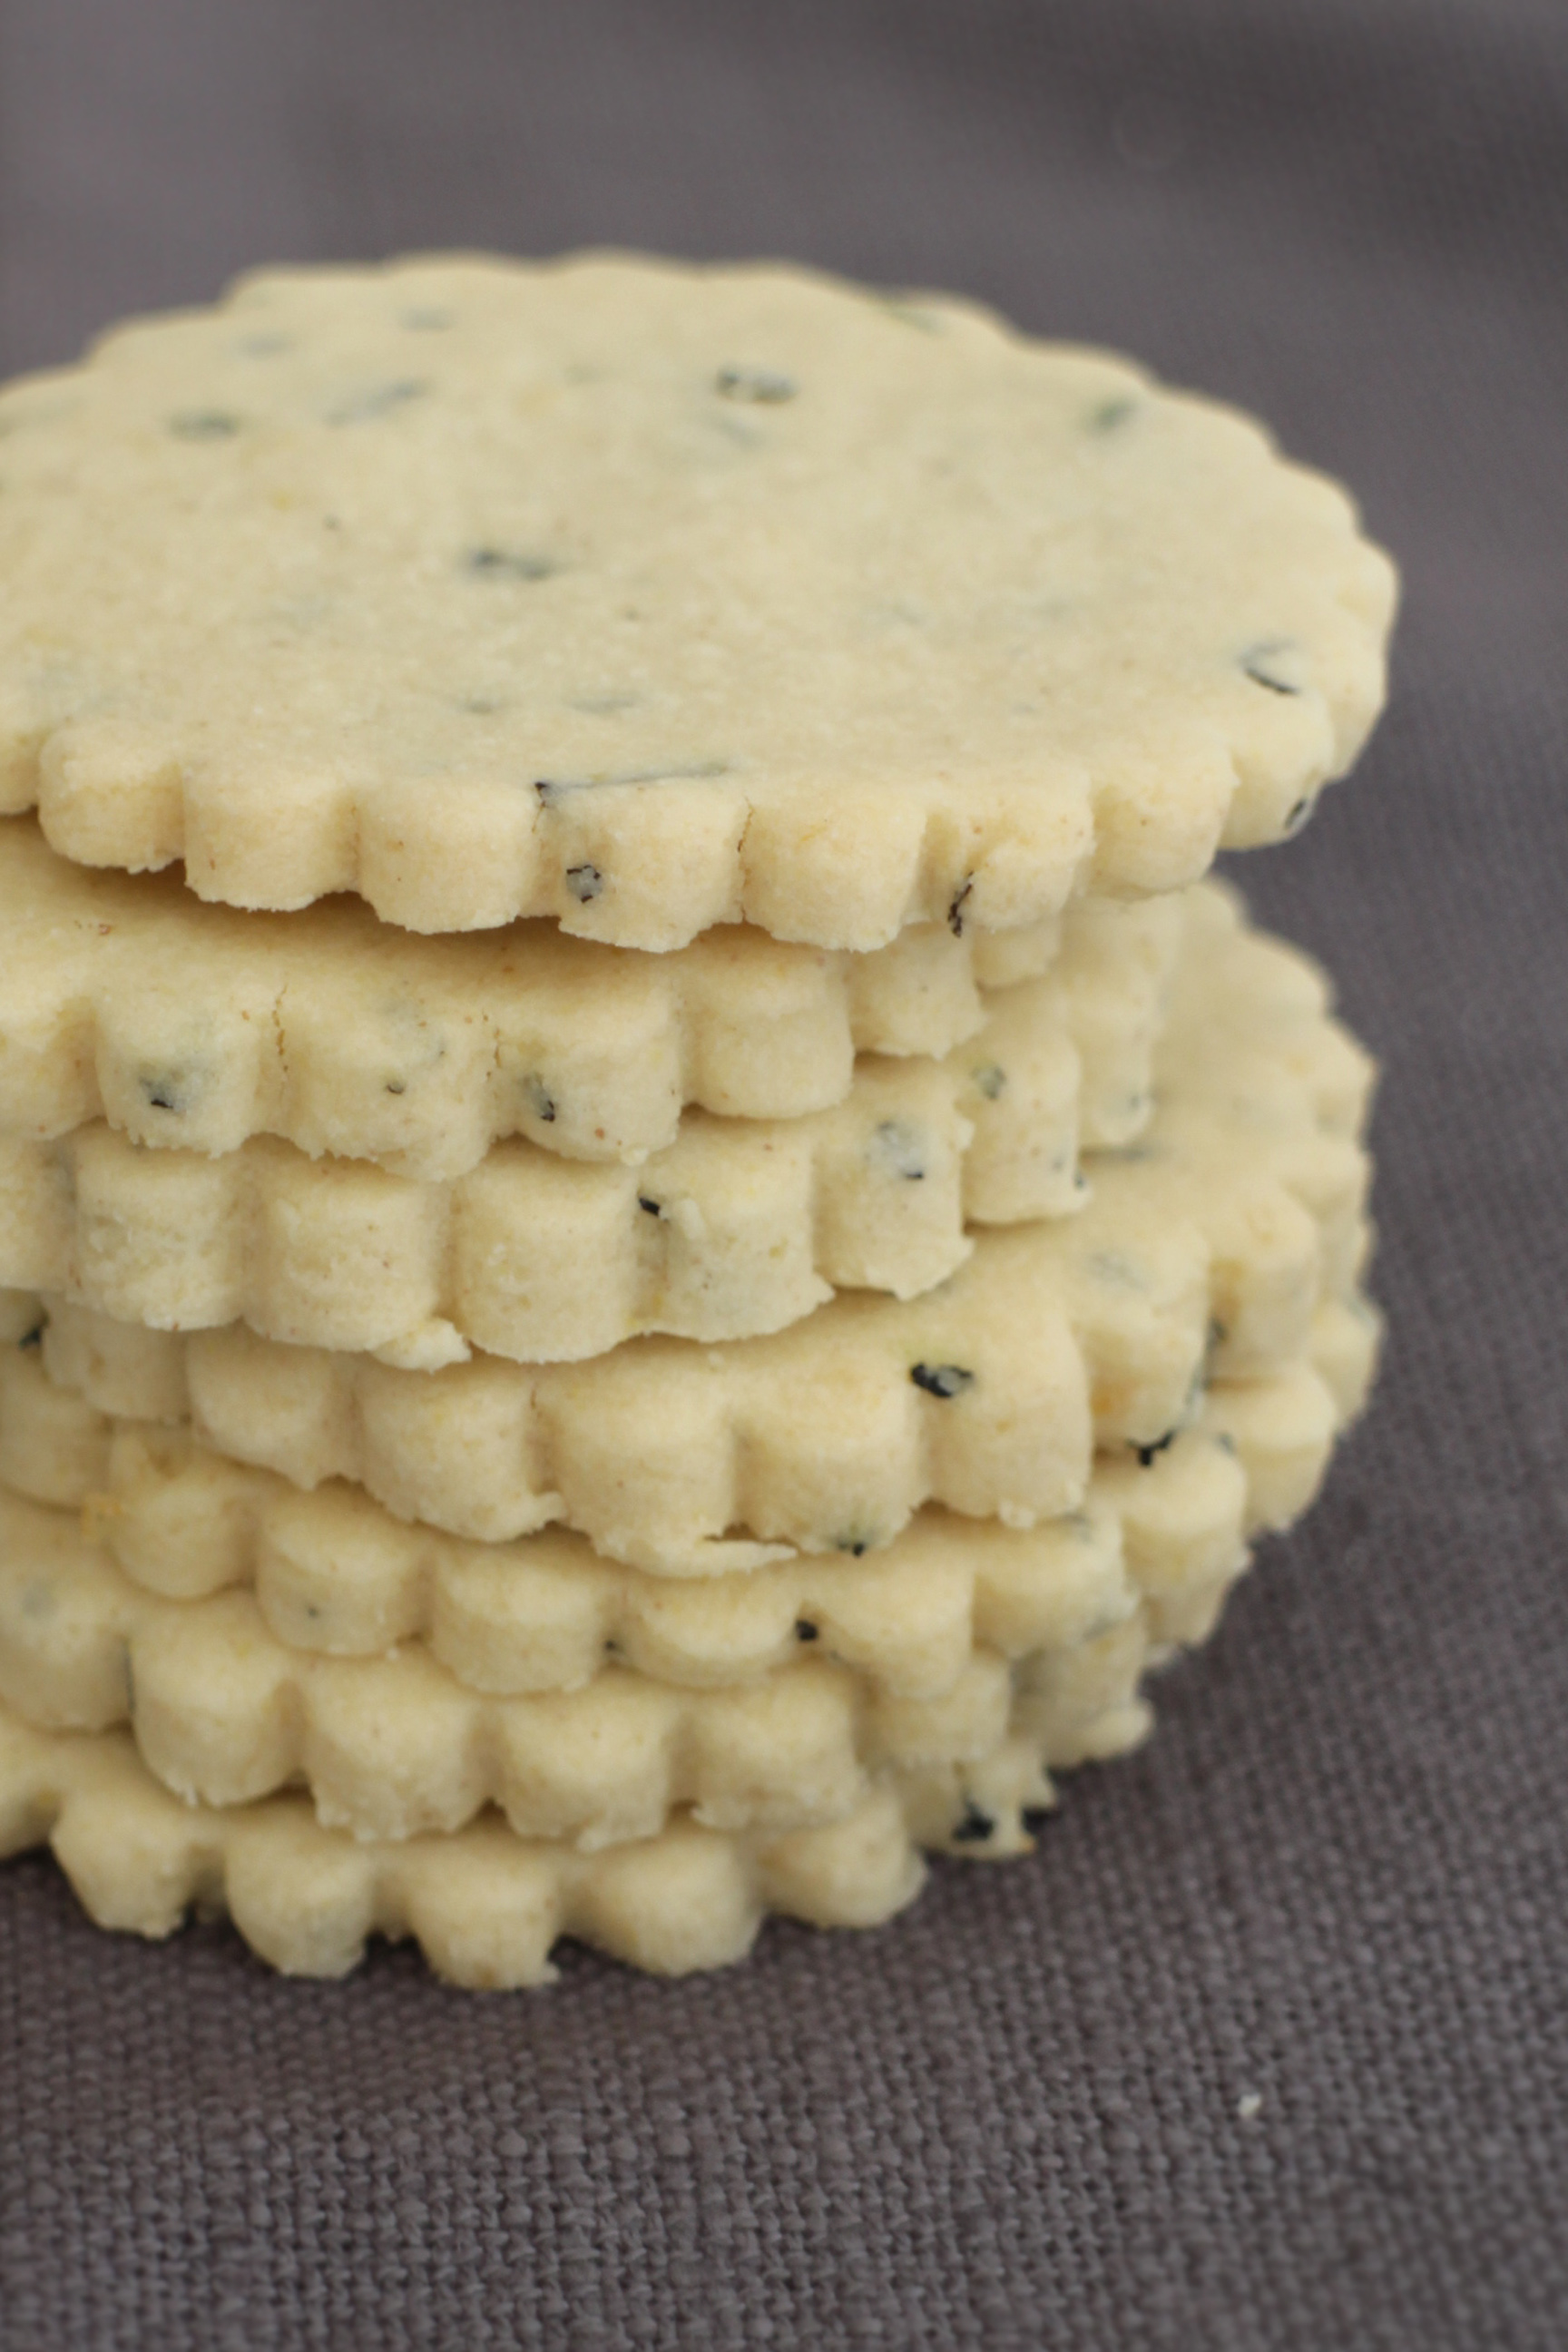
Lemon & Earl Grey Shortbread

Although our winter has been pretty mild, there's a biting wind and we tend to get torrential rain one minute (usually just before the school run is about to start!) and glorious sunshine the next. I'm definitely in need of a little bit of comfort and so it'a been a biscuit sort of week in our house.
I went to wholesale earlier in the week and came back with a big box of beautiful lemons. They are the sign that spring is on its way and are brightening up my kitchen daily. I have dinner plans for the weekend with them, but I had a biscuit plan today.

My quest for dairy free alternatives is ever on my mind and I wanted to have a go at dairy free shortbread -- and why not make it gluten free too? I'm always a huge fan of lemon so my shortbread biscuits were to be lemon and I decided to pair them with earl grey tea. Now I'm not an earl grey tea drinker but I thought it would be interesting to try.

The dairy free alternative I used was Dairy Free Pure Sunflower which was an experiment as I found it at the supermarket and hadn't used it before. The flour was Gluten Free Plain Flour and I also added in some Corn Flour too. The dough is easy to make. The butter, vanilla essence, earl grey, lemon zest and sugar are creamed together in a bowl for around 5 minutes. Then the flour and cornflour are stirred in and mixed gently to form a dough. This is a sticky dough. I popped it in the freezer overnight and it came out of freezer soft the next day so don't worry if yours has this consistency.
The surface should be well-floured and a little more flour sprinkled on top of your dough before rolling it. I found it easier to pat down the dough with my hand until it was the thickness I was looking for (0.5cm) and then a quick roll with rolling pin just to smooth the surface. Once you have used your cutter to great effect (I used a 6cm cutter), gently move each cookie to a lined baking tray. They don't spread much during baking so you don't need to leave too much space between each biscuit.

Then bake them at 170 degrees (fan) for 15 minutes. They don't change much in colour or go golden brown like other biscuits might. You should remove them from the oven and gently move each one on to a cooling tray with a spatula and allow to cool.
Using tea in these biscuits might not be to your taste. You don't have to put it in. I loved the speckled texture but it does add a floral note to the final biscuit. They would work beautifully with just lemon -- maybe with the zest of two lemons since it's your only flavour.
I love these little shortbread biscuits. They are light, have a beautiful snap and are perfect with a cup of tea. I have eaten almost the entire batch on my own!
Lemon & Earl Grey Shortbread (Vegan and Gluten Free)
adapted from Wallflower Girl's Vegan Chamomile & Lemon Shortbread
Ingredients
- 200G DAIRY FREE PURE SUNFLOWER (or an alternative dairy-free butter)
- 1 TSP VANILLA PASTE OR EXTRACT
- 1 TBSP EARL GREY (loose tea)
- ZEST OF 1 LEMON
- 100G CASTER SUGAR
- 300G GLUTEN-FREE FLOUR
- 1 TBSP CORN FLOUR
Method
- Make the dough the day before you want to bake your biscuits
- Place your butter, vanilla, earl grey, lemon and sugar in a bowl and cream together -- around 5 minutes
- Stir in the gluten free flour and corn flour and gently mix until a dough is formed -- it will be a sticky dough
- Wrap in clingfilm and place in the freezer overnight
- When you're ready to bake them, preheat the oven to 170 degrees (fan) and line a baking tray with parchment
- Flour your surface well and place the dough on top, sprinkling the top of the dough with more flour
- Using your hands, pat the dough until it's around 0.5cm thick
- Flour your rolling pin and gently roll the surface just to make it smooth
- Using a cutter, cut out your shapes and gently move them to the baking tray
- Bake for 15 minutes
- Remove from the oven and gently transfer your biscuits from the baking tray to a cooling rack
- Allow to cool for 10 minutes and then enjoy :)
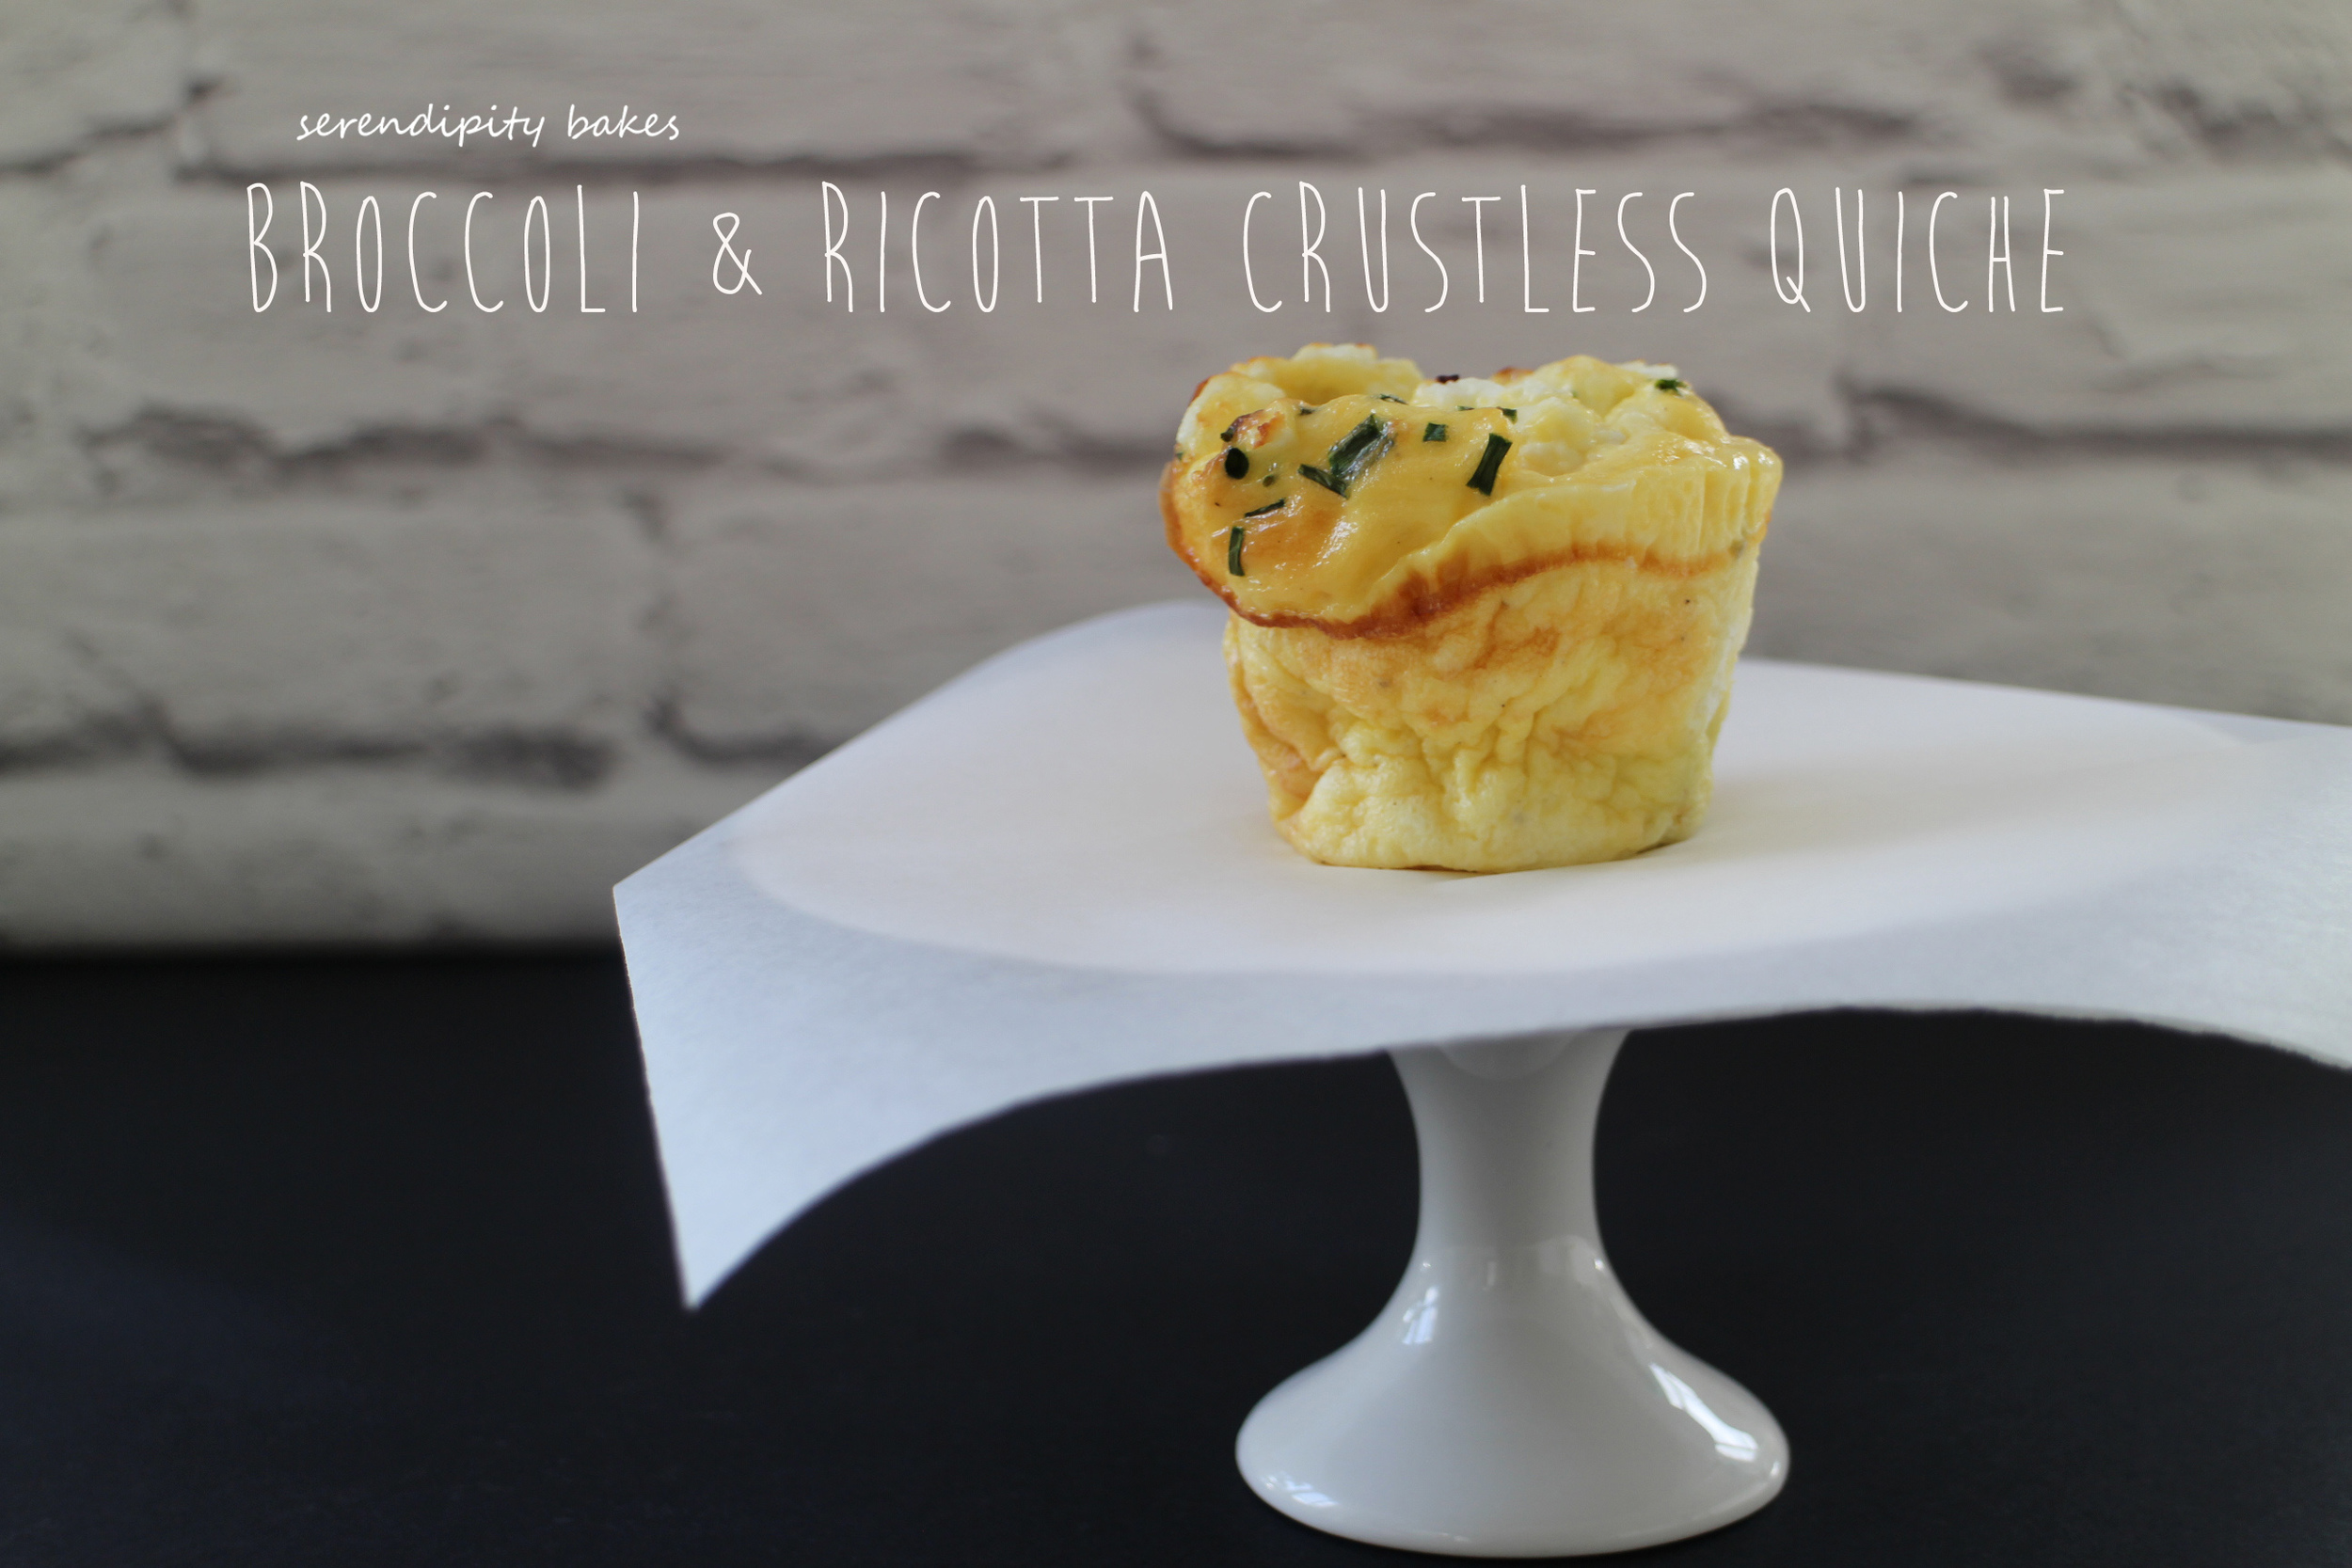
Broccoli and Ricotta Crustless Quiche
Do you ever walk into a cafe and see the wonderful display of cakes and muffins and think, "I could make that?" I'm always wondering how I could make the things I see every day and have been wanting to try crustless quiches for some time. So today I got to rustling them up for my lunch. Think of them as a crustless quiche or eggy muffin -- they're a cross between the two, I think.
They can be made with the ingredients you yourself love or whatever you have to hand. I wanted to make mine from broccoli, ricotta and feta as the main flavours. The mixture takes ten minutes to make and then they bake for thirty minutes in the oven so are super quick to turn around. They are perfect for a simple supper served with a salad or a lingering brunch with friends. I was so in love with them, I just ate two, but sssshhh -- just our little secret!

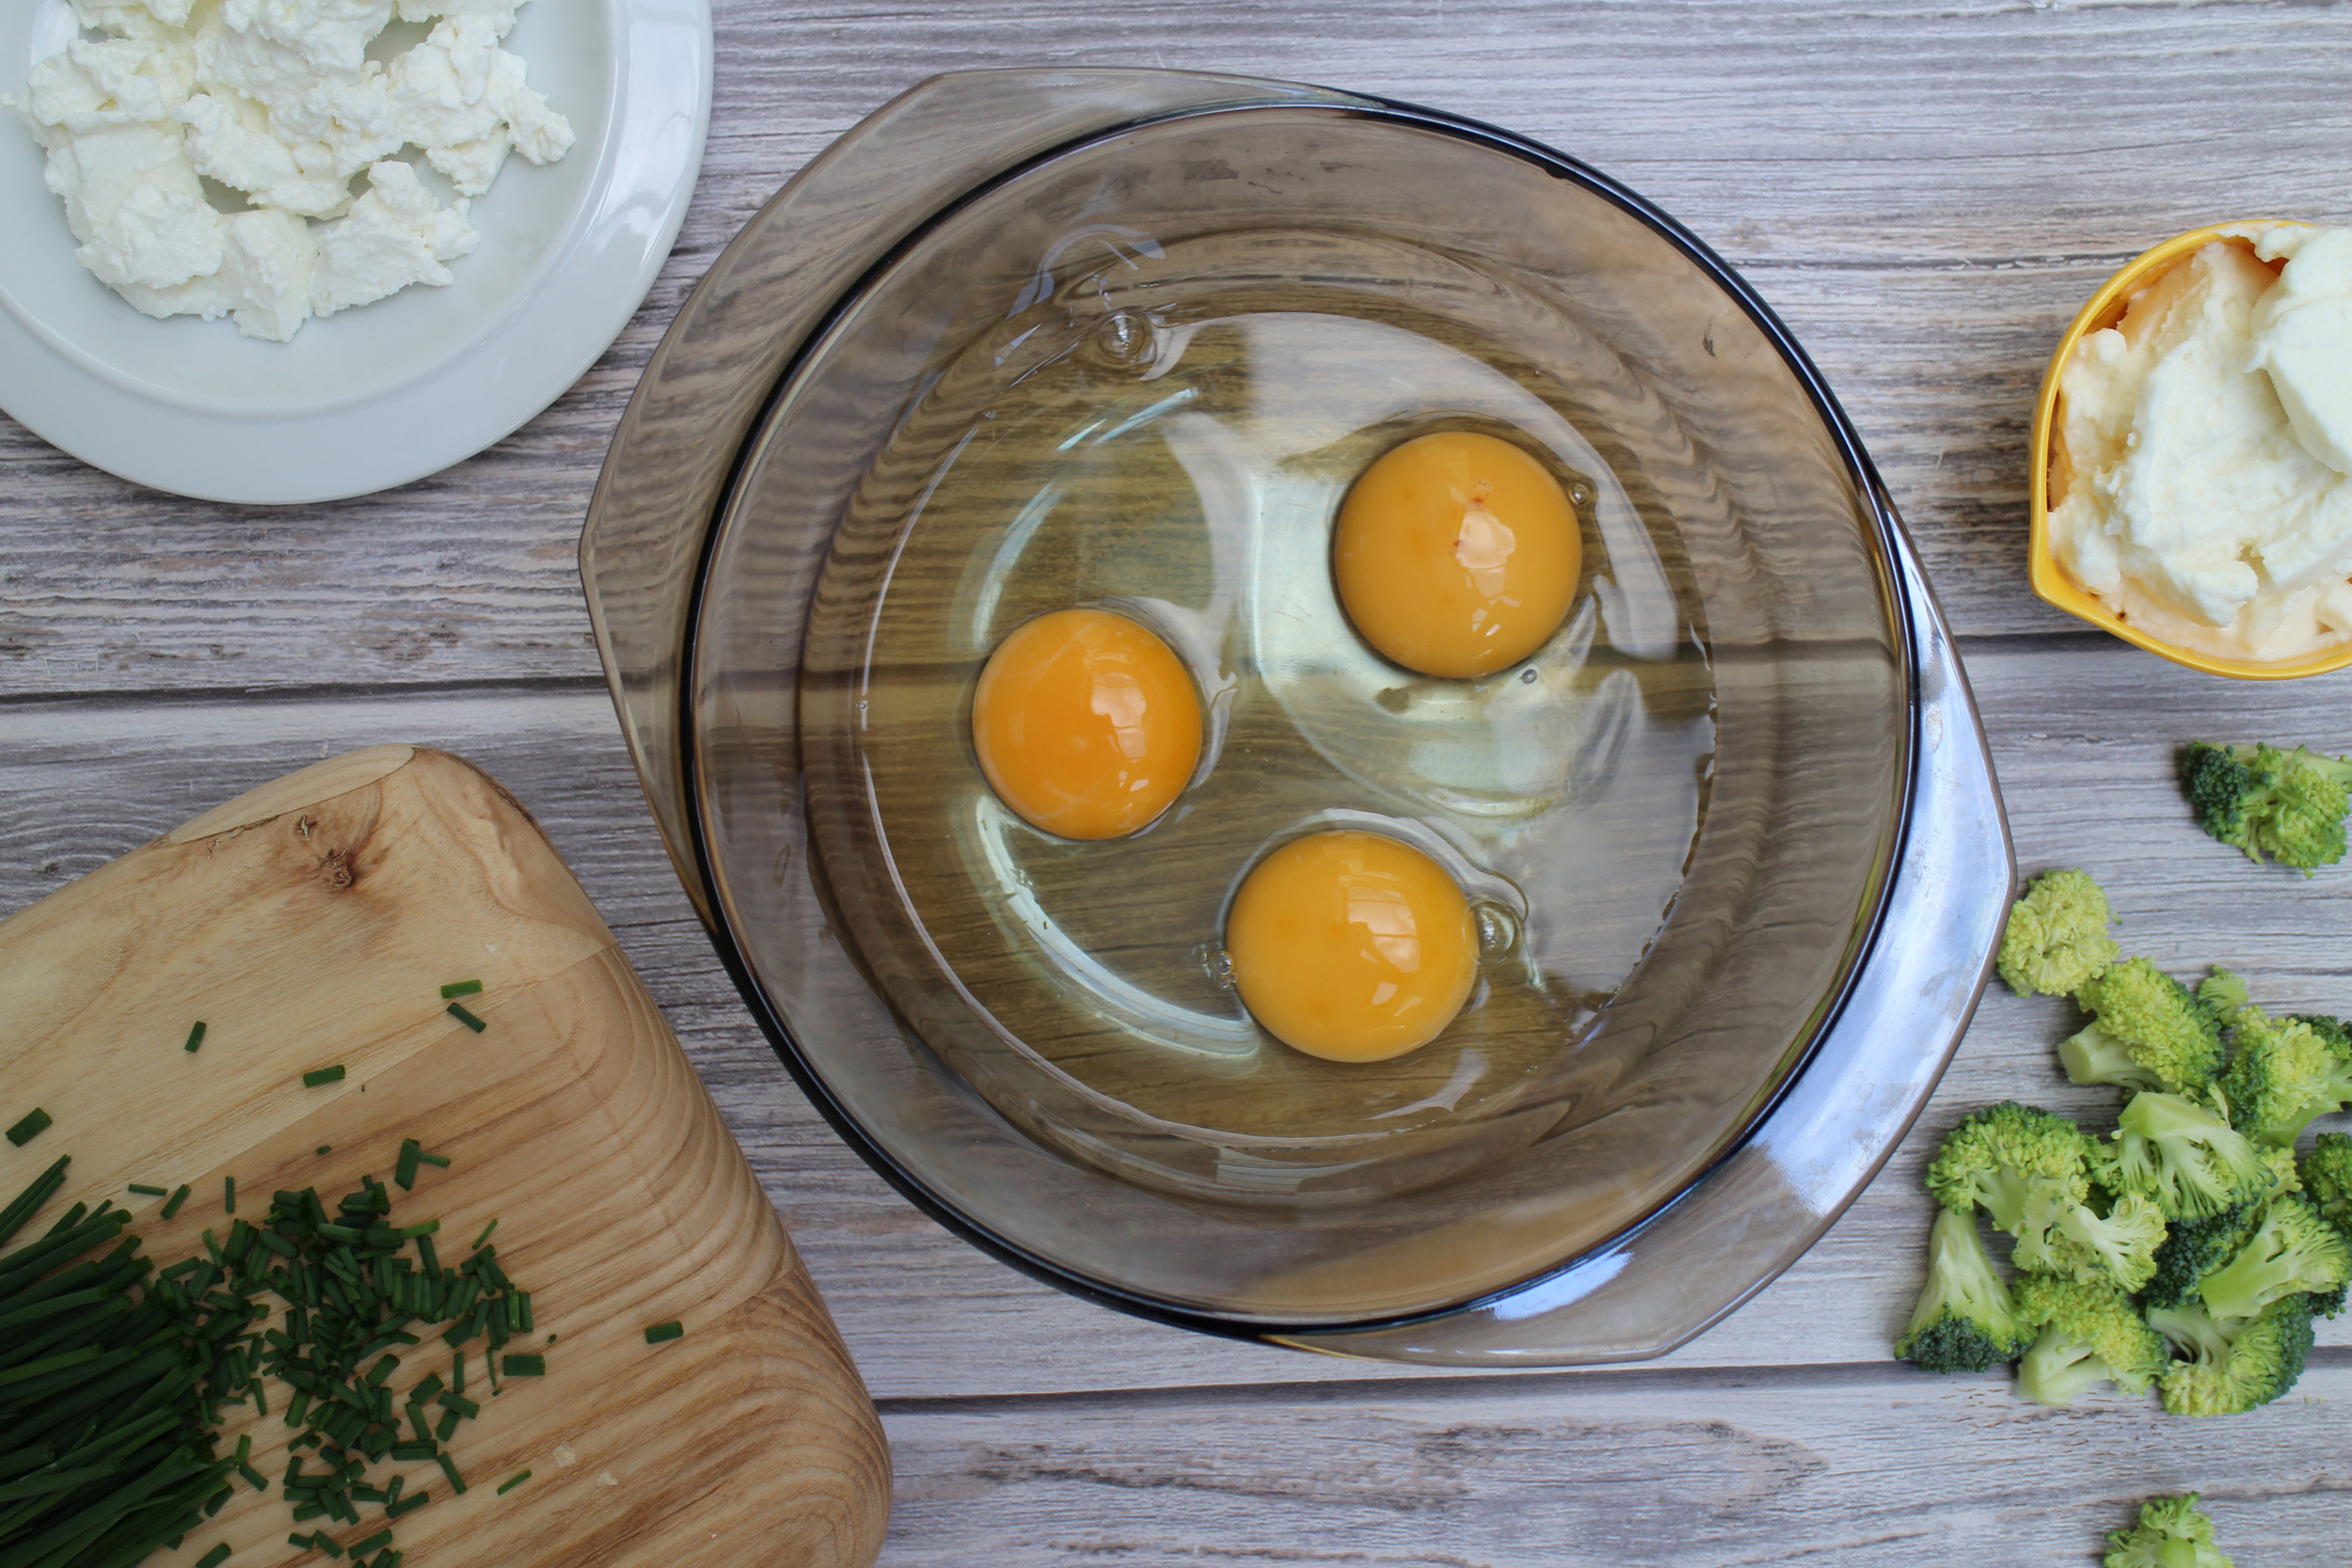
Experiments often don't work out the way you want the first time, but these are perfectly delicious. I only made three but have scaled up the mixture below to make six. You can make as many as you like but work with one egg per muffin and scale accordingly. I started by cutting the broccoli into tiny florets and put them in the base of the muffin holes -- when they're cut so small they cook perfectly and come out lovely and tender. Then the egg mixture is made with egg and ricotta, whisked until they're smooth and then seasoned with a little salt and pepper to taste. On top of the broccoli, I put some crumbled feta and the poured over the egg mixture. Then on the surface of them, I gently placed a few more pieces of feta and a couple of dollops more of ricotta -- and sprinkled them with chives. They bake for thirty minutes and arrive from the oven all lofty and puffed up. They quickly deflate which is no problem as these are quiches and not soufflés and I served mine warm from the oven.

I'm often eating scraps for lunch whilst everyone is away at school and work and it's sometimes difficult to feel inspired.

When these are so simple to make and with so few ingredients, it's not difficult to give yourself a treat now and again, is it?
Broccoli and Feta Crustless Quiche
Makes 6 muffin quiches
Ingredients

- 6 EGGS
- 270G RICOTTA CHEESE
- 180G FETA CHEESE
- 120G BROCCOLI (broken into tiny florets)
- CHIVES (chopped, to taste)
- SALT & PEPPER (to taste)
Method
- Preheat the oven to 170 degrees (fan)
- Whisk the eggs and 240g of the ricotta in a bowl until smooth -- place the remaining ricotta to one side
- Season with salt and pepper
- Place the small pieces of broccoli in the bottom of each muffin hole
- Crumble 120g of the feta evenly in each muffin hole on top of the broccoli -- place the remaining 60g to one side
- Pour the egg mixture evenly into muffin cavity
- Gently place the remaining ricotta and feta on the surface of each muffin
- Place gently into the oven and bake for 30 minutes
- The muffins should be golden brown and well risen
- Eat immediately :)
Marshmallow Teacakes

We had a fab week off for half term and all too soon the boys are back to school. After a busy week of baking in the week before half term, last week was all about spending quality time with my boys and catching up with friends. My eldest son had his 8th birthday (where, of where did those years go?) and I had a couple of fun projects to celebrate his big day -- Star Wars cookies for his classmates and a bright drippy cake for the big day (his celebration cake comes in a few weeks time!) Then some cupcakes for my gran to share with her new friends after moving into a new care home and finding life at 92 after living in her own place until now, a little challenging.

Last week, my friend dug out a rather fetching party photo of me from way back when featuring tea cakes (don't ask!) and said that her hubby had made the Peyton & Byrne ones for her once - and that they were delicious! I think her kitchen took a bit of a beating (we are talking about biscuits, marshmallow and melted chocolate) but it was totally worth it. I said I needed the recipe.
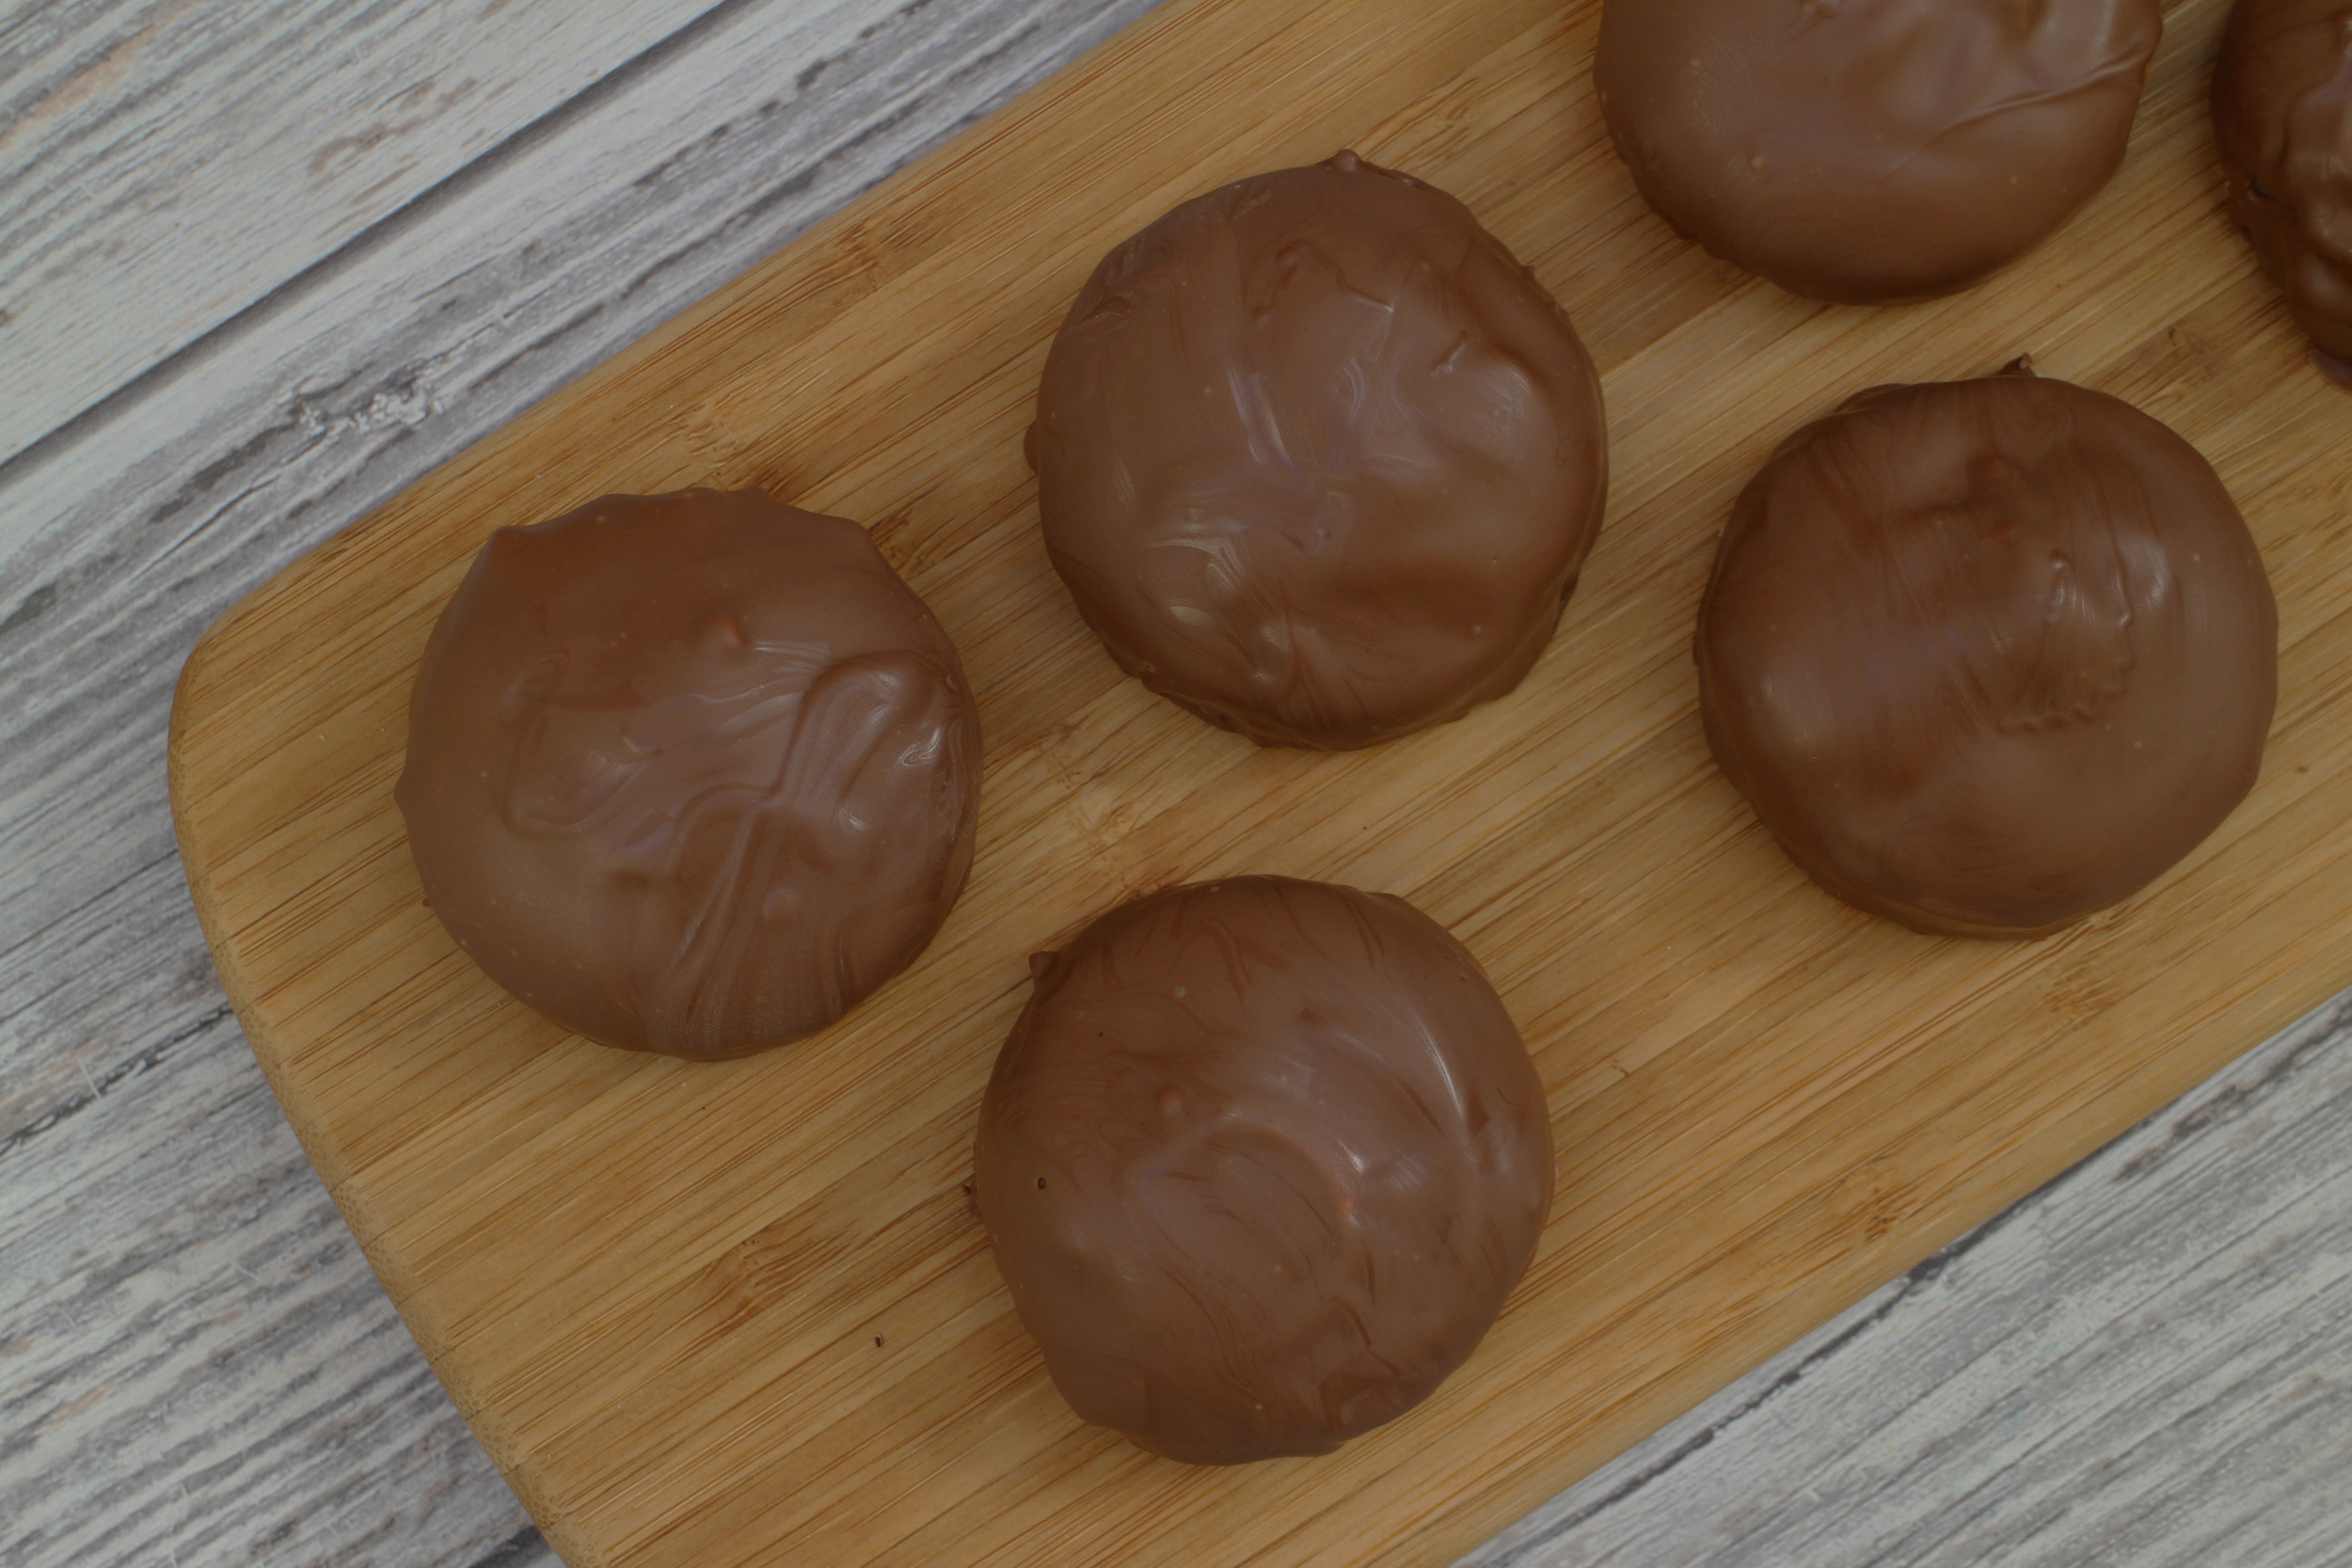
Do you remember the Tunnocks Tea Cakes that come wrapped in foil? I haven't had one since I was a kid and I don't know whether they've been available all this time or made a retro comeback but they are alive and well. So today I made the Peyton & Byrne Marshmallow Teacakes which were simply divine and had everything good about them that you'll remember from the Tunnocks ones - but especially yummy since they are fresh and squidgy and gooey and covered in melted milk chocolate. They have three stages but are simple to make.
The recipe makes twelve teacakes but our expanding waistlines are requiring a little more restraint of late so I halved the recipe and just made six. I've featured the recipe for twelve but you can alter the quantities to make as many as you like. First of all you need to make the biscuits. They are very simple although you do need to keep scraping down the side of the bowl to ensure that you mix it thoroughly. I then weighed out the mixture to make each one the same size. When they came from the oven, they were a little larger than I expected but I addressed that later -- keep reading!

As the biscuits cooled, I moved onto the marshmallow. All the ingredients are whisked over a saucepan of simmering water until frothy and slightly opaque. The recipe says that this should take 10-15 minutes, although mine was ready in 5 minutes so keep an eye on the texture. I then whisked the mixture with an electric hand mixer for a further 5 minutes until the marshmallow held its shape. It does set up relatively quickly so you want to move onto the next stage straightaway. I was a bit disappointed with the amount of marshmallow I had and would have been happy with twice the amount -- maybe that's just me! When I piped it on to the biscuits, I had to do this sparingly and there was quite a large ridge left around the outside of the biscuit. I didn't think this would look good once the chocolate was covering it so I decided to cut the biscuits smaller, using the outside of the marshmallow as a guide. It was a bit messy but I was much happier with the shape left.

Finally, on to the melted chocolate. Melted chocolate is dangerous in my kitchen because I love the stuff. Especially the melted Belgian milk chocolate variety that I used here. You melt half the chocolate first and then remove from the heat -- then adding the remaining chocolate and leaving 7 minutes before stirring it. This is a way of tempering the chocolate so it doesn't bloom when it sets and go dull and streaky. I have to say that mine were a little dull and streaky but that might be because I played around it with it too long when covering my little biscuits. Pop your biscuits onto a cooling rack with something underneath to catch your chocolate drips -- and get pouring! So much fun :) You need to try to make sure all the sides are completely covered but don't worry if not - they will just look a little more rustic but taste the same amount of deliciousness.

The final stage is to wait. An hour is needed for them to set. But it is hugely tempting to taste test them early! I let mine set for around 15 minutes and then lifted them with a palette knife, cleaning the drips from underneath, and put them onto a sheet lined with greaseproof paper to set.
Perhaps it will disappoint you to know that these need to be eaten the day they're made. All of them. It's a hardship but someone has to do it.
We're currently sat looking at an empty plate.
It's totally worth making these from scratch and you won't be disappointed.
Marshmallow Teacakes
from Peyton & Byrne's British Baking
Biscuit Ingredients
- 110G PLAIN FLOUR
- 1/8 TSP BAKING POWDER
- 1/8 TSP BICARBONATE OF SODA
- PINCH OF SALT
- 60G UNSALTED BUTTER, SOFTENED
- 60G CASTER SUGAR
- 2 EGG YOLKS (you need the egg whites for the marshmallow)
- 1/2 TSP VANILLA EXTRACT
- 1 TBSP DOUBLE CREAM
Method
- Preheat the oven to 180 degrees (fan)
- Line 2 baking trays with baking paper
- Sift together the flour, baking powder, bicarbonate of soda and salt into a bowl
- In a freestanding mixer, beat together the butter and sugar until light and fluffy
- Add the egg yolks and vanilla and mix well, scraping down the sides
- Beat in the cream and then the flour mixture until just combined
- Scrape down the bowl sides and mix it quickly once more
- Weigh the dough and divide it by 12, then divide the dough into 12 small balls and put them onto the lined trays (they do spread so leave space between each one)
- Bake for around 10 minutes until the edges are lightly golden
- Remove from the oven and leave on the baking tray to cool
Marshmallow Ingredients
- 2 EGG WHITES
- 100G CASTER SUGAR
- 1 TBSP GOLDEN SYRUP + 1 TSP
- PINCH OF SALT
- 1/2 TSP VANILLA EXTRACT
Method
- Place all of the ingredients in a bowl over a saucepan of simmering water
- Whisk until the mixture becomes frothy and slightly opaque (the recipe says 10-15 minutes but mine was ready in 5 minutes)
- Remove the bowl from the heat and then whisk it with an electric hand whisk until it hold its shape (mine was whisked for 5 minutes)
- Put the marshmallow into a piping bag and then pipe a dollop onto the top of each biscuit
- Optional - I wasn't happy with the surplus biscuit around the marshmallow so I cut each biscuit with a 5cm cutter to get a uniform shape
Chocolate Topping Ingredients
- 250G BEST QUALITY MILK CHOCOLATE (chopped into small pieces)
Method
- Take 125g chocolate and melt it in a bowl over a saucepan of simmering water until melted
- Remove from the heat and put the remaining chocolate into the bowl
- Leave untouched for 7 minutes and then stir the chocolate until it's all melted
- Place the biscuits onto a wire rack with a tray underneath to catch the drips
- Once ready, use a dessert spoon to drench each teacake with chocolate - you can help the chocolate along a little so it drips down the sides - if you want a perfect finish, then you may need to keep adding more chocolate to the teacake and tease it down the sides
- Leave the teacakes for around 15 minutes and then carefully remove each one with a spatula, tidying up the bottoms, and then place on a tray lined with greaseproof paper to set
- Leave for at least an hour until the chocolate has set
- Enjoy with a nice cup of tea :)
Flourless Chocolate Beetroot Cake

So let's talk about beetroot.
I have never liked the stuff. Never cooked it before. To me, it tastes so earthy it's just not a flavour that I enjoy. But -- I have always been kind of curious about baking it into a cake.
We had friends over for lunch at the weekend and I thought it would be fun to bake a cake for the grown-ups and children and see if the kiddies could spot a vegetable disguised as a sweet treat. Ha! They didn't :)

So the cake is a flourless chocolate cake made with hazelnuts making it a great gluten-free bake and my starting point for this was a recipe from the Australian Women's Weekly's Love To Bake. They adorn it with vanilla yoghurt and candied beetroot (the candied variety seemed one step too far in my beetroot journey!) As it's a solid cake (it doesn't rise to great heights), I decided to bathe mine in chocolate ganache, add some height with chocolate garnishes and give it a light shower of freeze-dried strawberries. The cake itself is very simple to make but requires a little prep and is best made the day before you're planning to serve it.
So the day before, the beetroot needs to be cooked for around 45 minutes until it's tender and then liquidised to a beautiful purple puree (see, I can compliment the beetroot for its look!) Then the chocolate and butter are melted together whilst you whisk the eggs, sugar, vanilla, ground hazelnuts and cocoa together in a separate bowl. Add them together with the beetroot puree and pour them into your baking tin. This needs to be covered with foil to be baked for around an hour. Once it's ready, it's then refrigerated overnight - or for at least three hours if you're making it the day it's to be served. I refrigerated mine in its baking tin covered with clingfilm.

Also, the night before, I made the chocolate garnishes so they would have time to set out of the fridge. I swirled circles on greaseproof papers and left them to dry.

When you're ready to prepare your cake for serving, remove it from the fridge, take it from its tin and release the greaseproof paper. I found my cake had shrunk away from the sides a little. This is all fine and it's going to be a relatively flat cake. I made my chocolate ganache as a 1:1 ratio of chocolate to cream which is a thick ganache - if you want it runnier with smaller drips, then you can use 1:2 chocolate to cream. When the ganache is ready, pour it over the surface of the cake allowing it to drip down the sides. Place your chocolate garnishes upright on the cake, holding them in place until they set a little and stand firm. Then sprinkle your freeze-dried strawberries across the top.

The beetroot gives a lovely moistness. The hazelnuts are a tasty addition in place of the flour, where I've usually used almonds in my gluten-free cakes. You definitely can't taste the beetroot in it but that's probably because it contains quite a lot of dark chocolate (which is never a bad thing in my book!)
I wouldn't say that I'm a beetroot convert. But whereas I can't eat it in a salad, I can definitely eat it disguised in a cake. That's progress. And the boys loved it too.
I think we'll be making this one again :)
Flourless Chocolate Cake with Chocolate Ganache and Freeze-Dried Strawberries
Flourless Chocolate Cake
adapted from the Australian Women's Weekly Love To Bake
Ingredients
- 250G BEETROOT
- 290G DARK CHOCOLATE
- 150G BUTTER
- 5 EGGS
- 3/4 TSP VANILLA
- 180G LIGHT BROWN SUGAR
- 85G GROUND HAZELNUTS (I bought whole hazelnuts and ground them in a blender)
- 3/4 TSP COCOA POWDER
Method
- Cook the beetroot in a small pan for 45 minutes or until tender
- Grease and line a 7 inch cake tin
- When the beetroot in tender, drain and puree in a blender until smooth
- Melt the dark chocolate and butter in a saucepan over a medium heat until melted and smooth
- Whisk the eggs, vanilla, brown sugar, hazelnuts and cocoa powder in a separate bowl
- Add the chocolate mixture and beetroot and whisk to combine
- Pour the mixture into the prepared tin and cover with baking foil
- Bake the cake for around 1 hour until cooked around the edge with a slight wobble in the middle (I tested mine with a skewer that came out clean)
- When you remove it from the oven, lift up the edge of the foil to let the steam escape
- Allow to cool and then cover with clingfilm and refrigerate overnight
Chocolate Garnishes & Freeze-Dried Starwberries
Ingredients
- 100G DARK CHOCOLATE
- 1 TUBE OF FREEZE-DRIED STRAWBERRIES
Method
- Melt the chocolate in the microwave until almost melted
- Remove from the microwave and stir the chocolate until completely melted and smooth
- You can either use a squeezy bottle or a teaspoon but you want to drizzle patterns on a sheet of greaseproof paper
- Allow the cool at room temperature (not in the fridge)
- My freeze-dried strawberries were little pieces and I want to create some powder too so I blitzed them in a blender to get a mix of powder and slightly larger pieces
- Place aside
Chocolate Ganache
Ingredients
- 100G DARK CHOCOLATE
- 100G DOUBLE CREAM
Method
- Chop up the chocolate into smaller pieces and place it in a heatproof bowl
- Heat the cream in a saucepan until a few bubbles start to appear
- Pour the warmed cream over the chocolate and leave for a couple of minutes
- Mix together slowly until smooth
- Remove your cake from the fridge and place in the plate you will serve it on
- Pour the ganache over the top of your cake
- Carefully position your chocolate garnishes upright and hold them for 30 seconds until they stand firm
- Scatter the freeze-dried strawberries over the top
- Serve with cream :)
Sticky Toffee Cakes

This week I've been working my way through my enormous collection of cookery books looking for different dinner inspiration. (Ideally) healthy but hearty for the cold weather. Finding a keeper is so satisfying and we particularly enjoyed Jamie Oliver's Mexican Fish Tacos - well worth going to the effort of making the pineapple salsa :)

Yesterday we had Nutella Macarons and Vanilla Macarons with Love Hearts. But today it's Friday and we need a little cake love. I wanted to make some little Sticky Toffee Cakes with Dulce De Leche Frosting and Salted Caramel Sauce. The cake itself can be a cupcake but I made little round cakes. They are filled with pieces of dates and made with dark muscavado sugar to give a real intensity of flavour. The topping itself is extremely indulgent. Added to the icing sugar, we have cream cheese, butter and dulce de leche and this makes a beautifully soft, creamy and rich buttercream. Then the cakes are finished off drizzled with salted caramel which is so delicious, you can eat it with a spoon straight from the bowl (shhh...nobody needs to know, right?)


To make the cakes, I used a mini sandwich tin so each cake has a straight side. You could make one large cake and cut out rounds to get the same effect or bake them as cupcakes if you prefer. Firstly, the dates need to be soaked for around 15 minutes to make them lovely and soft so your bowl of dates needs to be covered with boiling water, then the dates broken into small pieces. The cake batter is made in the usual way (method below) and once the flour has been added, the dates are stirred through. It is easy to overcook these so err on the side of caution and check them after 15 minutes, then keep an eye on them if they're not quite ready.

Whilst the cupcakes are cooking, we make a sugar syrup. You can miss this stage if you like but I think it helps adds a moistness to the cake. It's a simple sugar solution made with caster sugar and water and this is brushed over the top of the cakes whilst they're still warm in their tins.

The cakes are topped with a rich buttercream. The icing sugar and butter are beaten together and then the cream cheese is added. When this is beaten to a smooth consistency, the dulce de leche is stirred through until just combined. This needs time to set a little in the fridge - I've made cream cheese frosting before which is too soft to pipe and setting it in the fridge for a half hour really helps. You will need to beat the buttercream again when it comes out of the fridge and then it can be piped or spread on to the top of each cake.
The salted caramel needs to cool down before being added to the top of the cakes otherwise it will melt the frosting so you can make it at the same time as the cakes and leave it at room temperature. The golden syrup and sugar are melted in a saucepan and then the butter, cream and salt are stirred in. And allowed to cool to room temperature. Delicious does not do this justice!

The salted caramel is best poured over the cakes as you're ready to serve them - and then the cakes served with a bowl of the caramel sauce on the side for extra helpings (it's that good). The frosting really is rather sweet and rich but pairs well with the cake itself.
The boys had friends over tonight and they inhaled a cake each. They would have had seconds.
I think it was the frosting and caramel sauce that really made these - they didn't realise there was something as healthy as dates in them :)
Sticky Toffee Cakes
Makes 18 cakes
Sticky Toffee Cake
Cake Ingredients
- 150G DATES
- 1 1/2 TSP VANILLA
- 130G BUTTER
- 240G DARK MUSCAVADO SUGAR
- 290G SELF-RAISING FLOUR
- 1 1/2 TSP BICARBONATE OF SODA
- 1/4 TSP CINNAMON
- 1/4 TSP PUMPKIN SPICE (you can use allspice if you don't have this)
- 3 LARGE EGGS
Sugar Syrup Ingredients
- 75g CASTER SUGAR
- 75ML WATER
Cake Method
- Place the dates in a bowl and cover them with boiling water until they're just covered
- Lightly grease the cavities of the cake tin
- Pre-heat the oven to 170 degrees (fan)
- After 20 minutes, cut the dates into small pieces
- Place the butter and sugar in a freestanding mixer and beat until smooth and pale
- Whisk the eggs lightly and add them slowly to the mixture with the mixer on medium speed
- Sift the flour, bicarb and spices over the top of the bowl and then fold in gently with a spatula
- Stir through the dates
- Fill each cavity until it's 2/3 full
- Bake for 15 minutes and then check them - you want a skewer inserted in the middle to come out clean - they may need a few minutes longer but be careful not to overcook them
- Whilst they're in the oven, make your sugar syrup
- Bring the sugar and water to the boil in a small saucepan and then leave to simmer for a few minutes until all the sugar has dissolved
- Leave to cool
- When your cupcakes are out of the oven, leave to cool in their tins for 10 mins
- Then brush the top liberally with the sugar syrup, remove them from their tins and leave to cool on a cooling rack
Dulce De Leche Frosting & Salted Caramel Sauce
Dulce De Leche Frosting Ingredients
- 200G UNSALTED BUTTER
- 500 ICING SUGAR, SIFTED
- 200G FULL-FAT CREAM CHEESE (don't be tempted to buy the light varieties here)
- 140G DULCE DE LECHE
Caramel Sauce Ingredients
- 100G LIGHT SOFT BROWN SUGAR
- 50G GOLDEN SYRUP
- 75G UNSALTED BUTTER
- 75ML DOUBLE CREAM
- 1 TSP SEA SALT
Dulce De Leche Frosting & Caramel Sauce Method
- To make the frosting, beat the unsalted butter and icing sugar until smooth and creamy
- Add the cream cheese and beat until smooth
- Stir through the dulce de leche until thoroughly combined
- Place in the fridge for 30 mins before using
- To make the salted caramel sauce, place the sugar and golden syrup in a small saucepan with a tablespoon of water
- Bring it just to the boil and then simmer for 3 minutes
- Add the butter, cream and sea salt in one go and stir for another minute until everything is melted and fully incorporated
- Transfer to a bowl and allow to cool at room temperature
- When the cupcakes are cool and the frosting chilled, remove it from the fridge and beat it again
- Either pipe the frosting or spread it on the top of the cakes
- Top with drizzles of the salted caramel sauce (attempting not to eat spoonfuls of it along the way!)